
Lifeguards are necessary around pool areas to quickly save drowning persons, so they need an unhindered view of the pool when people use them. To ensure the safety of pool users, lifeguards require a clear view of the pool area. It is difficult for these pool supervisors to see the pool when on the ground level due to obstruction. Also, the lifeguard chairs use up so much ground space that they block the pool users.
The lifeguard chair is an elevated platform where the lifeguard can supervise the pool unobstructed, so pools and extensive pool facilities must have a lifeguard chair. Its importance cannot be overstated, considering it enables lifesaving and prevention of injuries.
Building a lifeguard chair can be a fun and fulfilling project with the proper guidance. With most of the chairs taking a few hours to a few days to complete, this project is exciting for DIYers of varying skill sets. If you’re looking for ideas, this guide will prove helpful, as we’ve curated free lifeguard chair ideas and plans.
Things to Consider Before Building

Before building a lifeguard chair, crosscheck against factors that affect the best type of lifeguard for your poolside. This section highlights some things to consider before making the chair.
Height
The height and overall size of the pool will determine the optimal lifeguard tower height to build. Typically, you want a high enough chair to get a clear view of the pool without obstruction, even when people are in and around it.
Above-ground pools require higher chairs since the pool rim is far from the ground. A wider pool will also need a higher chair to see all its areas.
Chair Position
One of the first things to consider before building a lifeguard stand is where you will place the chair, as this location can determine the amount of space available and ultimately affect the size of the chair.
Typically, you want to use up only a tiny ground room to leave more space for people to enjoy the pool; however, this space should be wide enough to give the chair stability as the height makes it vulnerable to strong winds as it moves above the ground.
Ladder Position
You also have to consider where to place the ladder on the lifeguard. Deciding which side to put the ladder on to get good access to the chair while using only a little ground space is essential. The best position to place the chair ladder depends on the pool, chair size, and style of the ladder, with front or side ladder placement being the most common.
Moving The Chair When Building in a Separate Location
Building the lifeguard chair beside the pool is the best option, but sometimes it is impossible, and you may have to make it away from the site. If you build away from the intended location, you have to consider how to move this often oversized chair to the desired position.
How you move the chair will depend on its size and the distance to the intended place. You can move it with the help of some extra hands or a truck, depending on its length.
DIY Lifeguard Chair Designs and Plans
If you need help with design ideas for your lifeguard chair, here is a collection of detailed plans with a short description to help you quickly decide which idea would be best for your pool area.
1. Lifeguard Chair For Above Ground Pool

Here is a 12 feet high lifeguard chair for an above-ground pool that is 5 feet tall. The plan utilizes sturdy 2x4s for the lower part of the chair, while the top seat area uses 2x6s as they cover the site faster. Even though the chair is gigantic, the wood sizes keep the overall weight lightweight.
Building this chair with a suitable base angle will ensure its stability. If you struggle with making angles, the angle grinder is a tool that can help you make correct angles when building. Get coated wood screws and deck screws to prevent rust, paint for the chair, and all the tools for building. Most DIY lovers already have these tools in their sheds, but you can rent or borrow them.
This idea shows how to build a lifeguard chair without a blueprint or plans and how to replicate the same. You can complete the chair in a single day with extra helping hands; otherwise, a two- to three-day timeframe is ideal. The video plan explains the process of building the chair using an already-built lifeguard stand, with information on all the materials and tools needed for building.
2. HighRise Lifeguard Chair
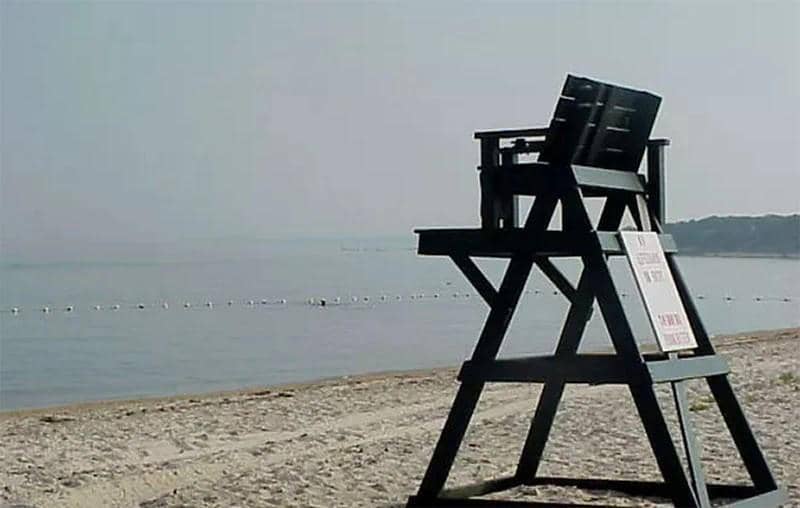
Here is a high lifeguard chair best suited to the beach rather than a small poolside considering its height. Depending on the pool, you can adjust the size, with a 36″ seat height ideal for small pools while 72″ and above for larger pools or beach sides. For this project, the seat is 20″ deep and 24″ wide, which will accommodate most people.
Measure the 2x4s and cut out two 18″ long and 24″ long lumbers for the base. Before using 3″ long screws to hold the wood together, ensure the longer pieces are in front of the shorter 2x4s and arranged in a rectangular shape. Cut out four 36″ long 2x4s and attach them to each end of the seat to make the lifeguard chair legs. Attach a 24″ long 2×4 at the center between the legs to act as a step to the seating platform.
To make the seats, you must attach up to five 24″ long 1×4 lumbers to the top, forming the seat frame. Use 1 ½” screws to hold the pieces together.
Making the backrest requires following the correct wood dimensions with this plan and using 24″ long lumber for this area. Each piece is arranged side by side and held in place using 3″ screws. The idea also contains the dimensions for other parts like the armrest and leg support beams.
3. Small Poolside Lifeguard Chair
Away from the high lifeguard chairs on the list is this small poolside chair, ideal for securing small pool areas. Its size means you can complete this in under a day using minimal resources.
The primary lumber for this project is the 2×4’s which are durable enough and lightweight. With the overall weight and size of the chair, you can quickly move the chair. Its movability means you don’t have to leave it under harsh conditions like rain and snow; keeping it under a shade when not in use will increase its durability and lifespan.
It is not a tall lifeguard chair, so it does not need a ladder, as you can easily reach the seat from the ground by stepping on the footrest. All you need for this project is 2x4s, 2×2’s, paint, screws or nails, a nail gun or drill, a saw, sandpaper, and a tape measure. The project is easy to follow with no problematic cuts to create, making it ideal for even beginner-level DIYers.
Start by building the chair legs, which involves cutting 2x4s to the correct length, before creating the lower frame using another set of 2x4s and bracing using the smaller 2×2 lumber. This lower frame acts as the leg support and the footrest.
To build the seat frame, repeat the lower frame process, but this time with a different dimension, and cover all the frame area using 2×4 slats. Attach the backrest at 75 degrees to the seat to get comfort while using the chair.
4. Recycled Wood Lifeguard Chair
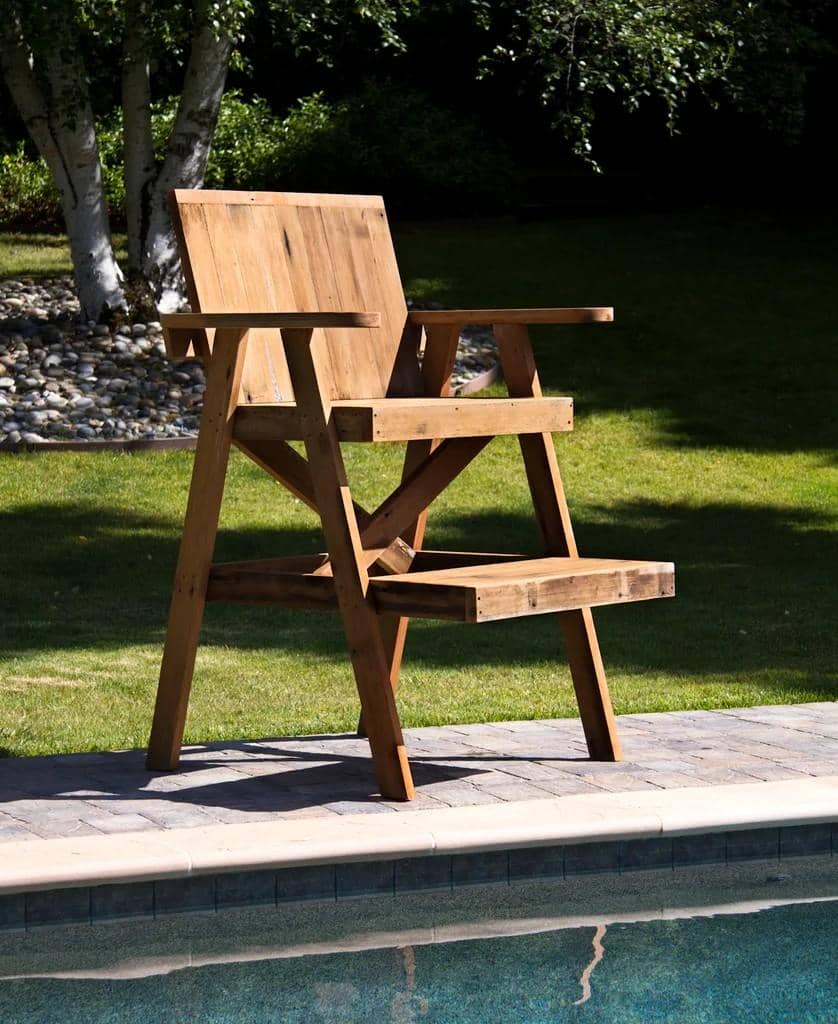
If you have an old deck, pallet, or project, you would like to recycle; this lifeguard chair may be the best option, as it uses recycled redwood deck lumber to build a durable lifeguard chair for your poolside.
The weathered look and old screw holes leave the chair looking rustic and perfect for an old-school poolside design. Since you don’t have to buy lumber, the cost of this project drops significantly with screws, paint or stain, wood glue, and other materials you may need to purchase.
This lifeguard chair design suits intermediate DIYers as it involves angled cuts and dado boards. You can recycle wood and complete the project with a table saw, drill, and belt sander.
For recycled lumber, it may be challenging to know the size of the lumber without measurements. 2×4 lumber is the primary wood for the project, and measuring with tape will reveal the correct size. Bear in mind that 1.5″ x 3.5″ is 2×4 lumber.
Get materials like 2×4 lumber, 2×6 lumber, 2.5″ deck screws, 2″ deck screws, glue, and stain for the recycled wood chair. The plan divides the building process into the backrest, seat, and footrest to make building easier. And you can improve the stability of the project by building the parts separately before assembling them. The final pieces that hold the different sections together are the armrests, support beams, and legs.
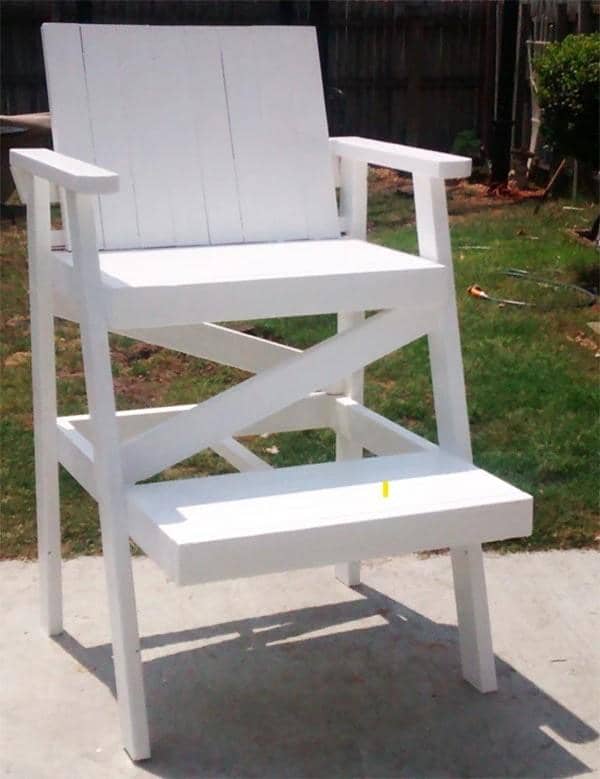
5. Basic Lifeguard Chair Design
Sometimes, building a basic lifeguard chair is all you need to supervise your pool area and avoid accidents. This plan features a basic design with a high-rise chair, an angled backrest, an armrest, a deep seating area for comfort, a footrest, and long legs to give it the required height. It’s bright brown finish protects the wood and beautifies the design.
Like many other lifeguard chairs, you’ll need 2x4s and 2x6s as primary materials, while screws, wood glue, and paint are also essential. Clamps, a drill, a belt sander, and cutting tools like a table saw and band saw are some tools you should get before proceeding.
Projects that divide the building process are easier to follow, which is why this plan is divided into several parts, including building the backrest, seat, armrest, and footrest. Follow the guide to cut the 2x4s and 2x6s with the backrest requiring nine pieces of 2×4 lumber cut at a desired length. A 15-degree angle at the lower end of the backrest will make it easier to attach to the seat and improve comfortability.
Six 2×4 planks are required for the seating area. Attach them using glue and screws while ensuring you leave gaps between each plank so water can pass through. The armrest is made of 2×6 lumber, and cutting the legs at a 32-degree angle widens the base to provide stability.
6. Adirondack Lifeguard Chair

Adirondack chairs are known for their wide armrests, slanted back, and generally comfortable seats, which are also some of the most vital components of a lifeguard chair. Although this plan was not initially made as a lifeguard chair, it is high enough for a lifeguard to view the pool area. Combined with the standard features of Adirondack chairs, this design is a classy chair to build for your poolside.
Adirondack chairs’ seating area and backrest feature wood slats joined at awkward angles that may be challenging for beginners to follow. This is why this project is suitable for intermediate- to expert-level DIYers.
Cedar, wood glue, dowels, and nails are needed, while standard woodworking tools like a table saw and drill are also essential. The cedar will be durable, especially if you intend to leave the chair by the pool, no matter the season.
Planing the wood using a planer before starting the project will reduce the need for sanding after building the chair. Carefully mark the cut line on the wood before cutting on the bandsaw. Use waterproof glue when assembling the chair since it will be outside in harsh weather. Dowels are spacers between each wooden slat to get the desired Adirondack design.
Summary
Choosing between a fixed or movable lifeguard chair will help you determine the size and style of chair you need, with most movable lifeguard chairs offering lightweight designs. Lifeguard chairs are vital furniture to have by your poolside for an uninterrupted view of the pool. This article provides so many options from which to choose.

 By
By


