

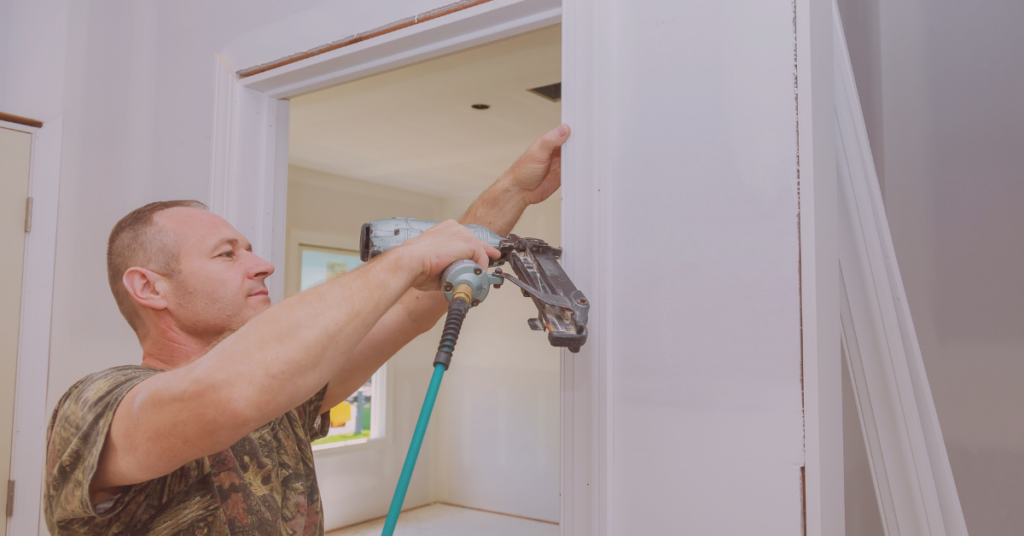
A very common power tool used for DIY and home improvement projects is a brad nailer. It is used to fasten 18 gauge brad nails in various repairing projects. Attaching pieces of furniture, small carpentry tasks or attaching trims, it does it all.
This guide will help you get all the knowledge you need to operate and work professionally while using a brad nailer.
What is a Brad Nailer?
Brad nailers are nail guns that are used to piece together small mouldings and woodcuts to woodwork. It is basically an electrically powered tool that fires 18-gauge brads. It is often the preferred choice as it uses very small nail gauges that will not slit the wood surface no matter how light it is.
Moreover, brad nailers are very versatile when it comes to nail accommodation. Most often support 18-gauge brad nails with a range of 5/8 to 2 1/8 inch in length. These are the smallest kind of nail and are almost invisible over a wood surface. You will not even have to refill the nail holes when using these brad nails. Nevertheless, if you do, it will not be burdensome.
Besides to ensure that it will work as expected, always buy the right one, in terms of nail length accommodation as well as ease of use and maintenance. This allows for better results and prolongs its usefulness. In this guide, you will learn how to efficiently use brad nailers and make the most out of your operations.
How to Choose Brad Nails
A visit to any hardware store during home improvement can be quite mind-boggling if you don’t have an idea of the exact brad nails that you’re looking for and what your project requires. The truth is that there is a baffling array of brad nails at our disposal. Therefore, you ought to do your homework first to avoid the daunting task of getting the right nail to secure your project.
Importantly, nothing is as important as having your project kick off without a hitch. See, when doing any construction project, there are a variety of brad nails needed for different purposes. Evidently, many models resemble but what many don’t know is that there are certain peculiar features that set each brad nail apart from the other.
To tackle this, you just need to be sure of the right brad nails for what project. This will undoubtedly help in making an informed decision before procuring the brad nails. The following text will decipher which brad nails to choose for your project thus making it easy to purchase the right brad nails without struggle.
Things to Consider
The first consideration when choosing the right brad nail is to determine what type of jobs you’ll be doing. Brad nails come in a variety of shapes and sizes, but all perform similar function. Below are some factors you should consider:
1. Length
What length brad nail do I need? This is the most common question in brad nail selection since different building codes require different nail lengths. Considering that, there are two prevailing rules of thumb to help get the right brad nail size.
- Rule of Thumb 1: Ensure the brad nail is at least 3 times the length of the material being nailed through.
- Rule of Thumb 2: Use a nail that doesn’t penetrate through the material being nailed but one that goes to at least 3/4.
To err is human, considering this, if you’re to err on brad nail length selection, better use one that is longer than too short.
2. Sizing
Brad nails are sold according to penny size, i.e. 8d, 12d, 16d etc., where ‘d’ stands for the penny on the British monetary denomination. Penny sizing simply refers to the length of the nail whereby the larger the penny number the larger the nail and vice versa.
Gauge refers to the thickness of the brad nail and not the length. You can have different lengths in each different size gauge. If you’re looking for a good all-around brad nails, I’d suggest the 18-gauge. for its versatility.
3. Interior or Exterior
If the brad nails are to be exposed, then they need to be up to the task. Using interior nails on the outside results to their rusting and shortly thereafter, they bleed through the paint and fail. The following would do as exterior brad nails:
- Electro-Galvanized. Thinly coated with zinc to strengthen their resistance to rust.
- Hot-Dipped-Galvanized. They’re immersed in molten zinc during their manufacture. They’re rust resistant and are highly for pressure treated wood which usually cause corrosion of standard brad nails.
- Stainless Steel. They’re a perfect blend of alloys in the steel and are guaranteed not to rust. For instance, if your project is on the coast where they are salt water spray, there are the nails that you need.
4. Shank Patterns
Just like there is a brad nail for every project, there is also a different shank pattern for varied tasks as well. Below are some popular patterns and how to use them.
- With a smooth shank and zero frills, it’s a standard all-purpose brad nail.
- Ring. They add holding power to ensure maintenance of the nails in place. Popular for roof decking.
- Spiral. Normally used with hardwoods. They usually spin as they are shot in thus an additional holding power than common nail thus preventing splitting wood.
Brad Nail Size Chart
As discussed above, there are peculiar brad nail’s lengths, sizing and gauge for varied projects. It’s imperative to consider the relation between nail lengths and nail gauge using the below charts. Using the wrong brad nail may result to damage on the work surface.
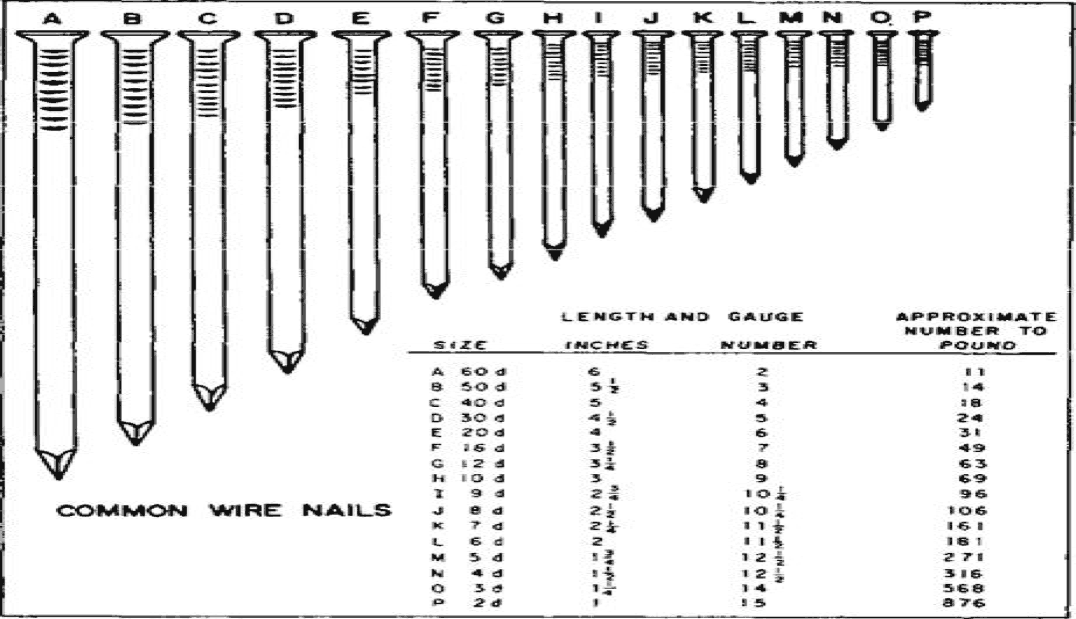
From the chart above, size ‘60d’ i.e. nail A represents the largest nail since the larger the penny number the larger the nail, reverse is true.
The gauge numbers above show the thickness of the brad nails. As you can see, there can be different lengths for different gauge sizes.
Importantly, safety is a concern when using any type of brad nails, safety goggles should be worn. Obviously, you should keep your fingers clear of the firing path.
Brad Nail Features
Considering the features of a brad nail is vital in helping you make an informed decision when you want to buy them. Nail features play a part in enhancing the characteristics of the nails depending on size and model. Three main features to consider are:
- Nail Head. The different types include flat head, checkered flat head, countersunk head and cupped head.
- Nail Shank. The different nail shanks that serve varied purposes include smooth shark, barbed shank and screw shank
- Nail point: It determines how easy it will be to drive the nail during operation. The different types include long diamond, diamond and blunt. Diamond point nails are the most popular.
Buying The Right Brad For Your Project
If you now have all the information you need on brad nails, you’re now good to go ahead and buy the right nails that will best suit your project. Depending on your requirements, you can now choose the sizes, heads, shanks and points that suits your project. This will not only help you with your budget but also ensure you spend wisely.
In case you’re running many projects that need varied types of brad nails, buy an assortment of nails to help you finish your project in time.
An assortment is a great asset since you don’t know when you need to do a few repairs in the house. Brad nails are available in virtually all stores, hardware and discount stores. Since they don’t expire, however long you have them, they will serve their purpose.
Helpful Resources:
- Brad Nailer vs Finish Nailer: The Differences
- Best Brad Nailer: Our Top Recommendations & Buying Guide
How to Load a Brad Nailer
Loading brad nails into the nail gun is then a priceless lesson to learn.
While there are many applications for a brad nailer, the brads may be difficult to drive through some hardwood and manufactured wood products such as plywood.
This reminds us of why it’s wise to ensure we’ve loaded the brad nailer with appropriate number of the brads and closed the magazine correctly.
Essentially, brad nailers are used for trimming around interior windows and doors, crown molding, cabinet and furniture work. When working on a project that requires the use of brads, it will be necessary to use an electric or pneumatic nail gun.
Loading a Brad Nailer: Key Elements
- Air Pressure Dial: Adjusts the amount of air that is expelled when the trigger is pressed. The more the air pressure, the deeper the brads; less pressure means higher brads.
- Depth Gauge: Meant to adjust the distance of the nailer from your work material.
- Magazine: It’s where brad strips are loaded.
- Magazine Lock: It’s pressed to load the gun. On the other end of the magazine there is another lock used to clear the magazine of jammed brads.
As expected, different brad nailers load differently. However, there are some features that are common to virtually all nailers. These are:
- Brad length: Ensure that your brads are of correct range of length. One may ask, what about brads shorter than the lower end of the range? Well, they may fit in the magazine, but chances are they won’t fire in the desired manner and instead jam at the end of the magazine. Gauge of the brads is equally vital.
- Continuous Strips: Carefully handle the brad strip to ensure it doesn’t break apart. You can piece together shorter lengths.
- Push Forward: You’ll slide the brad strip far forward towards the nailer’s firing end.
- Slide Magazine Shut with Care: As much as you may need to vigorously slap the magazine shut, too much force may jam the nailer or cause the brad strip to fall out of place.
As you’ll notice, you’ll NEED these accessories before even thinking of loading a brad nailer.
- Safety goggles
- Brads of right size
- Power supply
- Nail gun
Having considered all these, below is how you go ahead with loading a brad nailer.
1. Preparation
You always must read all the warning labels that come with your tool before you use it. As you’ll find out, some models require the air hose to be connected whereas others require it to be disconnected. Ensure you adhere to the varied instructions and requirements on the tool’s warning labels for the type of brad nailer being used.
2. Hook-up the Airholes
This can be effected by wrapping the fitting them with a Teflon tape. The airhole is tightened to ensure it does not allow air to leak during operation.
3. Open the Brad Magazine
You do this by depressing the cartage. Pull it back all the way to have access to the magazine. That’s where you basically put different types of brad nails.
4. Loading the Brads
Place the brads into the magazine. Ensure the head of the brad correctly fits into each of the provided slots. You’ll notice that there are several different grooves to allow for different size brads. It may slide a little bit in the groove but won’t be able to pull out. Insert several brads but ensure they comfortably fit in the magazine.
However, you should shun overloading the magazine. Depending on the specifications, you can put 110 nails at a time, it’s not necessary to count them. Just make sure there is a comfortable amount.
5. Close the Magazine
Eventually, go ahead and slide the magazine until it clicks in place.
6. Loading Mechanism
This is exclusively dependent on the type of brad nailer being used. Some brad nailers load brads from the side while others load from the top, just like a standard office staple gun. Irrespective of the loading mechanism, just ensure that there is a proper fit of the brads to the loading device for safety’s sake.
Usage Tips
Once you’ve loaded your brad nailer and are confident of its readiness for usage, it’s wise to note that different types of wood have varied splitting properties, however, a little experience with each type of wood you choose will give you an idea of how closely you can work to the end grain of the stock without necessarily splitting it.
Additionally, because brads are so thin, you may encounter some nails that do not sink all the way into the stock. This is specifically problematic with brads since it’s much harder to pound the brad all the way into the stock with a hammer.
As you’ll quickly discover, brads bend quite easily under the head of a hammer. Instead of trying to nail in the protruding brad, it is probably wiser to remove it. With a brad to remove, instead of using a hammer to pull it out, brad nailers are undoubtedly handier in removing the nails with ease, especially with the lightweight brads.
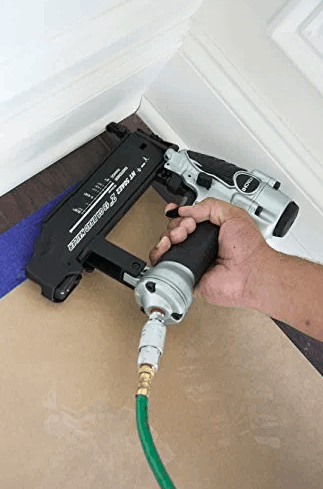
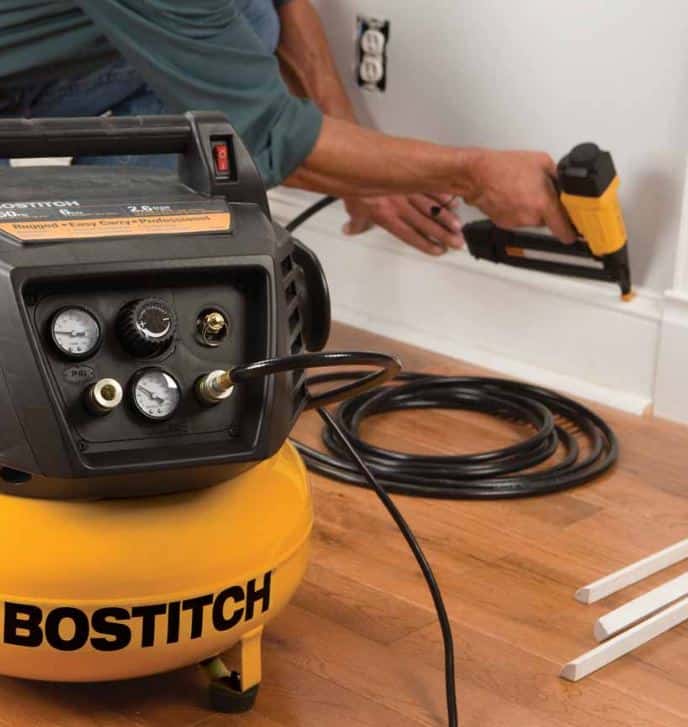
How to Use Pneumatic Brad Nailers
A pneumatic brad nailer often uses an air compressor to fire brad nails into wooden surfaces.
Things You Will Need
- Air compressor and air hose
- Hose adapter
- Pneumatic tool oil
- Teflon tape
- Adjustable wrench
- Tack cloth
1. Connect the Hose Adapter to the Brad Nailer
When you are using a pneumatic brad nailer, you have to ensure you have the correct hose adapter for it. You can then connect to it, make sure it is tight or tighten it with an adjustable wrench.
You can wrap the hose adapter fitting with Teflon tape to prevent any air leaks and to ensure that the area between the air hose and the brad nailer is not loose.
2. Lubricate the Hose Adapter and the Brad Nailer
Brad nailers often need to be lubricated before every use. Therefore, take the pneumatic tool lubricant and lubricate its metal parts and the hose adapter. A few drops are sufficient. After which you can clean any spills with the tack cloth.
They often use air pistons to function, so lubrication is important for its functionality as well as longevity.
3. Load the Brad Nailer with Brad Nails
When it comes to loading, ensure you have the correct nail size as well as nail count for the wood job. Nevertheless, you can also reload when the nail count reduces.
4. Connect the Brad Nailer to the Air Compressor
You will have to let the air compressor pressurise before connecting it to the brad nailer. You can then connect to it using the air hose. Ensure that both ends are tight to prevent air leaks. If the two end connections are loose, you can use an adjustable wrench to tighten them up.
5. Test the Brad Nailer
Before using any brad nailer, you should test its functionality on a wood surface. Ensure you have a proper hold of it with its nose tip at 90°on the wooden surface. Then pull the trigger and let the brad nail sink in the wood. If it works, then proceed and use it for your woodwork project.
You should always be careful when handling pneumatic brad nailers as they often exert a force that can be dangerous if handled badly. Moreover, you should always wear the required protective gears to stay safe.
Additional Information
All of them need to be handled with care, it does not matter if it is corded, electric or pneumatic. The same applies to nail length. You will have to load each of them with the right nail size for it to function well on the chosen wood.
The only difference when it comes to their use is a power source, as pneumatic brad nailers often use air compressors. While electric brad nailers use electricity and corded ones use rechargeable batteries.
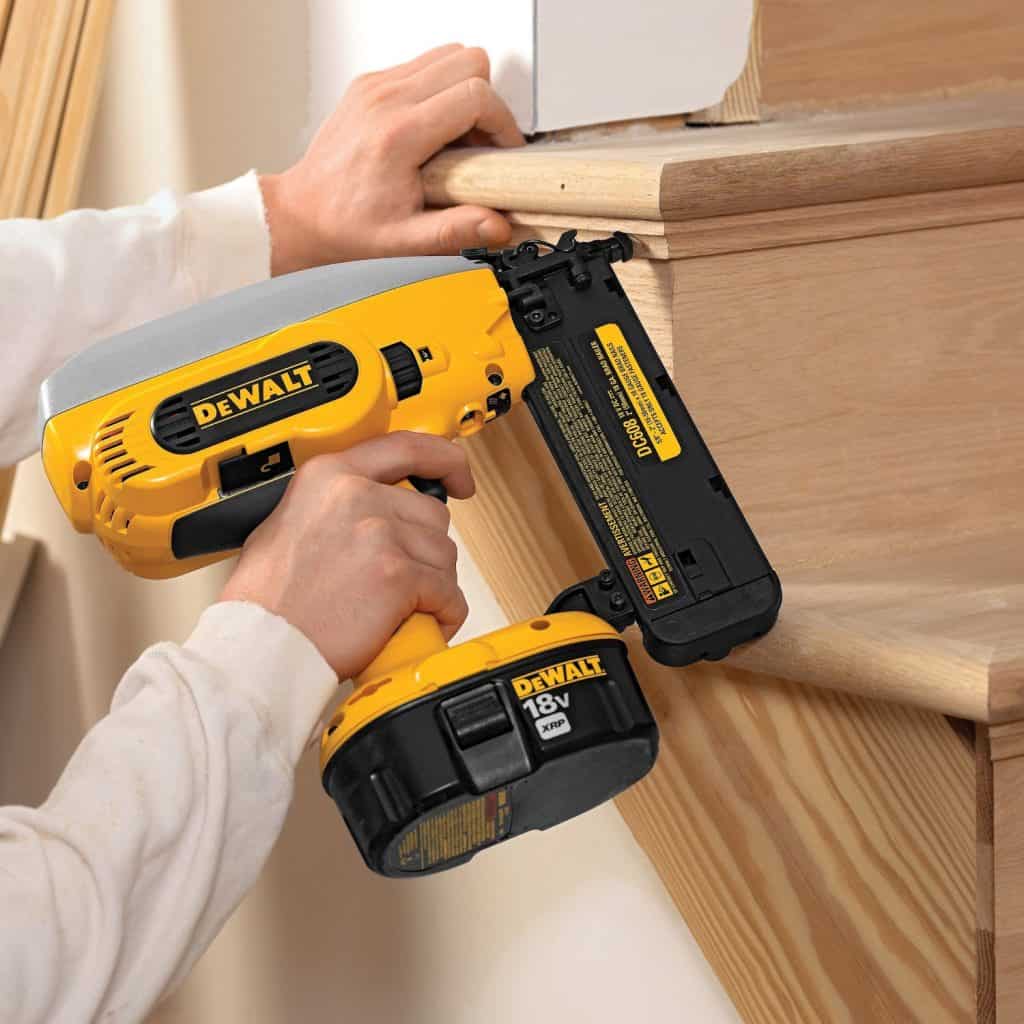
How use an Electric Brad Nailer

Electric brad nailer can either be cordless or corded. The corded models are cheaper than the cordless ones. It is simply an electrically powered tool that is used to fire 18-gauge brads.
How Does It Work?
An electric brad nailer loads an air compression chamber via an electric charge. As the chamber discharge, it releases the power that shoots the brad. The brads are normally 18 gauges but can be as long as 2”. For an electric brad nailer to function properly, it must possess the following key features.
Key Features Of an Electric Brad Nailer
- Double Insulation: This is meant to eliminate the need for a three-wire grounded power cord.
- HI-LO Power: Use HI power setting to shoot the brad nails into hard surfaces. Use LO power setting to drive the brad nails into soft materials.
- On/Off switch: Allows you to switch it off when not in use and vice versa.
- Depth Gauge: It enables the user to adjust the distance of the nailer from the work material.
- Magazine: It’s the section where the brad strips are packed.
- Air Pressure dial: This feature is meant to regulate the quantity of air that is expelled once the trigger is pressed. The more the air pressure the deeper the brads, less pressure means higher brads.
- Flush nailing: It’s stapling tacker fits flush against perpendicular surfaces.
- Magazine Lock: This lock facilitates the loading of the electric brad nailer. It’s normally pressed to load the tool. It’s often confused with another lock at its opposite. However, the other lock on the magazine is there to help clear the magazine of jammed brads.
Functions of an Electric Brad Nailer
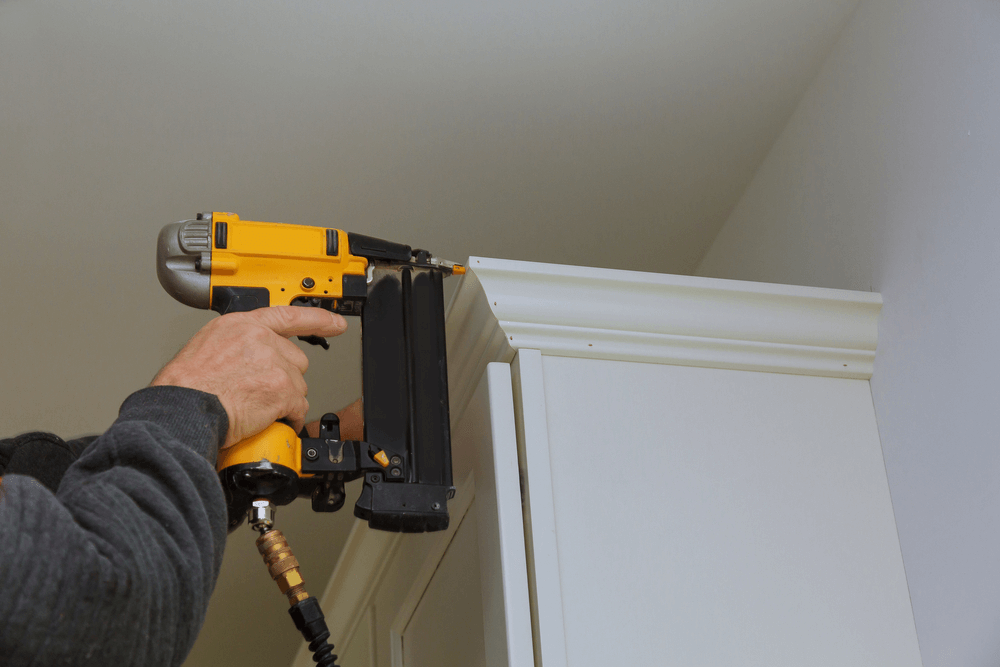
- Crown molding: This is one of that magical fix-it and an awesome way to accessorize your home.
- Fixing cabinets and furniture.
- Trimming around interior windows and doors.
- Installing baseboards and quarter-round.
Please note that electric brad nailers should not be used for tacking up insulation, thin material like veneer nor plastic sheeting. It’s also not for construction works such as nailing a 2×4 of framing a house. For such works, it’s advisable to use a pneumatic framing nailer with a coil magazine that’s capable of shooting 1.5” to 3.5” nails. With that in mind and having your tool then it’s prudent to learn how to use an electric brad nailer.
Procedure
Well, it’s quite simple to use an electric brad nailer. Undoubtedly, you ought to be cautious and ensure that your work doesn’t split. Essentially, an electric brad nailer is quite effective and gets the job done much quickly and efficiently than a manual attempt.
Just like any other brad nailer, the electric brad nailer call for adherence to a set of safety precautions lest it causes injuries if not handled properly. It’s wise to have a first aid kit at a close range throughout. Obviously, even before using an electric brad nailer, you got to load the brads first.
Loading an Electric Brad Nailer
- Unplug the tool-Place on/off switch in ‘off’ position.
- Ensure usage of specific brads identified by stock numbers. Any other brads will cause jamming.
- Identify the image of a brad nail on the tool and slide the brads into that direction only.
- Hold it upside down.
- Place brads into the magazine while tilting the brad nailer to ensure the brads lie against the channel’s wall. Afterwards, slide the latch backwards and ensure that the brad strip doesn’t fall.
- Use low/high power setting while driving brads.
After loading the brad nailer, you’re now good to go. To use the electric brad nailer, follow these steps:
- Use clamps to secure and support the workpiece to a stable surface.
- Ensure the on/off switch is ‘off’ and the plug brad tacker in.
- Turn the electric brad nailer ‘on’ and hold it firmly against the work surface to engage safety mechanism.
- Apply sufficient pressure on the knob when the trigger is pulled but don’t force the tool.
Importantly, read and adhere to all instructions. Failure to do so may result in electric shocks, fire or serious personal injuries.
Electric Brad Nailer Safety Tips
While using an electric brad nailer, it’s advisable to adhere to instructions pertaining he work area, electrical safety, and personal safety as well. Below are some of the instructions that will prove handy during the operation.
Work Area
- It should be clean and adequately lit.
- Avoid explosive environments during operations.
- Shun any distractions that may lead to loss of control.
Electric Supply
- Avoid body contact with grounded surfaces.
- Keep the tool away from wet conditions and water.
- Don’t abuse the cord, replace the damaged cords as soon as possible.
- When using the electric brad nailer outside, look for an outdoor extension marked ‘W-A’ or the one marked ‘W’ as those cords are specifically rated for ‘external’ use thus reduced risks of electric shocks.
Personal Safety Tips
- Wear safety equipment e.g. goggles, dust masks and hearing protection for appropriate conditions.
- Ensure you remove adjusting switches before turning it on.
- Stay alert and sober when using the tool.
- Avoid accidental starting. For instance, ensure the switch is off before plugging in.
- Stay balanced throughout. Proper footing and balance ensure you have proper control in unexpected situations that may arise while using the tool.
Maintenance
- Don’t lubricate the tool. It’s crafted to function without oil or grease.
- Don’t use solvents to clean the tool as they damage the plastic parts. Instead, use a clean cloth for removal of any dirt.
Clearing a Jammed Brad Nail
Generally, this tool should not jam if properly loaded, cleaned and the correct size of the brad nails are used. In case of a jam, unplug it and remove any removing brad nails and reload with new brad nails.
How to Maintain Brad Nailers
Most people often take it for granted when they are told that machines need to be maintained properly in order to function and last for some given time. The same applies to brad nailers, without proper care and storage, it will spoil.
Here are some tips to keep them as functional as they were when newly bought.
1. Lubricate even as you use
You should always lubricate all metallic moving parts in a brad nailer to prevent them from jamming or clogging. It often needs just a few drops.
You can also lubricate the air hose before using and blank-fire the nailer at least thrice to allow the oil to disperse and work on it. If you will be using it the whole day, you can lubricate as you work for proper nail firing.
Moreover, always use pneumatic tool oil as other lubricants can eat away the brad nailer, especially the rubber parts.
Besides, always lubricate before and after use to prevent wear and tear that comes with constant use
2. Environmental Exposure and Storage
You should always take care not to expose them for too long, in areas with high moisture and salt content. This is often common in coastal regions, where salt can cause the machine to rust and stop functioning. The Same principle applies to when you are working in sandy and dusty areas.
Moreover, the airborne particle can also clog the brad nailer and wear it out. Therefore, invest in an airtight case for storage purposes, when you are not using it.
Besides, keep it away from cold places when storing it. However, if it gets cold you can blank-fire it a couple of times to warm it.
3. Use it properly
The better you handle it, the longer it will last. Therefore, ensure you use it as stipulated in the user manual.
Use the right kind of nails as well as operating pressure, especially if you are using pneumatic brad nailers, as improper pressure can damage it. You should also use the proper size of air compressor depending on the woodwork.
For corded ensure you double check on the battery’s expiry date.
4. Tighten the Bolts and Screws
To ensure that all its parts work well, always tighten its bolts and screws every month. This is because they often loosen up with the constant vibration and firing of the machine.
You should always double check on this, because if any part falls apart then you will lose control of the whole brad nailer, which can lead to injuries.
For a brad nailer to function properly you will have to maintain it and use it as stipulated. Otherwise, you will be buying brad nailers for the rest of your life. Therefore, you should always factor in maintenance costs and time before opting to buy any type of tool.
Conclusively, safety is essential whether you are using it or maintaining it. This also ensures it works properly for a long time.
Helpful Guide:
Conclusion
With this we come to the end of this massive guide on brad nailers. We tried to cover it all from scratch which includes the definition, usage, safety tips and proper maintenance techniques as well.
If you are a professional woodworker and would like to add something to this, please feel free to comment below.
And if you think this is a great resource, do share it with the community as it would help many others who are beginning their woodworking journey or are stuck somewhere.
And if you think this is a great resource, do share it with the community as it would help many others who are beginning their woodworking journey or are stuck somewhere.

 By
By


