
People install fences for many reasons, as they are multifunctional. Fences can serve as privacy screens, a means to keep kids and pets in, and a territory marker while also increasing the aesthetics of the space.
Fences require several parts to complete. The combination of these parts determines the type of fence, the level of durability, and the purpose you will get for your space. The many pieces involved in setting up a fence are the major reason some people seek the services of professionals.
However, using professionals is quite expensive and may be out of reach for many. This is why despite the somewhat stressful process, many people prefer to set up the fence themselves.
Depending on the type, size, and stretch of the fence, you can easily set it up yourself. The process gets even better when you make use of pre-made fence panels instead of making them from scratch. You can save time and energy that would’ve been consumed.
However, pre-made fence panels will typically cost you more than making them yourself. Whether you’re a DIY lover or simply someone looking to save the cost of hiring professionals for their fence, learning how to attach these pre-made fence panels is the way to go.
The process becomes straightforward once you know what to do. Luckily, this guide shows how to attach pre-made fence panels to posts and everything you need to know in a step-by-step manner.
Materials/Tools Needed For Attach Pre-Made Fence Panels to Posts
When you want to attach fence panels, you’ll need some things. These materials and tools will make it possible to assemble a fence panel.
- Marker
- Fence panel
- Fence post
- Protective gear
- Shovel
- Hole digger
- Carpenter’s level
- Drill
- Tape measure
- Hammer
- Twine and stake
- Concrete mix
- Gravel
- Exterior screws
- Gravel boards
Step-By-Step To Attaching A Pre-Made Fence Panel To Fence Post
Get the necessary tools and materials listed above and get ready to install the pre-made fence panels on fence posts. Whether you’re a novice or not, the guide is easy to follow.
Mark and Prepare The Area

Determine where you want to site the fence and what it should be covering. Use your tape measure to calculate the total distance and distance between posts. Mark the fence line and the fence post positions. Use the twine and stakes to make it clear for you. Measure to know how many fence panels are needed to complete your fence.
Measure the width of the fence panel to know the distance you should set between fence posts. The posts should be measured from the center, whereas the last post should be measured from the end. This will ensure the panel laps perfectly against each other when assembled. Use a marker to mark the center of each fence post.
After marking the area, clear bushes, dirt, and debris. Make sure to remove anything along that fence line. You need unobstructed access to the area.
Dig Post Holes
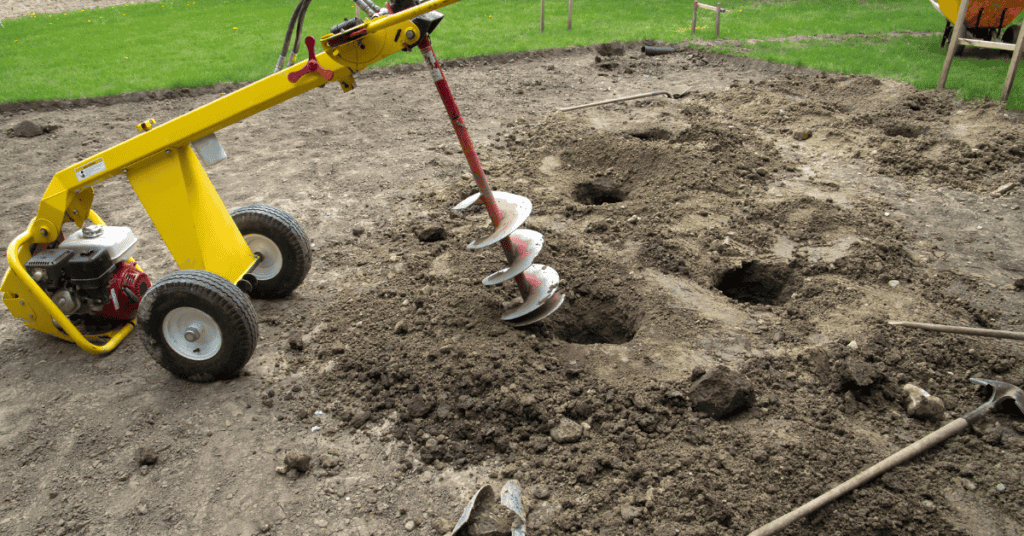
Using your spade or hole digger, dig the marked area. Remove the loose soil from the hole and dig till you can put just over one-third of the fence post inside the hole. The hole diameter should measure at least twice the diameter of the post. This will ensure the post is firm on the ground and not easily moved when there is strong wind or pressure.
Install Fence Post

To install the vertical bars that act as support to the fence, first, decide if you want to set the post without concrete. There are several advantages of setting a post without concrete which includes ease of removal while maintaining durability.
If you choose to set your fence post in concrete, you can go with the quick-setting concrete mix method and enjoy an easy process. To set with concrete mix, pour gravel at the bottom of the hole to keep the base of the list away from the ground moisture. Flatten the top and place your post at the center. Combine the quick-setting concrete mix in the bag, ensuring you’re wearing protective gloves.
Pour this mix inside the hole and around the post. Using a spirit level, adjust the post till it is upright. Add the appropriate amount of water on top of the mix. If in doubt, check the concrete mix bag for guidance on the amount of water needed.
The water will slowly enter the mixture and start reacting. The reaction will see the mix harden and hold the fence post firm. Cover with topsoil and do it for the remaining posts.
Install Gravel Boards

Gravel boards raise the fence panels above the ground and prevent water damage. They can be installed along the foot of the fence line and the fence panel attached above it. Cut the gravel boards using the measurements of the fence panels. Place the gravel boards on the ground from center to center of each post and then fasten them to the post using screws.
Use a spirit level to check if the top of the boards is perfectly horizontal to prevent the slanting of the fence posts when placed on top.
Attach Fence Panels

Place the fence panel from the center of the first post to the center of the next post using the marked lines as guidance. Ensure it is aligned properly using your spirit level, and then drill in the crews or hammer the nails. The unwritten rule is that the fence post should be facing the owner of the fence, so the fence panel should be attached facing outside.
Use 50mm screws through the panel batten to fasten it to the fence post. Repeat the process for the next post till the last post, where you’ll need to cut the panel board to fit the remaining space.
Remember to measure from the last end instead of the middle of the posts as you’ve done for others. But before cutting the last panel, ensure you remove the framing batten measure and cut before replacing the batten.
Attach Post Cap

Post cap improves the aesthetics of the fence by giving it a unique look at the top. It also protects the top of the fence post from taking in too much water and rotting. Removing damaged fence posts can be challenging, and that is why you need to protect the post as much as you can.
Post caps are used when the fence posts are higher than the top of the fence panels. Soak the post can in water to prevent it from peaking when pressure is applied. Coat the underside of the post cap with a sealant made from silicone to prevent a lot of water from reaching the top of the fence post. Nail the post cap to the fence post.
Finishing
Finishing and staining are important as they protect the wood from external damage from water, UV light, and insects. Some wood types like cedar have some level of natural protection against some of these forces.
However, that shouldn’t stop you from applying a finish if you would like to since it can also improve the aesthetics of the fence. Even cedar wood with some resistance needs extra protection outdoors; this is why the extra finishing at the end is essential.
You can paint the fence any color of your choosing. You can also decide to stain the wood or apply a finish to prevent water from seeping in, reduce the effect of UV light and also keep insects at bay.
Extra Tips to Attach Pre-Made Fence Panels to Posts
Here are extra tips to guide your pre-made fence panel assembling:
- Get Extra Hands
Dealing with heavy posts and fence panels alone while struggling with accuracy is never a good combination. Getting extra help will not only reduce your risk of injuries but will also ensure you can get a perfectly aligned fence.
- Start During Warm Months or the Early Growing Season
The best time to start your fence project is during the warm months when the ground isn’t frozen. If you have vegetation around the fence line, you should start the project early in the growing season, so the vegetation has enough time to recover from the stress.
- Wear Protective Gear
Some of the materials, like the concrete mix, contain chemicals, while others can also lead to injuries without the right protection. Wear goggles to prevent chips from flying into your eyes when cutting the panels.
- Seek Government Approval
Check if you need the approval of building regulators in your locality before building your fence. These regulars may also be able to tell you if the area has underground pipes you should avoid. You can get a cable avoidance tool to know if cables are running under the fence line.
- Check Boundaries and Discuss with your Neighbors
Check the boundaries on the property’s deeds to be sure you’re building the fence in the right spot. Discuss with your neighbor if the fence will be next to their property. Ensure not to encroach into their land when building your fence.
Bottom Line
Building a fence can be a stressful process if you decide to do it yourself. However, you can reduce the stress by using pre-made fence panels that you can attach directly to the post with little to no cutting required.
The process of attaching these pre-made fence panels is straightforward if you know what you’re doing. You can save a lot of time and energy by using the pre-made panels; however, it will generally cost more.

 By
By


