

Heat is an enemy of wood as it damages the finish on the wood and goes deep into the wood lattices until the heat is removed. Freshly finished wood is a joy to behold till they accumulate burn marks.
That once clean surface now feels like several decades-old furniture. However, even after removing the wood, the signs of the damage remain, and it requires special intervention to get rid of those marks.
Most people leave those marks on the wood and hope it fades away. However, this method is ineffective as it relies on other wood parts to lose color. There are better ways of eradicating these marks and enjoying a smooth finish.
Burn marks may occur due to several reasons. For example, when a hot tea cut is placed on the wood or when a hot pressing iron or pot touches the wood.
It can also get burn marks from a cigarette or fallen candle marks. The reasons for seeing a burn mark vary, but they all leave a distinct dark mark from the heat on the wood. This article discusses ways to remove burn marks from wood.
Ways to Remove Burn Marks From Wood
Accidents leave burn marks on wood; being intentional about the marks will remove them. Here are ways to remove those annoying marks intentionally:
Materials Needed
- Toothpaste
- Baking soda
- Random orbital sander
- Clean towel
- Tack cloth
- Paintbrush
- 150-grit, 180-grit, and 220-grit sandpaper
- Steel wool
- Protective facemask
- Utility knife
- Epoxy
- Stain
- Steel wool
1. How to Remove Surface Burns With Steel Wool?

Surface burns leave light heat marks on the wood. It is called a surface burn because the burn stops at the surface and does not go deep into the wood lattice.
Burn stains on the surface are the easiest to remove as the marks are only on the wood surface. For example, a hot teacup or plate can cause surface burn stains. Here are the steps to remove these marks:
Step 1: Clean the Wood
A clean surface is the first step to removing surface burn marks on the wood.
Removing dirt on the surface of the wood clears the area and provides a clearer view of the affected area. Avoid using cleaning agents; only use a damp rag to clean the top of the wood. Allow the surface to dry before moving to the next step.
Step 2: Lubricate Steel Wool
Get fine steel wool with soft tendrils for this step. Pour 2.5 ml of mineral oil on the steel wool to lubricate the tendrils. Lemon oil or any non-dying liquid are substitutes where mineral oil is unavailable. You get one from your local store nearby.
Step 3: Scrub the Burn Mark
Ensure you scrub along the grain to avoid spoiling the wood. Hold the steel wool in your hand and use one part to rub the burn mark in a single direction.
The marks are shallow and can be removed by dragging the steel wool over the stains. Keep at this process until you’ve noticed the stains are gone.
Step 4: Clean the Oil with Damp Cloth
After using the steel wool, oil residues will generally collect in the scrubbed area. Soak a clean cloth in water, and squeeze the excess water, leaving it only slightly damp.
Excess water in the rag will cause water stains on the wood. Use the slightly damp cloth to pat down on the area to rove the oil. Avoid scrubbing or dragging the wet rank.
Also Read About: How to Dry Wood Fast For Woodworking? (3 Easy Ways!)
2. How to Use Baking Soda and Toothpaste?

Baking soda is a relevant ingredient in baking but also helps to remove surface burn stains with the addition of toothpaste. A combination of toothpaste and baking soda can remove light stains. Baking soda and toothpaste are great for superficial burns on wood.
Step 1: Clean the Surface
Soak a rag in clean water and squeeze to remove the excess water. Next, take the damp rag to wipe the surface of the wood till it is clear of dirt, grime, and more. After cleaning, allow the surface to dry before the next step.
Detergents and other cleaning agents in your home are unsuitable, as they can leave chemicals that’ll react with the baking soda to reduce its effectiveness.
Step 2: Cover the Mark With the Paste
Make a paste of non-gel toothpaste and baking soda in a bowl. The paste will be sticky and a bit thick due to the nature of the contents.
Apply the paste generously in the grain direction and allow it to sit for up to seven minutes. After the waiting period, use a clean rag to wipe the paste away. The burn mark should be gone with the paste.
Alternatively, you can use a combination of linseed oil and powdered pumice of rottenstone to create a thin paste.
Unlike the thick toothpaste and baking soda mixture, thin mixtures may work into the wood better. Next, use a rag or brush to apply to the burn mark using an along-the-grain movement. Leave to sit for some minutes before wiping with a clean rag.
By now, the shallow burn marks on the wood would’ve cleared, and you’re left with a clean wood surface, albeit with different tones. Sometimes, you may have to repeat the process a few times to clear the marks from the wood completely.
Step 3: Finish
After cleaning the wooden surface, the wood will have different tones. You want to match it by applying the same finish on the other wood parts, paint, or stain. Mix the finish in a bowl or paint bucket and apply it to the burned area using a roller, paintbrush, or spray, depending on the type of finish.
Start from the corner and work to the edge, so you don’t box yourself in the middle while finishing. It is also a great idea to lightly apply the first layer of the finish before increasing the tone to match the wood surface.
3. How to Use Sander?
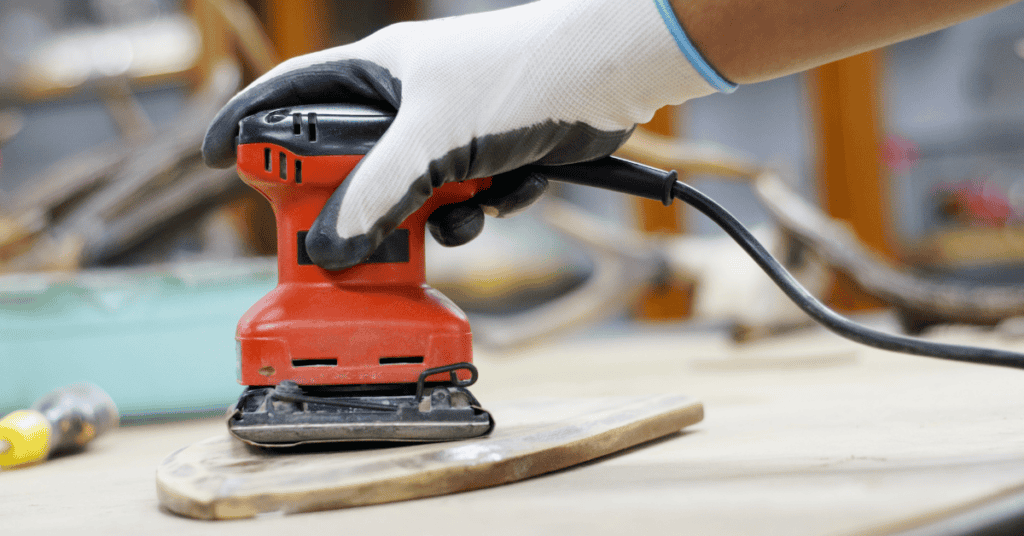
Sander is another great way of removing burn marks from wood surfaces. The deepness of the burn will determine the type of sander you’ll use. Lighter burn marks will need fine grit sandpaper, while deeper burns require rougher sandpapers.
Sanders is great for floors and give and can handle deeper burns better than steel wool. You’ll also find that the sander is a great way to remove paint or finish from the hardwood floor.
A random orbital sander with the required sandpaper grit is the more convenient way to use sandpaper, especially if it is over a large surface. In the absence of a sander, you can use regular sandpaper.
Step 1: Wipe the Area
Use a slightly damp rag to wipe the surface and allow it to dry properly. Too much water in the rag will leave water marks on the wood and would require a separate mark removal method. The extra moisture will also mean more time to dry completely.
Step 2: Sand the Burned Area
Attach 150-grit sandpaper to the random orbital sander and sand the affected area. Sand lightly at a time, repeating the process until the mark is gone. The deeper the burn, the wider you sand to even out the surface.
Next, switch to 180-grit sandpaper and smoothen the surface better before finally using 200-grit sandpaper to get a smooth last later. Sanding along the grain is the best way to protect the wood from further damage.
Step 3: Clean With a Tack Cloth
Use a clean, dry tack cloth to wipe the surface to remove dust particles from sanding. Removing dust particles will expose the now clear area and allow you to move to the next step.
Step 4: Finish
Apply the finish to cover the now-open wood part and match the other parts of the wood surface. You will need to purchase the same finish used on the wood, whether paint, water-based, oil-based polyurethane or any other stain.
Lightly apply the first layer and increase its thickness as you progress, making sure you start from an edge and work your way out.
4. How to Remove Burn Marks Using a Utility Knife?

Deeper burns require more aggressive options as most of their other methods will not remove the marks. Using a utility knife effectively removes deep burn marks that prolonged direct heat has caused on the wood. Burn marks deeper than ⅛” typically require a utility knife to clear.
Step 1: Scrape off the Burn Marks
Use the utility knife to scrape off the burn marks and work along the grain. Working across the grain can damage the wood. Instead, remove the burn marks in smaller portions by going over the surface with the knife held at a slight angle to the wood.
Step 2: Sand the Area
After removing the burned-off parts of the wood, get fine-grit sandpaper and smoothen out the surface. Next, choose higher grit numbers when purchasing sandpaper from your local hardware store, as it indicates a fine surface.
Remember to move along the grain and not across it. Using sandpaper will smoothen the chopped-off area for shallow cuts.
Step 3: Wipe Off Wood Particles
Chopping off burned parts and sanding the area will leave you with small wood parts and dust particles everywhere on the wood. Instead, use a slightly damp rag to remove wood particles, dust, and more from the surface. Ensure the rag is not moist to avoid pushing the particles around.
Step 4: Apply Wood Oil
To restore the wood color after rigorous processes, apply wood oil like tung oil on the worked surface using a clean rag. Then, rub the oil in using short strokes along the grain.
You can also use linseed oil and take advantage of its yellowing features over time if the other wood parts have yellow tones.
Allow the wood to absorb the oil and solidify overnight. Since these oils are non-drying, some manufacturers even recommend wiping off the oil after some time. Whichever method, allowing the wood for several hours will allow the oil to work into the wood or solidify.
Step 5: Cover with Epoxy
Mix the epoxy following the manufacturer’s guidelines and apply it to the worked area using a spackle knife. Use the wood epoxy to fill up the hole from the chopped-off burned part of the wood.
Apply generously and use the knife to work it in properly. Allow the epoxy to dry for about 20 hours before sanding with rough-grit sandpaper at first. Sanding will level the dried epoxy with the wood surface. Next, move to finer-grit sandpaper to smoothen the layer.
Step 6: Finish
Finish off with a matching stain or paint with the other part of the wood. You may need to test the paint or stain on a different wooden material to be sure you’ve gotten the exact shade. Then, apply to the surface using a suitable method like brushing or spraying.
5. How to Remove Burn Marks Using Nail Polish Remover?

Light burns from things like a cigarette can be annoying when found on wood everywhere in your house and even on your favorite furniture. You can use nail polish remover to clear the burns and restore the wood.
Step 1: Wipe with Damp Cloth
Clean the area with a damp cloth to remove grime, dirt, and dust from the wood surface. Allow the wood to dry completely before moving to the next step.
Step 2: Clean with Nail Polish Remover
Wet a cotton swab with nail polish remover and wipe the surface of the burn mark, ensuring to wipe across the grain in straight, short wipes. This is ideal for shallow burn marks.
For slightly deeper burns, scrape off using a knife and fill up with a combination of ¼ teaspoon of transparent nail polish and nail polish remover. Use this mixture to fill up slightly chopped-off areas. Apply this mixture in layers until you’ve filled the area to the height of the wood surface.
Step 3: Finish
Finish with the appropriate stain or coating to match the other part of the wood. Where in doubt, test the shade on another piece before finally coating the worked area.
Read More: How To Cut Wood Paneling And What Are The Best Tools For That?
Summary
There are many methods to remove burn marks, with most depending on the burn mark depth and the cause of the mark. Most methods do not need fancy tools and materials and can be completed using regular household materials.

 By
By


