
A shed is usually a small free-standing structure, typically around 12×12. The shed can serve as a playground for kids, an extra sleeping space, a workstation, or storage space; whatever the case, more room is always welcome.
Creating more ground room is often too complicated and expensive, as you may have to destroy your concrete anchor to expand the shed.
Instead, there are better, more economical options for creating more space in your shed than outright demolition. For example, building a loft in the shed uses the space above to make room for other activities.
Building a suitable shed loft can be a problem for many, especially without guidance. The size and weight of the loft make it a challenging job for people looking to add a loft to their sheds.
Weight distribution and management are the keys to building a durable loft in your shed. This guide teaches you how to build a shed loft; before we go into it, let’s see what a loft entails.
What is a Loft?
A loft is an elevated platform under the roof of a building with enough room to make it accessible. Adding a loft increases the space available for use.
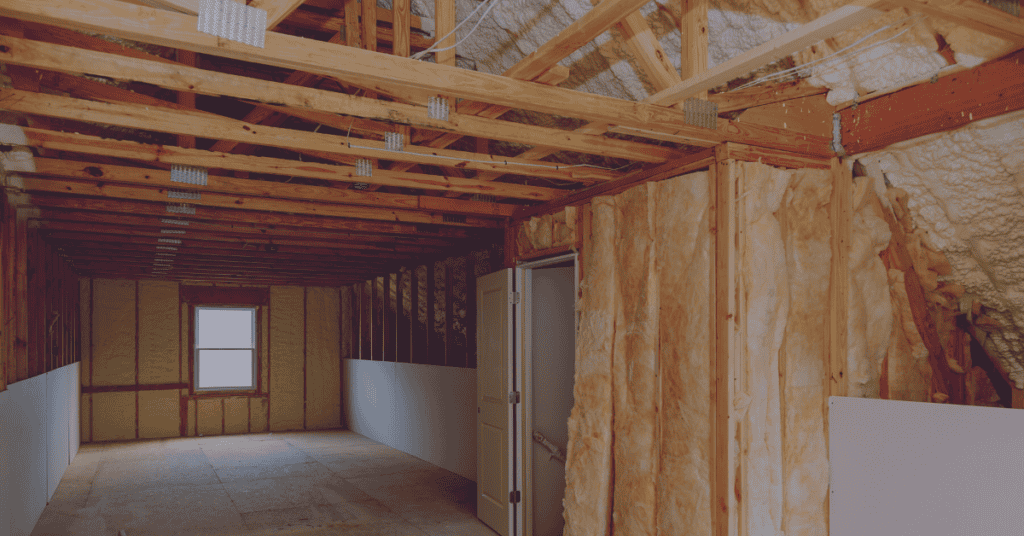
The loft is built in the interior space of the building, where the ceiling joists create the stability required while plywood creates the platform.
Depending on the space available, you can create a full or partial loft. Full loft designs are harder to access and are usually possible in only large sheds.
Full lofts give you more room but also mean accessing the loft takes more time. On the other hand, partial lofts are great for storing frequently used items since you can reach for the items without having to be on the loft.
Ladders give access to the loft areas. The ease of using these ladders depends on the ground space available and the type of loft.
Your shed will always affect the amount of space your loft has available. For example, flat roof sheds generally leave smaller loft spaces than gambrel roofs.
How to Build a Loft Shed?

Adjustments to your shed are huge and can prove costly without proper guidance. In addition, building a loft in the shed covers so many variables that it becomes challenging for many.
1. Gather the Required Tools and Materials

Before undertaking a loft project in the shed, you’ll need to curate and gather all the tools required for the construction.
The tools are primarily standard woodworking tools found in home workstations, with a few exceptions. The materials are mainly wood of different forms and sizes for building the loft. Here are some of the tools and materials required to create a loft in a shed:
- Miter saw: Miter saws make the perfect angled cuts required for some parts of the loft. This versatile saw can also make crosscuts with the right blade.
- Plywood: Plywood thin wooden sheet for covering the top of the loft to prevent objects from falling through the frame.
- Ladder: a staired platform for accessing the loft area. It can be from wood or metal, depending on the choice.
- Deck screws: The screws hold the plywood to the wooden frame, ensuring it does not come off.
- Electric drill: Drill powered by electricity to ensure the smooth opening of holes for screws.
- Drill bit: Drill bits are usually made from steel and used to make different holes for screws and nuts. They come in different shapes and are attached to the electric drill depending on the needs.
- 2*4 woodcuts: Wood for making the loft frame with the quantity dependent on the size of the loft.
- 2*6 woodcuts: Wood for making loft legs and support with the quantity dependent on the depth and width of the shed
- Tape measure: The tool required to take the accurate measurement for the loft.
- Joist hanger: Joist hangers anchor the loft by holding the joists in place and preventing it from collapsing. The durable steel material can hold up to three sides, ensuring its stability.
- Carpenters Pencil: The pencil is used to mark measured points to ensure accuracy.
- Nails: Nails steel materials driven into the wood to hold two wooden parts together.
- Hammer/hammer drill: A hammer is a tool with a strong flat head used to drive nails into wood. The hammer drill also drives nails but is a powerful tool that does not require manual force.
- Level: This is a tool used to check for the accurate horizontal and vertical position of a material.
2. Choose Style
With the different styles available, there are so many creative options for your loft, but first, you must choose between a full or partial loft. Choosing between these two will allow you to focus on the possible styles and measurements.
Consider how you intend to use the loft and the overall weight it would carry, and then consider the size of your shed.
These factors will help you make the best decision on the correct type of loft to choose. You can then select a suitable style to build it from the numerous online you can even design a style if you’re feeling creative.
3. Measure

After choosing the type and style of loft to build, take your tape measure and measure the shed. Take the floor measurement and the size of the exposed shed anchor.
It would be best if you also chose the height of the loft, considering the ground floor and loft area headroom. Some shed roofs and sizes make it impossible to have an enough room at the top, so you may have to make do with a smaller loft area.
4. Cut the Wood

Take your miter saw and tape measure to cut the wood accurately. Then, using the tape measure and the height measurement from the last step, mark the length required on the 2*6 woodcuts from the support and legs.
Also, use the measurements from the length and width of the loft area to mark the 2*4 woodcuts. And then finally, mark the plywood, ensuring that all its sizes fit directly on a wooden frame.
Use the miter saw to cut all the marked points on the 2*4 woodcuts, 2*6 woodcuts, and plywood. Ensure all the cuts are smooth and clean, so they fit.
5. Build the Frame

The frame of the loft area involves building the floor frame, the legs/support frame, and the loft frame. These three parts make up the frame of the shed loft and require a lot of heavy lifting.
First, use the 2*6 woodcuts to make the floor frame by nailing or screwing the base wood into the anchor wood of the shed. Next, make the frame around the anchor or across the length of the floor for partial lofts.
Next, make the legs/support frame using the 2*6 woodcuts with the desired height of the loft. Use nails, screws, and joist hangers to secure the legs placed at the corners of the shed.
Depending on the number of corners and size of the shed, you may have more than the typical four legs used for small rectangular sheds.
Finally, make the loft frame using the 2*4 woodcuts cut using measurements of the length and width of the loft area. You can then use joist hangers to secure the 2*4 woodcuts to the 2*6 support frames.
Finally, use nails and screws to attach the 2*4 woodcuts to others on the frame.
Use the spirit level to ensure accuracy, the electric drill to drill holes for the screws, and the hammer/hammer drill to drive in nails.
6. Attach the Ladder

Choose a suitable location for the loft ladder. The ladder position should make it easy to access the loft and leave the room on the ground.
Ladders close to the walls are more space efficient. Attach the ladder using screws and nails, ensuring the ladder is not too steep that climbing becomes difficult or dangerous.
7. Attach the Plywood
By now, the frame of the loft is complete, and everything is coming together. Use the plywood that has been cut to size to cover the top of the loft. Start from one end covering frame by frame and ensuring each piece fits smoothly.
Use small screws or nails to secure the plywood to the 2*4 woodcut frames. Do this for all the pieces till you’ve covered the entire loft area.
Summary
Building a shed loft requires planning before execution since it involves several variables determining the loft type you can create.
For example, the type of roof, height, size of the shed, purpose of building the shed, and the amount of extra room required can affect the type of loft.
Where building a more oversized shed is impossible, an extra layer in the shed can help increase the space, no matter its purpose.

 By
By


