
Boxes to store pieces of jewelry come in varying shapes and sizes. The designs for these boxes are almost unlimited; anybody can create something unique for their project.
There are so many free plans on the internet to help DIY lovers kick-start their creativity, giving them ideas they can explore. Woodworkers can also use the plans to make their jewelry boxes.
The good thing with jewelry boxes is that they can serve so many other purposes aside from keeping your priced jewelry.
For example, jewelry boxes can be used as gift boxes or photo boxes, depending on their size and shape. The possibilities are endless, and you shouldn’t limit yourself to a few uses only.
This guide contains some of the top designs we’ve found, including the skill level required, time, and material. You’ll also find a link to their detailed free plans to explore.
Most of these plans only need a few tools, while others are complex, requiring more than a few diverse materials.
Free DIY Jewelry Box Plans

This guide requires basic woodworking knowledge to complete any of the plans. Here are some of the most exciting plans we’ve found.
1. Simple Maple and Walnut Jewelry Box
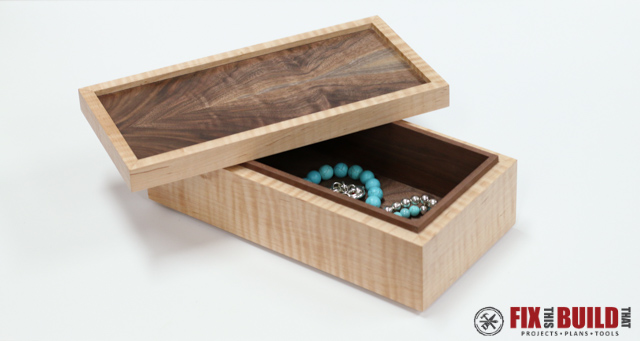
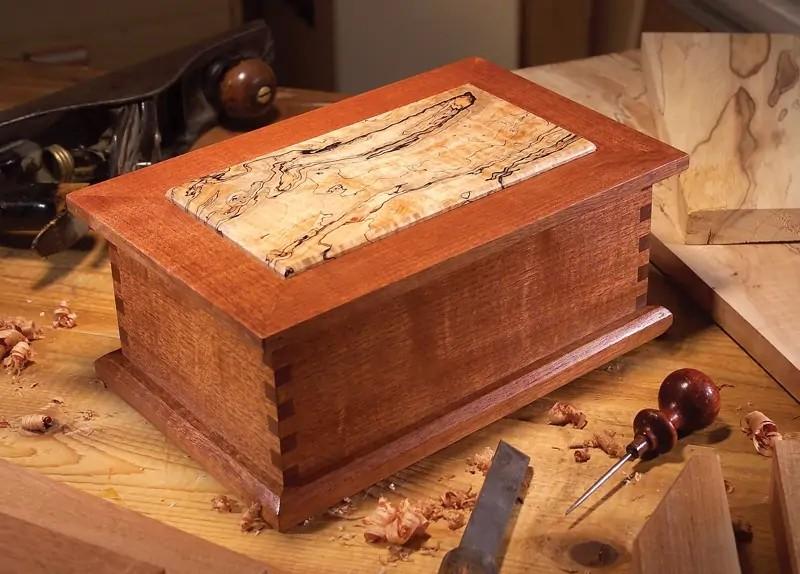
There’s hardly a better way to start this list than with a simple design to set the mood. So here is a simple jewelry box in a traditional rectangular shape.
The box is made from maple and walnut wood, with the walnut wood layered inside and on the box.
This project would take an hour or two to complete with the right tools. However, the blend of the two wood types with varying designs and colors creates a satisfying contrast in this jewelry box.
Beginners can complete this box design as it requires no special woodworking skills.
2. Nifty Rectangular Jewelry Box
Following the traditional jewelry box shape, this fantastic design has an added style and a classy lock.
The woodworker will require plywoods, hinges, and hasp, paint, and stain of their choice, and soft interior cloth, among the woodworking tools.
The materials to make this design are easy to find and can even be sourced from leftover materials in your workshop. Using leftover materials can reduce your cost considerably.
However, the design is inexpensive and requires only basic woodworking knowledge to produce. While this plan’s features are simple, the lock is the center of attraction, so don’t hold back when selecting the design for this piece.
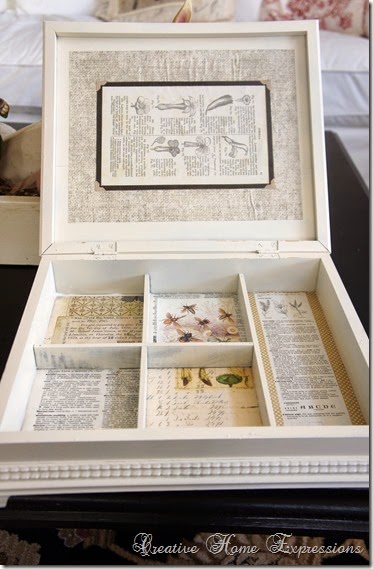
3. Multiple Layers Box
Here, we’re moving away from simple designs for this jewelry box design to more sophisticated plans. The design involves multiple drawers housing different compartments for your jewelry.
The different sections help you arrange your jewelry in style, model, price, and occasion. In addition, you’ll need an anti-scratch bottom to reduce friction and prevent the box from leaving drag marks on your table.
The finishing on this multiple-drawer design is beautiful, leaving a shiny glow. You’ll need quality wood with finishing that can leave contrasting looks to make the drawers stand out from the rest of the board.
The plan requires intermediate to professional woodworking experience to complete and may take several hours due to its complexity.
4. Impressive Walnut Jewelry Box
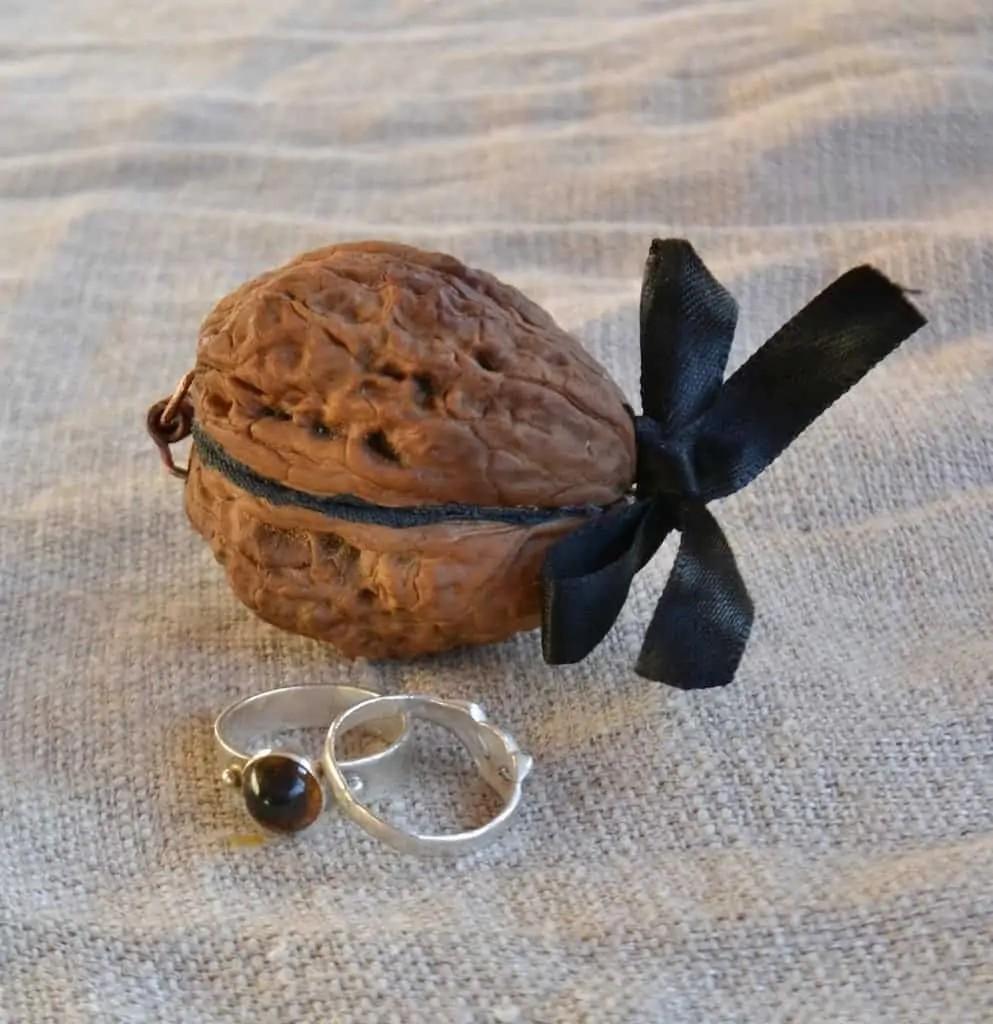
If you’re looking for something unique, here is a design that will blow your mind. The walnut jewelry box converts a large walnut into an intriguing box to keep jewelry.
The box can only carry a few pieces of jewelry at a time since it is difficult to find an extra large walnut to use. It is perfect for giving as a gift, preferably with a unique piece of jewelry inside.
You’ll need a giant walnut, a piece of soft fabric to line the insides of the walnut after you’ve removed all the nuts.
You’ll require hinges and a simple satin ribbon which will serve as a lock for the box. Simple woodworking tools are enough to make this exciting design. A beginner can also complete the style in about 30 minutes without hitches.
5. Fancy Jewelry Station

This design contains more than a box with several drawers and hanging sides. The sides can be dragged out and taken in after use, making the box smaller and conserving space.
It is fancy, intriguing, and practical, able to carry all your jewelry and even sample some of the best for your viewing pleasure. In addition, it helps you stay organized with the different compartments.
The skill level for this jewelry station design is professional with the many parts and fancy design it carries.
It will take several hours to complete this jewelry station. You’ll also spend a considerable amount on materials and finishing; however, it’ll all be worth it.
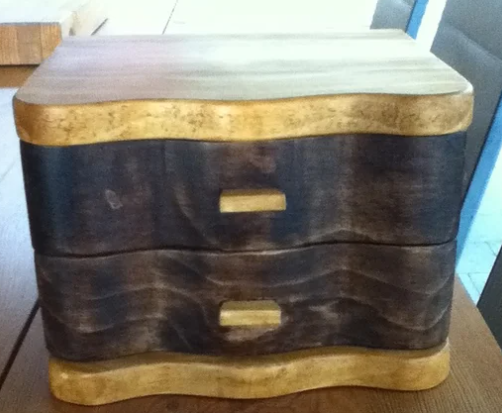
6. Jewelry Cabinet
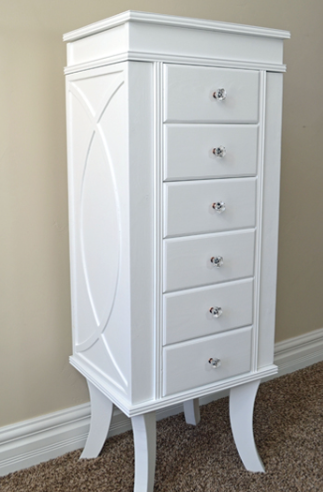
Here is another large jewelry box project. This design is a jewelry Cabinet standing on extended legs and towering high.
The cabinet contains over four drawers, opening sides on either side, and the top of the drawer. You can close all the sides to keep the jewelry out of sight. The plan will require a large quantity of plywood and board since the cabinet is large and a skilled worker to complete it.
Primer and white paint complete the design, giving it this classy look. It’ll take several hours and a lot of woodworking materials to complete this project.
Set the cabinet against an open wall to properly admire the design.
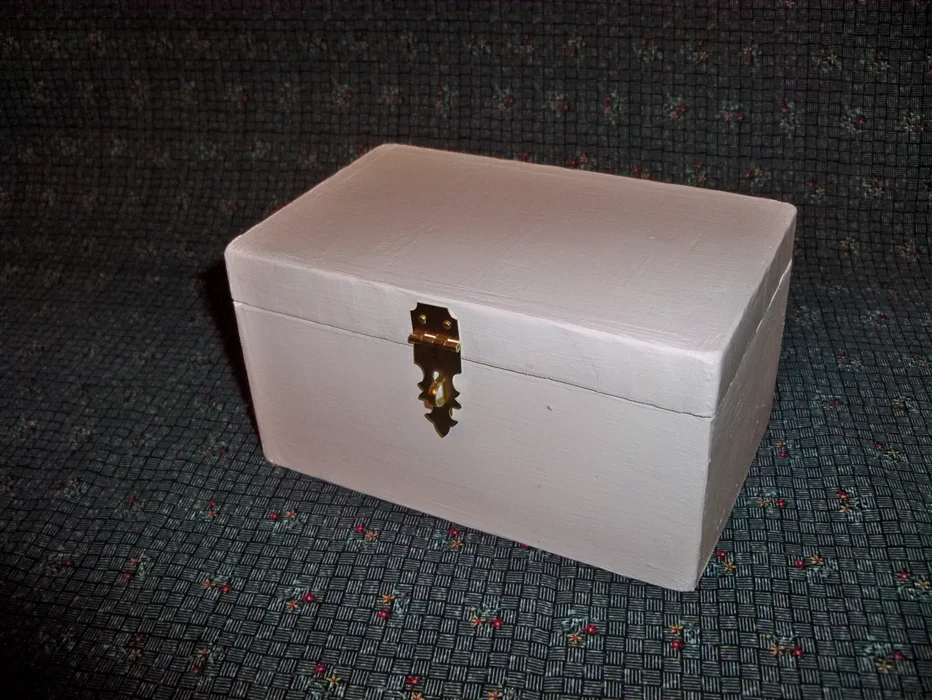
7. Treasure Chest Jewelry Box
This is a perfect design in the mold of a treasure chest, as jewelry is often priced as assets treasured by their owners.
Therefore, making a treasure chest box makes sense to house the jewelry pieces. The design makes it seem simple but requires several detailed cuts and attachments to get it together.
An intermediate skill level is required to complete this project without hitches. The project will take about 5-10 hours, depending on your speed and experience.
Tools for this project are standard woodworking tools most people have in their shed. Contrasting wood colors like mahogany, walnut, and cherry, make this jewelry box stand out.
8. Curved Lid Oak Box

Oakwood features unique patterns that make any design exciting. This jewelry box uses oak wood and features a curved Lid to add to the excitement.
It uses trays with several compartments to house your jewelry. The DIY lover uses thin sheet hardwood to make the trays with as many compartments as possible. The tray is covered with soft fabric for color and to protect the jewelry.
A skilled professional woodworker will efficiently complete this task in about 6 hours. The curve on the lid requires special attention when making, which is why special skills are required. The style is unique and fulfilling.
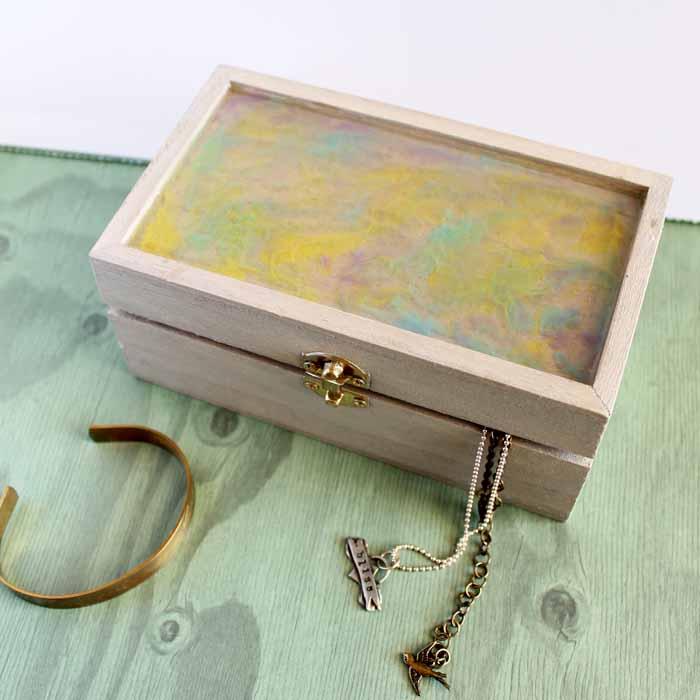
9. Hanging Jewelry Box with Glass Cover
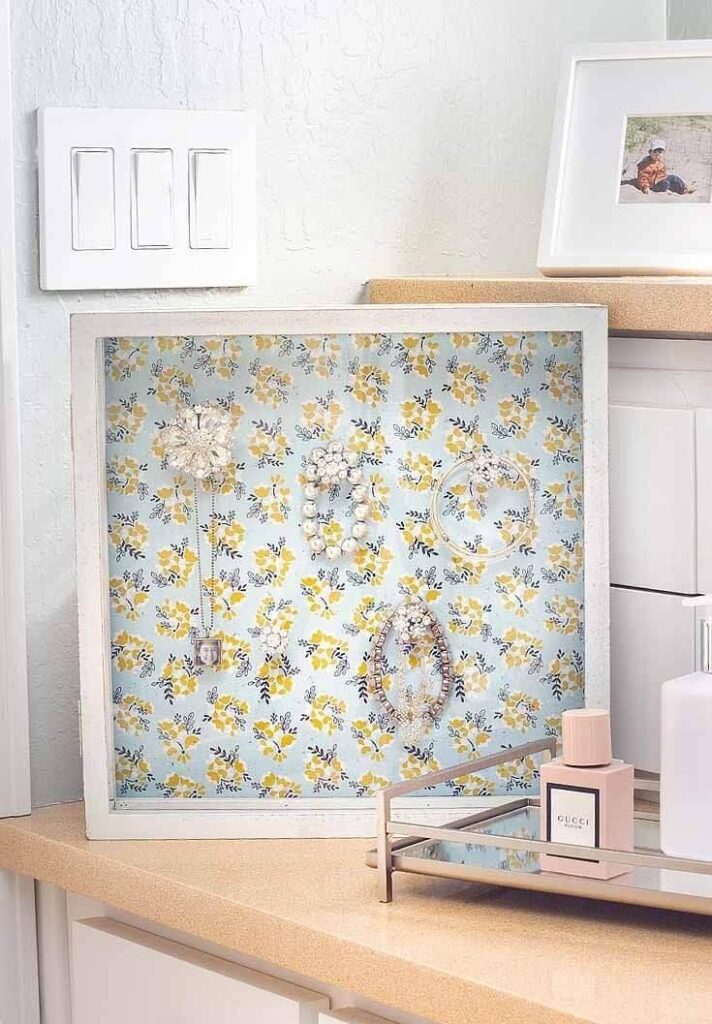
Away from the traditional designs where jewelry is concealed and kept away, some people prefer to sample their jewelry for viewing pleasure. So what better way to sample this jewelry than with a hanging jewelry box with a glass cover?
The magnet inside the box holds the jewelry in place as they hang on your walls or sits on tables. The floral patterns in the box make it even more beautiful. An intermediate skill level is enough to make this handing box design and a work time of around 5-7 hours.
10. Earring Storage Box
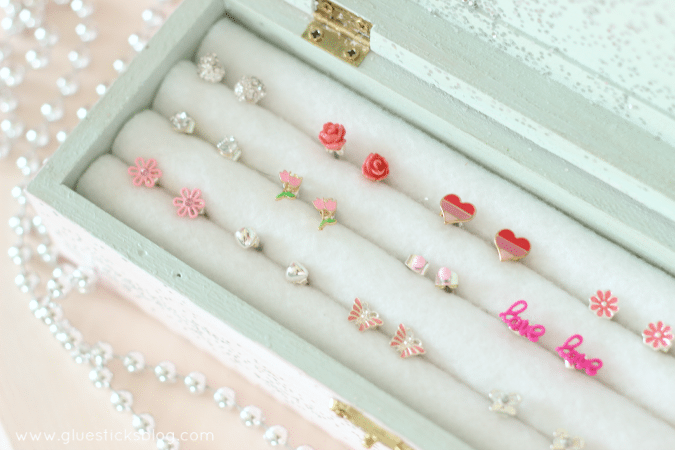
Sometimes all you need is a unique jewelry box for a particular Jewelry, and this earring box satisfies that need. It is simple and beautiful, helping you store your earrings in one place.
The grooves in the box hold the earrings in place and ensure they are not clattering inside the box.
A beginner skill level is required for this design, with only a tiny wooden material enough to make the box due to its size. The choice of wood depends on preferences, but you can get all the materials you need for under $5.
11. Vintage Style Jewelry Box
Here is a jewelry box with vintage designs with the insides lined with vintage images. A simple compartment style inside the box helps to organize the jewelry.
The box edges feature intricate designs that put this vintage box style out of reach for beginner and even intermediate-skill woodworkers.
It may take up to 8 hours to complete this design, with more time to make the outside edges. Finally, the top of the box is covered with paper carrying a powerful quote to make it even more enjoyable.
12. Velvet Jewelry Box
Your jewelry box can be simple and affordable yet exciting. Being affordable shouldn’t take away the fun in your box, and this velvet design shows how you can incorporate the two.
Spending less than $2 for this box is possible if you have some of the materials in your home. An old box, foam rollers, and velvet scraps are all you need to get this going.
Cut the foam rollers to fit into the box and wrap them with your velvet material.
Fit the rollers snugly into the box so they can serve as grooves that hold your jewelry in place. With suitable materials, beginners can do this simple project in less than an hour.
13. Newspaper Tube Box

This newspaper Tube Box is unique and uses newspaper tubes glued together to form a box.
You need a colorful thick sheet of paper, cardboard, newspaper tubes, ribbons, beads, pastels, and glue. Putting all these together will take a few hours to complete and would only require an intermediate beginner skill level.
The guide shows simple steps to make this newspaper tube box with cutting dimensions and possible color combinations. Covering it with brown Patel gives it that natural color.
14. Secret Compartment Jewelry Box
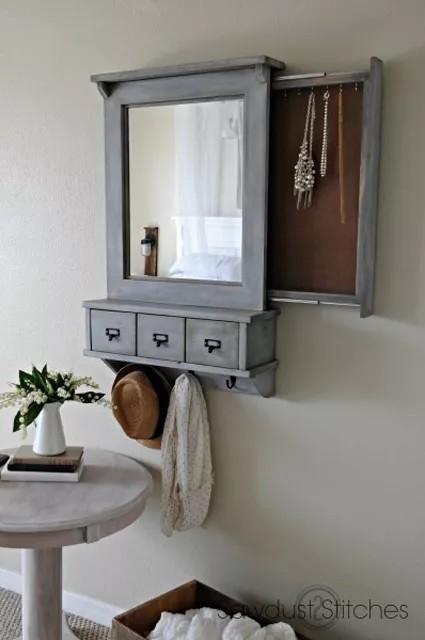
You can hide your expensive jewelry inside this hidden compartment behind the mirror. It’s a sliding chamber from the side of the hanging mirror that’s difficult to spot. This means you can safely keep your gems and easily reach them whenever possible.
The hanging mirror sits on the top three drawers, where you can keep some of your frequently used pieces. You can save the hidden compartment for the rarer jewels.
The entire materials, cut list, and tools needed for this project are included in the free guide. Start by building the mirror frame with room for the sliding chamber on one side. For the three individual drawers below the mirror, you need single back and bottom boards with dividers between them.
Follow the guide for a detailed process that includes images and written steps.
15. Stylish Handmade Jewelry Box
This is a handmade yet impressively finished box to store your gems. The idea is not to make a perfect piece but to allow the imperfections to shine through, however, without affecting its finish, as the box’s glossy top shows.
You can make a personalized piece with unique details. Build the right size and then finish to your taste. Nevertheless, the finishing is the most detailed part of this guide, as it details how to make an impressive handmade look.
Add a vibrant color to the inside of the box for a pleasant surprise that helps the jewelry pop into the box. Combining resin and various liquid colors creates a vibrant, glossy top.
16. Simple Jewelry Box Without Power Tools

Do you know you can make a safe for all your jewels without a power tool? Essential hand tools like a screwdriver, a saw, a chisel, and a ruler, among others, are all you need for this project. You’ll find the complete tool list in the plan.
After making all the cuts involving all the wooden pieces, you can join them. You’ll need wood glue and screws for this step. The plan utilized thick clear pine for the box and thick basswood for the dividers, but you can use any suitable wood of your choice.
It is simple and can be completed within a day. Nevertheless, it involves several sectors to house the different pieces. A basswood frame and wire net make the earring screen that fits into the box.
You’ll need hinges, hasp, and hooks to secure the box and enable the moving parts. At the end of the project, you can finish based on your preferences. Oil stains and paint are popular options.
17. Gold Trimmed Acrylic Box With Clear Frames
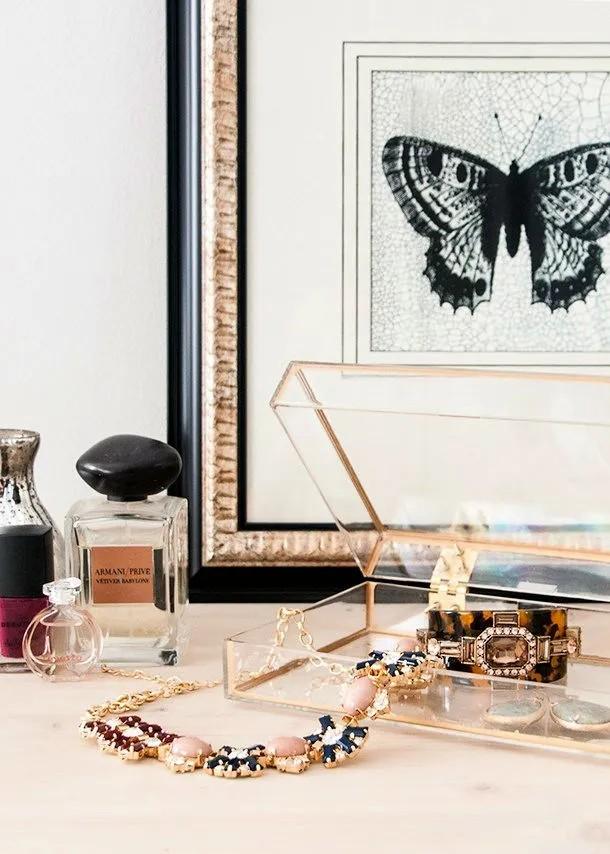
Here is the perfect display frame for your beautiful jewelry. It keeps your pieces safe and easy to reach but allows you to display them to any viewer’s delight. Some pieces are too beautiful to have hidden away in a box.
The idea uses two clear frame boxes as the primary materials for this project. But that’s not all, as it improves the appeal by lining the edges with gold trims. The trim is made from a gold pen, so it’s easy to apply.
Brass hinges match the gold trims, ensuring uniformity and appeal. You’ll need to drill at high speed over tape to open holes for the hinges.
It takes about an hour to complete this clear-frame jewelry box. Its simplicity is evident in the length of the plan – short and to the point without the need for unnecessary information.
18. Detailed Jewelry Box with Multiple Compartments

This is one of the most detailed jewel boxes in this list, containing various chambers for your precious pieces. The drawer with corresponding grooves glides along the rails. It is located below the box with a handle similar to the cover.
Opening the lid reveals a plethora of compartments for your gems. The interior features two trays sitting above more chambers for storing your jewelry.
The idea is to have separate areas for your pieces, keeping them arranged and easy to reach. Due to the details in this idea, it is better suited to more experienced woodworkers. However, less experienced DIYers can follow the detailed guide.
You’ll need to cut all the pieces precisely, as any slight variation may misalign the structure and make it impossible to fit. Completing the chest first before building the trays will reduce mistakes.
Summary
Ideas are unlimited and shouldn’t be constrained by a few designs. Jewelry boxes are personal items where your unique idea can make it even more fulfilling for you.
So if you’re a DIY lover looking to make a jewelry box, some clear ideas can kickstart your creativity.

 By
By


