
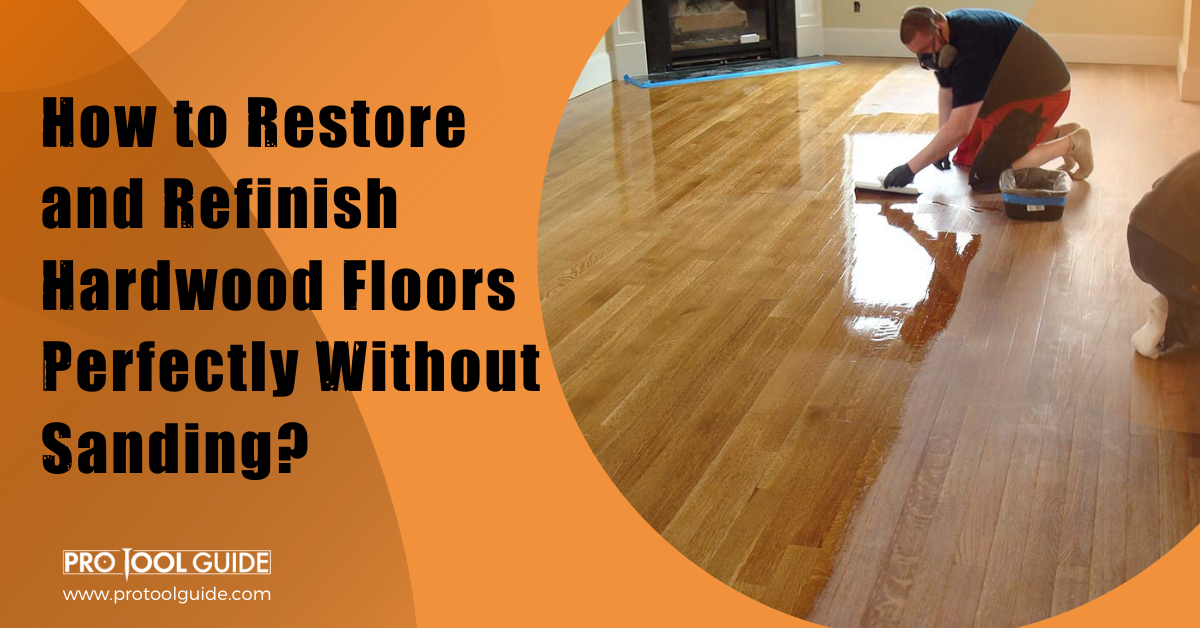
Hardwood floors are clean, classy, and appealing. Luckily, they are beginning to get the popularity they deserve, with more people adorning their floors with it. Most types of flooring require some form of maintenance or the other to remain useful or appealing.
Hardwood floors are durable when the right type of wood and finish is used; however, even that may not be enough to prevent normal wear and tear or fading after some time.
Installing a hardwood floor is one thing; maintaining it to keep its shine, class, and effectiveness takes something more. Careful use of the hardwood floor will ensure some of the depreciation is minimal, but even with the most careful use, you’ll still get some fading or scratches.
A hardwood floor will see a lot of human activity, heavy objects being moved across its surface, moved rugs, and even the activities of pets on them. Over time, the wood finishes fade, scratches appear, and the once shiny hard floor looks bland and unappealing. When this happens, you know it needs to be restored.
When most people hear about hardwood flooring restoration, the first thing that comes to their minds is often sanding with orbital Sanders or any other sander. While this can be an effective method for deep hardwood floor scratches, it is time-consuming, costly, and stressful. Sanding the hardwood floor is also too much and unnecessary for minor fades, light scratches, and wears and tears.
In this piece, we’ll learn the other ways to restore your hardwood floor to its previous state without the need for sanding them. These ways are easier, less expensive, save time, and are better suited to light scratches and fades.
Ways to Refinish Your Hardwood Floor Without Sanding

There are several ways you can refinish your wood floor that does not involve sanding the wood. Sanding requires a lot of materials, time, and resources to pull off, and this is why it is not necessary for light damages.
1. Use a Chemical Abrasion Kit
Using an abrasion kit is one of the most effective methods of refinishing wood floors without sanding. It involves using chemical abrasion kits bought from stores to fill up scratches and refinish the floor. The good thing about this method is that you can easily buy the DIY kit from home improvement stores.
Materials Needed
- Chemical abrasion kit
- Bucket
- Paint tray
- Paintbrush
- Shoe covers
- Sponge mop
- Painters tape
- Wood stain
- Rags
- Scouring pads
How to Use Chemical Abrasion Kit
Here are the steps to use this kit on your hardwood floor:
Step 1: Clear and Clean the Floor
You need to clear every furniture, rug, or material on the floor. Remove the door from the hinges as this can prevent you from reaching every corner of the floor. You want the area to be free from boxes or cabinets.
Clean the floor with a vacuum or a mop, and ensure not to include any chemicals in the cleaning as this can affect your abrasion procedure. Clean dust, oil, or grime from the surface as they affect your floor repair process. Next, you should close every electrical outlet with a duct.
Put off the fan and all ventilation systems, including the windows. This will limit the spread of dust. Close the window blinds to keep sunlight out.
Step 2: Use the Abrasive to Scrub the Floor
Here you’ll need an abrasive pad included in the kit to scrub the floor with the abrasive working together. You can go on your knees to use the abrasive pad while scrubbing the floor or screw it to your mop handle, so it’s easy to stand while scrubbing.
Dip the pad into a small container containing abrasive, squeeze to remove any excess fluid, and then move it on the floor, covering it portion by portion. Doing a small portion at a time will ensure you do not leave the abrasive on the surface for long. Clean up excess abrasives on the floor. Allow the floor to dry up for about 30 minutes before moving to the next step.
Step 3: Clean Again
Use a small amount of dishwashing liquid in warm water to clean the floor with your mop. You want to use only a damp mop to minimize the water entering the floor. Allow the floor to dry for another 30 mins.
Step 4: Fill Up Deeper Scratches
Use a tiny paintbrush to fill up deeper scratches with a matching stain. Examine the stain and ensure it matches that of the wood. Flatten the edges, so there are no protruding edges.
Step 5: Coat the Whole Floor with Finish and Allow to Dry
Choose the finish and method of application, then plan the application process. The last thing you want is to get stuck in the middle of the room while applying. Apply the edges first and then follow the areas one portion at a time. You may seek the help of an extra hand or two to make it easier for you.
Allow it to dry properly before stepping on it. Typically it takes about 8 hours to dry enough for you to walk on it, then about two weeks before you can fully move in or utilize the space.
2. Buffing and Recoating

This method of hardwood floor repair uses light sanding. I know you’re wondering how this makes the list since we’re only looking at methods that do require sanding. The sanding here is light and only removes the finish. It doesn’t scrape off the top layer of the wood like in hard sanding.
Materials Needed
- Shoebox
- Broom handle
- Application pad
- Applicator block
- Paintbrush
- Painters tape
- Plastic sheeting
- Hardwood floor cleaning materials
- Wood stain
- Vacuum
- Mineral spirits
- Sanding screens
- Rented buffer
- Finish if your choice
How to Buffer and Recoat
Before you go ahead to use this method, you should know that it does not work on floors that have a wax finish, and they create bubbles when you buffer and recoat them. Learn how to use the buffer and Recoat method by following these simple steps:
Step 1: Figure Out the Type of Finish
Remember, this type of hardwood floor refinishing does not work with floors having wax finish, and this is why you need to confirm the type of finish first. To do this, apply mineral spirits to a tiny portion of the wood and wipe with a white rag. If you notice a change in color of that spot to brown or yellow, the finish is most likely wax. Otherwise, you can go ahead with the process.
Step 2: Clean the Floor and Fix Problematic Areas
Clean the floor thoroughly, ensuring you do not use any chemical cleaner as this can affect your repair. Pay extra attention to areas with hard stains and grime. A clean floor is easier to repair and also lasts longer.
Hammer any protruding nail into the wood and fill up with some putty or wood stain. Sand the stain so it becomes flush with the wood. Fill other deep scratches or gouges with putty and sand to get a level surface.
Step 3: Set the Sanding Screen Under the Buffer
A buffer is a machine that can do a lot of things depending on the pad attaching, including scrubbing, sanding, and more. In this case, you should attach a sanding screen under the buffer.
Step 4: Turn on the Buffer
Buffer the whole area, ensuring you check the sand screen every couple of minutes to remove dirt that builds up underneath. The sanding screen will also wear out after about 15 minutes and would need to be replaced.
Step 5: Clean up Dust
You want to remove as much dust as possible that must have been created by the buffer. Use a vacuum cleaner instead of a broom, so you don’t force the dust deeper into the cracks. Dust window blinds and curtains thoroughly.
Step 6: Apply Finish and Allow to Dry
Choose a suitable finish to apply on the floor. Polyurethane is one of the most popular choices, and you can go oil-based or water-based, with each having its advantages. Applying polyurethane, as with other finishes, is easy. You need to apply the edges first with a small brush before attaching the applicator pad to the block and then to the mop stick. Start applying in small portions and work your way from one edge towards the door.
Allow the finish to dry for some days depending on the type of finish used, with oil-based finishing requiring more time to dry.
3. Using Polyurethane Revitalised Gloss

This method is the easiest among the listed methods and is used for hardwood floors with the least amount of damage. Perfect for renewals where only an upgrade in color and shine is needed. This revitalizer fills in mild scratches and improves the look of the floor.
Materials Needed
- Mop or paint roller
- Shoebox
- Paint tray
- Hardwood floor cleaning materials
- Revitalizer liquid
- Painters tape
- Vacuum
How to Use Polyurethane Revitalizer Gloss
It is perfect for mild scratches and for renewing fading floors. It also requires a minimal amount of work to get your floor shining again. Here’s how to do this on your hardwood floor:
Step 1: Clean the Floor
First, clear the floor and remove all the furniture. Remove the door from the hinges to get full access to the floor. Remove cabinets, boxes, and everything that can obstruct your access to certain parts of the floor. Clean thoroughly without using any chemical cleaning agent.
Step 2: Apply the Revitalizer
Before applying the revitalizer, ensure it is compatible with the current finishing on the hardwood; you can try out a small portion to see if it bonds well. Seal the floor with polyurethane before you start the application.
Pour the revitalizer on a paint tray and dip the mop or paint roller in. Allow it to drip before applying it to the floor. Ensure the revitalizer is properly worked into every corner of the floor to get an even surface.
Step 3: Allow to Dry
Allow the revitalizer to dry for about an hour before you can step on it, wearing a sock, of course. A full 24 hours should pass before you’re free to move furniture and rugs into the space.
Summary
Sanding shouldn’t be the only way to renew your hardwood floor. Several other effective methods are time efficient and easy. You can repair scratches, remove stains and shine faded floors using these methods.