

A wood lathe machine is one of the first machines woodworkers purchase for their projects because of its importance. The powerful equipment handles several woodworking projects, but how many can use it effectively?
Suppose you’re new to woodworking, whether as a DIY enthusiast or professional, using the wood lathe may seem like a chore. It’s huge with a couple of moving parts, so this is understandable. However, the process is not as complicated as it seems.
Before buying that lathe machine, take some time to digest this piece, as we’ll delve deeply into how to use it. But that’s not all. We’ll also include helpful techniques for successful and safe lathe usage.
Before we get into all of these, we’ll see what a wood lathe is about.
What is a Wood Lathe Machine?
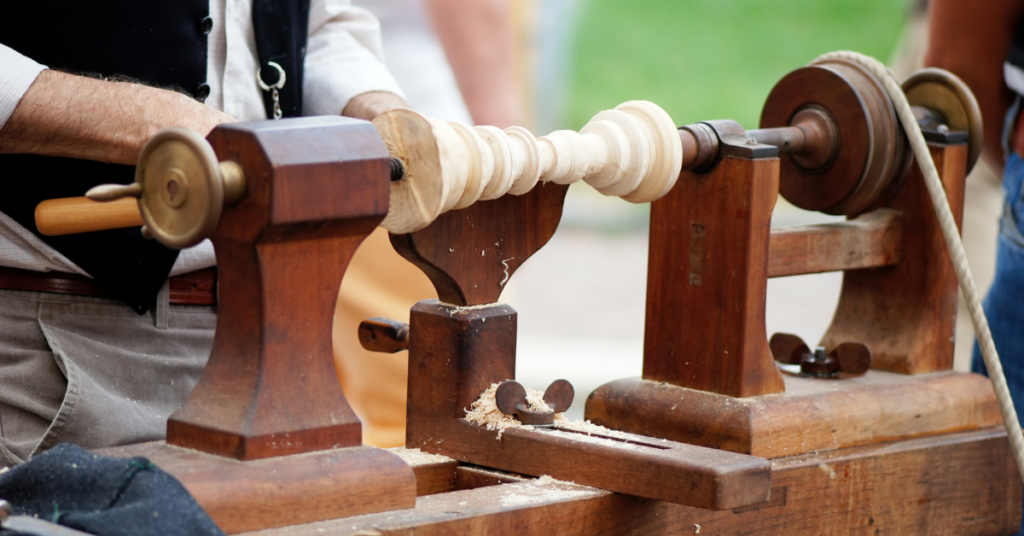
A wood lathe machine, or wood turning lathe, is woodworking equipment used to make cylindrical profiles. It is used only for wood and differs from the metal lathe. The wood lathe makes curves around furniture legs and baseball bats, among other projects.
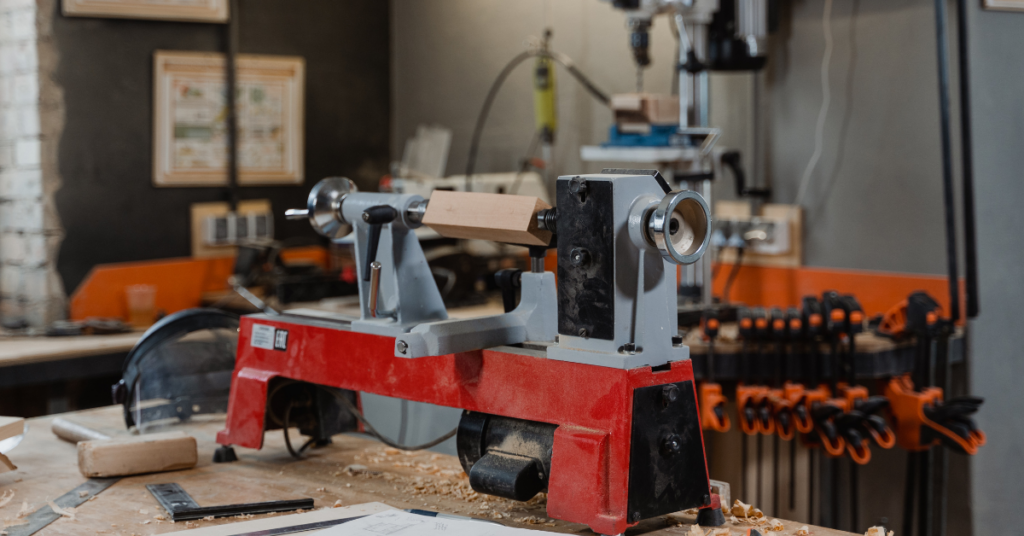
The overall aim of this machine is to shape wood, giving it an aesthetically pleasing and practical shape. It comes in varying sizes and forms, with tabletop lathes being the most common.
Components of a Wood Lathe Machine
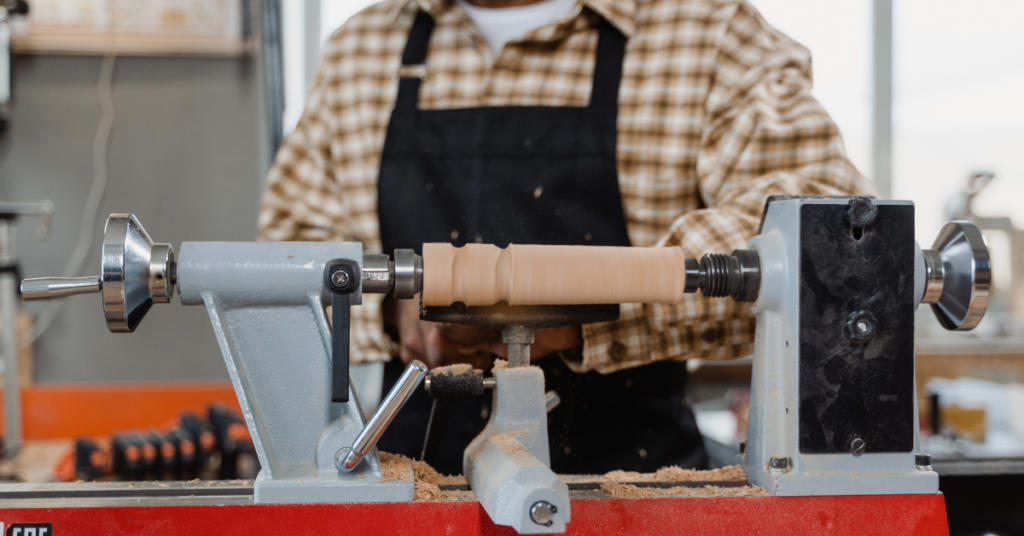
You’ll immediately notice two things about the wood lathe: it is massive and has unique top pieces. The lathe machine features a variety of components that make it effective. Here are its primary parts:
1. Headstock and Tailstock
Two of the most noticeable parts of a lathe are the headstock and tailstock. These two parts are often labeled together due to their functionality; they work together to hold the wood.
The headstock is on the machine’s left and features the lathe’s motor. This part also contains the bearings guiding the workpiece on the rotating bit.
You’ll find the tailstock on the opposite end of the machine (right-hand side). Unlike the headstock, the tailstock is not fixed to a spot, with its position adjustable depending on the workpiece size. The tailstock controls the spindle’s positioning and effectiveness.
2. Motor
The motor runs the lathe machine and is located on the headstock. It is one of the most essential parts of a lathe, as it determines the machine’s capacity. Typically, a lathe motor’s capacity ranges from ¾ to 2HP.
Motors with higher power can effectively shape large workpieces and typically come with an extensive lathe size. The motor is powered by electricity.
3. Controls
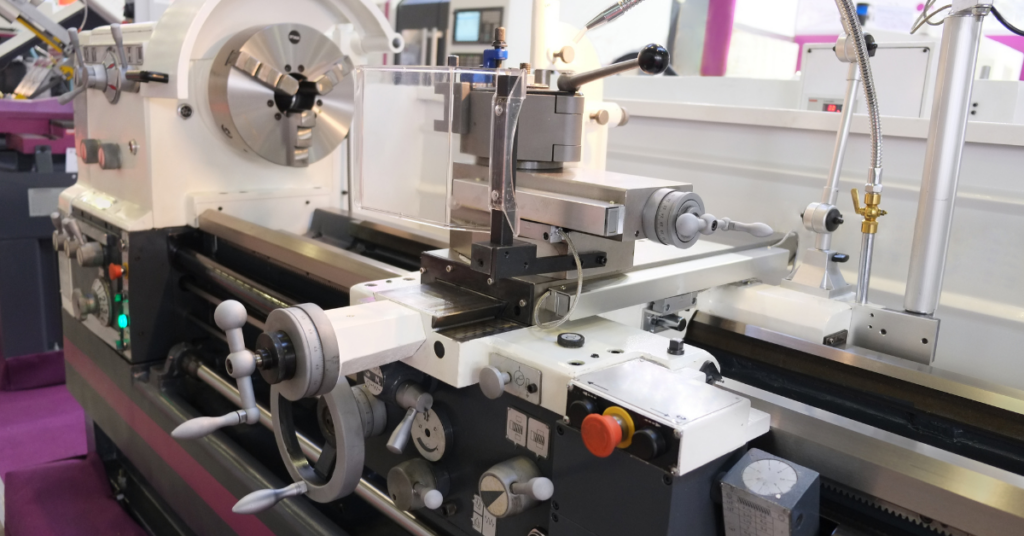
You know the lathe is powered by electricity and features a motor. But how do you control the machine? The controls allow you to effectively and safely shape the wood.
You’ll find the switch control switch on the belt pulley, which features both electrical and manual controls. This switch is critical as it helps you adjust the speed of the motor to make the perfect cylindrical profile. Speed capacity on most lathes ranges from 500 to 3000 RPMs.
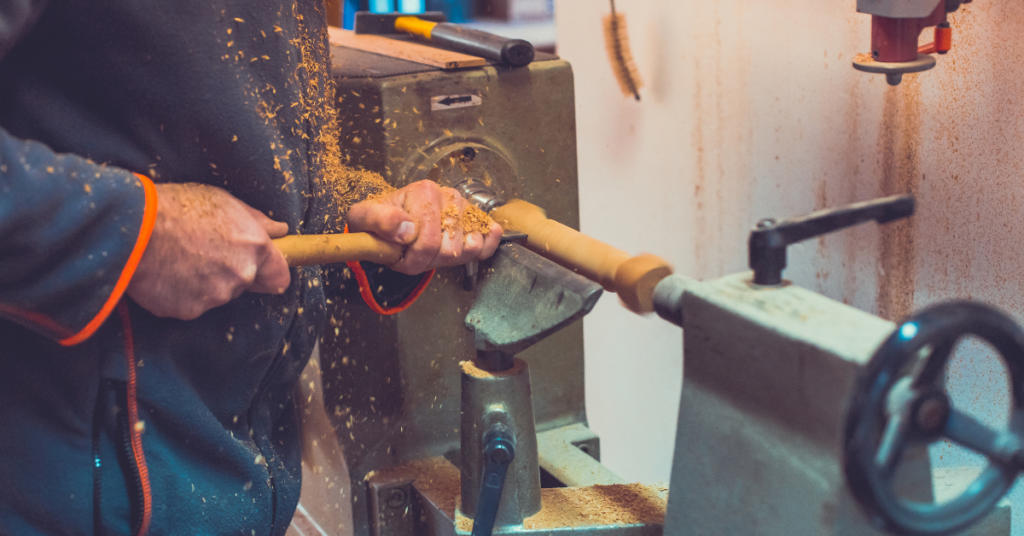
4. Tool Rest
With the speed and power of the lathe machine, using this equipment without proper safety techniques isn’t recommended. This is where the tool rest can come in handy.
The tool rest is a platform to place your tools while spinning the wood. It is vital to utilize this space, as it allows you to safely and conveniently keep tools used for the project on the lathe.
There are different types of tool rests on lathe machines, all featuring varying numbers of rest positions.
How to Use a Wood Lathe?
The lathe machine is a crucial woodworking tool capable of making impressive shapes. But you must know how to use it to enjoy its benefits. Many woodworkers feel intimidated by its size and power, but its usage can be seamless with the right guide.
1. Choose a Suitable Lathe
As mentioned earlier, wood lathes come in various forms, sizes, and designs, all with different capabilities. It is vital to select the most suitable lathe for your particular needs.
Start by choosing between a benchtop lathe and a more extensive turning machine. If you’re working with small pieces, the benchtop is enough. The length of the bed is another factor you can select. Others include horsepower, speed, and weight.
That’s not all, as choosing the correct set of tools is part of this step. The required tools vary depending on the project, but some of the most common include parting tools, roughing gauges, and skew chisels.
2. Select the Wood

Getting the perfect shape using the lathe machine can be challenging with the wrong wooden piece. You must take some time to select the suitable wood to use. First, ensure the wood is large enough with room for shaping.
The perfect wood characteristics are soft and new. Get a soft wood that’ll easily shape and ensure the wood is new. Invest in lumber with many grains, especially straight ones; they are easier to use. Some popular options include balsam fir and yellow pin.
It is best to use lumber with no knots; however, where this is impossible, only use wood with tight knots. Timber with loose knots is unsafe to use on a lathe.
3. Read the Owner’s Manual
You would be surprised at how much information you can pick up from the owner’s manual. There’s no better place to learn about your machine’s specifications and components than this manual.
Keep this booklet handy when using the lathe. The guide can teach you how to replace accessories and maintain the machine.
4. Square the Stock and Cut into Desired Length

Workpiece preparation after choosing the wood includes squaring the corners. This action reduces the amount of wood that needs to be cut out by the lathe. You can bevel or chamfer the corners to reduce the piece.
Cutting the wood to smaller sizes that fit the lathe is vital. You may also have to shape out the edges to reduce vibrations. This is also an excellent time to cut the length of the piece to its desired size and one that fits into the machine.
5. Mark the Center of the Wood and Position
With your piece down to shape, you can position it on the lathe. But before then, it is essential to center the wood correctly. Finding the dead center is your best chance of correctly positioning a bare piece of wood.
You’ll need to mark the center of the front and rear faces of the wood. Thankfully, doing this is easy with the center-finding tool, while the spring-loaded punch marks the pints.
Place the piece between the headstock and tailstock while ensuring it is centered correctly using the marked points. You can then slide the tailstock until it pushes the wood firmly against the spur center. Now, you can secure the setup by tightening the clamps.
6. Position the Tool Rest

The exact position of the tool rest is not predetermined, but placing the rest close to the workpiece is essential. However, ensure it is not too close, affecting the lathe’s rotation. Place the tool rest parallel to the length of the workpiece and about 1 inch from the wood.
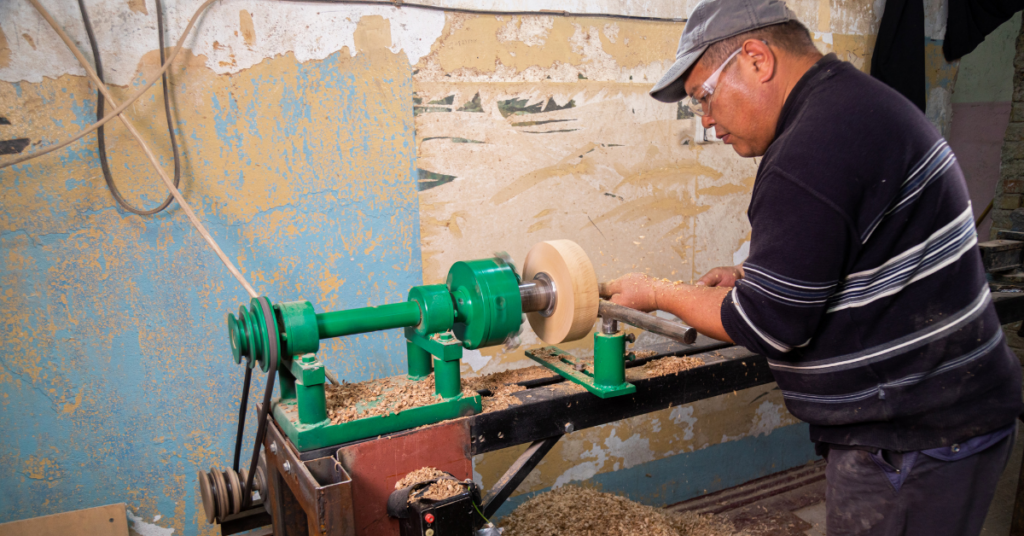
7. Turn the Lathe
Before powering the lathe, ensure everything is in place and you’ve chosen the correct tool. Set up the machine and power it. Ensure to start at a low speed and slowly adjust the speed to avoid accidents.
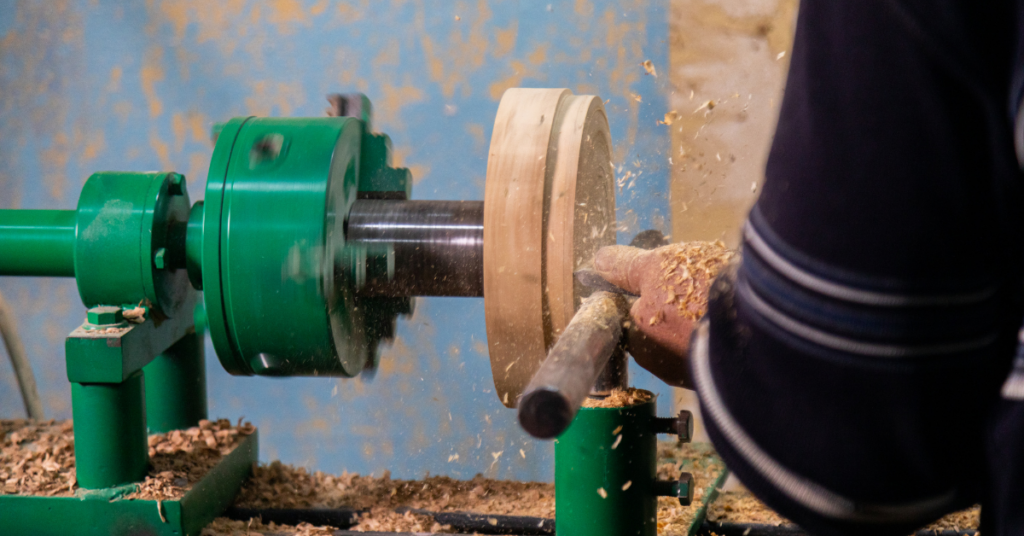
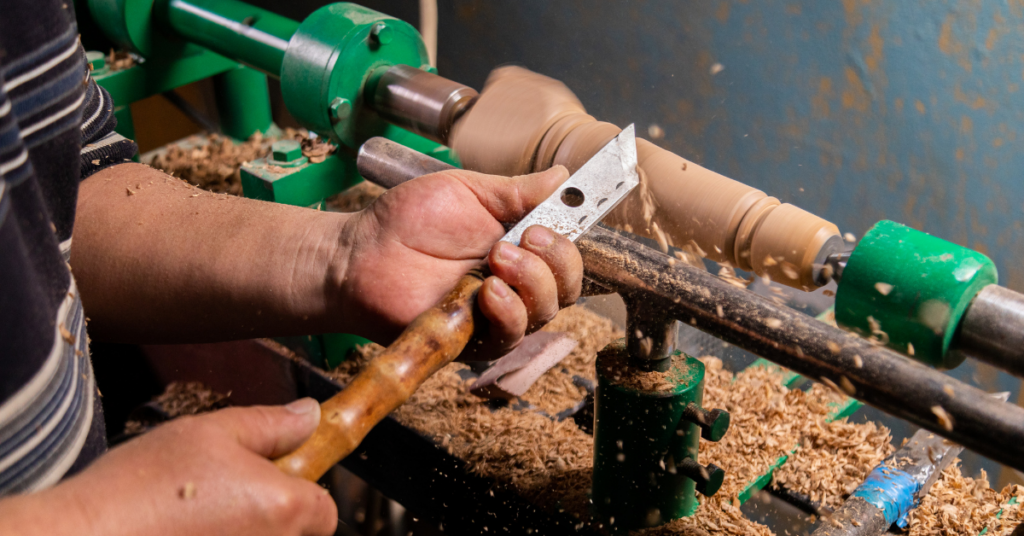
You need some patience and carefulness as you position the cutting tool on the rest. Grip it firmly while holding it perpendicular to the lumber. You’ll need to gently lower it into the wood as it rotates on the spindle.
Gently increase the pressure on the tool while moving the length of the piece. Ensure to keep the same pressure on each movement so the chipping is uniform.
Repeat the process across the wood by moving the cutting edge parallel to the piece. Adjust the pressure and angle to get the desired shape out of the wood.
8. Inspect the Work
As a beginner, it is essential to inspect the work frequently. This way, you can pick up mistakes faster, see your progress, and discover which areas require more effort. Measure the diameter of the workpiece across different points to monitor your progress.
Smoothing and sanding the Wood After getting the desired shape and diameter, you’re almost ready to use your workpiece. But first, you must smooth the surface. Typically, the surface may feature rough and uneven parts.
Hold the tool farther from the workpiece so only a tiny portion is in contact with the spinning wood. As the workpiece is spun, slowly move the tool across its length to achieve even smoothness.
You can improve it by sanding the piece to get the perfect finish. Pay extra attention when using sandpaper directly on the lathe machine. Turn off the lathe, then place the suitable grit sandpaper close to the wood before turning the lathe back on.
4 Tips and Techniques for Using a Wood Lathe
Some techniques make your woodturning extremely successful; following them will improve the quality of the finish. Here are some of these tips and techniques:
1. Wear Protective Gear
There’s hardly a more pronounced tip than ensuring safety by wearing protective gear. But it is often neglected, even by professionals. Using a powerful machine with many moving parts can be dangerous without the right equipment.
Use eye protection like goggles and wear boots in the workspace. You should also avoid wearing loose-fitting clothing, as it can get stuck in the machine.
2. Eliminate Vibration by Stabilizing the Lathe
Vibrations are one of the leading causes of poor and improperly shaped workpieces. Stabilizing the Lathe machine will significantly reduce or eliminate vibrations.
You can bolt the lathe’s base to the ground or weigh it heavily. The aim is to hold the lathe in a particular position.
3. Make Shallow Cuts
Making shallow cuts while repeating the process is an easy trick to getting the perfect shape on your wood. Instead of ripping into the workpiece with your tool, continuously make more minor cuts till you reach the delisted shape.
Deep cuts and blunt tool edges cause the wood to crack. Using only sharp tools at high speeds to remove small portions at a time is vital to an impressive finish.
4. Take a Good Stance
While using the lathe, your posture and stance can affect the quality of the finished piece you produce. A poor stance will inadvertently result in the wrong positioning of tools, resulting in a poor finish.
Stand with your feet shoulder-width apart and your hands by your sides. Bend your elbow at 90° and check that the lathe’s center is even with the elbow. One hand holds and controls the cutting tool, while the other grabs the tool’s shank.
FAQ’s
Check out a collection of popular questions on using wood lathes and their answers:
Ans: While turning wood using the lathe can be challenging for beginners, constant practice improves mastery.
Ans: A drill press can turn wood when a wood lathe is unavailable. Since the lathe covers a lot of space, some woodworkers may use alternative means to turn their workpieces.
Ans: Resistance is normal while working with a lathe, as the tool comes against the wood and strips some of it off.
Finally
Wood lathes are powered by electricity and help to shape wood into cylindrical profiles. The machine turns wood and allows you to shape it using a tool. It can be challenging for beginners, considering its size and sheer power.
However, constant practice makes this a lot easier. By following straightforward steps, even inexperienced woodworkers can use this machine.

 By
By


