
You can make many projects with wood as the primary material, some of which are cabinets, tables, stairs and rails, cupboards, and more. You can get an impressive look that will turn heads depending on the style. However, before you can go any further with utilizing wood for your projects, you need to cut the lumber down to size. While the sizes you choose will vary from project to project, the cutting pattern is a huge factor to consider. Do you want to make straight cuts or curves? The decision rests on the type of wooden project, the style, and your preference.
Making stylish designs, antiques, fence post caps, and more may require cutting curves in wood. Learning to make cuts will set you apart as a carpenter or woodworker. Making curves in wood is less popular than straight line cuts and, as such, requires a deeper understanding to make accurate curved cuts for projects. It involves the different tools for making curves in wood and how to use them.
Many factors are involved when making curves, including the curve’s type, location, and dimension. However, this guide focuses on making curves rather than the other aspects. First, we’ll discuss cutting curves in wood using different tools, including their effectiveness.
Ways to Cut Curves in Wood
Saws are the major tools for cutting wood and making straight cuts or curves. Some saws can make both consecutive cuts and cuts, while others are dedicated to a single type. Here, we’ll see how to use the curve-cutting saws and if we can utilize any non-saw tool to cut curves in wood.
1. Using a Router

Cutting curves in wood only sometimes requires a saw, as the router has shown. The router makes curved edges with precise arcs, bends, or circles. Routers can also cut different curves and shapes out of the wood and deep holes. You’ll find that the plunge router is the most effective; however, you can utilize other routers to make the curves you need. The drill bit determines the quality of the curve and varies depending on the size of the curve. Choosing the most suitable drill bit is the first step to making a precise curve on wood.
Use a jigsaw to remove excess wood and keep the wood piece as small as possible since this will help you stay close to the work and improve accuracy. When making a curve or circle in the wood, you should mark the curve with a pencil and make a rough outline to make it easier for the router to pick up the cut and remain in turn. With the design visible, you can place the router bit as close to the marked curve as possible and cut.
2. Using Hand Saws

Without power tools, hand saws can make curves, albeit with limited accuracy. However, the old-school method of using hand tools remains tried and trusted, with different saws available for varying needs. For example, large saws like large bows are suited for making ample curves, while fret or coping saws are great for tight turns.
Hand saws are practical since they are familiar and affordable; however, their precision is limited. Use hand saws to make curves and circles in a wood where precision is not required. Other hand saws you can use include turning saws and bow saws. First, mark the curve using a pencil and then make the initial impression to create a visible outline before making the final cut using the chosen saw.
3. Using a Jigsaw

The jigsaw is specifically used for cutting intricate designs, including curves and circles. The first saw that comes to mind when you want to make curves in wood. Mark the curve using a compass or tracing cutouts; ensure to drill a hole at the starting point when marking to stay the course and produce accurate curves.
It would help if you had the right jigsaw cutting blade with a suitable size and depth to ensure a precise curve. The cutting process involves accurately placing the blade at the edge of the marked curve on the wood. Steady hands and firm wood on the workstation will ensure the curve moves in line with the mark. Start by sinking the blade into the wood and move the edge forward through the turn. Next, fine-tune the angle where necessary and smoothen it with sandpaper to produce your desired curve.
Also Read: Reciprocating Saw vs Jigsaw: Which One to Choose?
4. Using Circular Saws

The name “circular saw” is less about the type of cut it makes and more about the shape of its blade. This circular saw is specifically for making cross-cuts and rips cuts; however, you can create curves using the saw. Circular saws have large circular blades, which makes it challenging to cut tight curves, but they can cut large sweeping curves. Cutting curves using circular saws requires a lot of concentration to keep the blade in line.
Circular saws are handy when cutting plywood sheets as they’re thin. However, since it is heavy, you’ll need strong hand coordination to make curves using circular saws. The idea is to cut off the curves in small parts as you work your way to producing curves in the wood.
Read More: Reciprocating Saw Vs. Circular Saw | What’s the Difference & Which One For Your Project?
5. Using a Reciprocating Saw
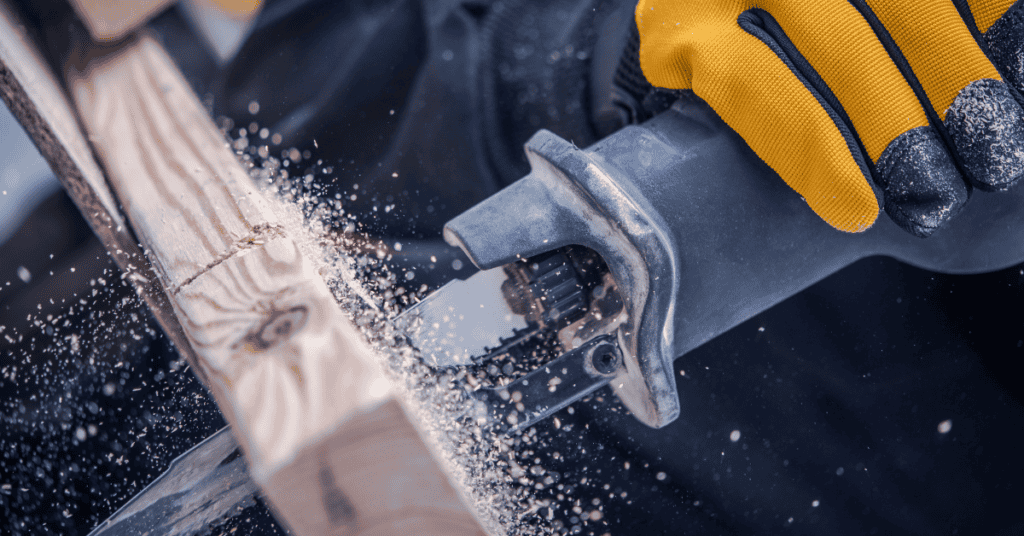
Reciprocating saws usually destroy saws used to demolish rather than cut intricate curves. However, with limited options, you can utilize the saw when making curves in wood. Since precision is not a reciprocating saw’s most vital attribute, you may need a smaller saw to fine-tune the curves.
Its thin blade makes it easier to handle; however, making tight curves is difficult because of the need for more precision. You’re limited to making large sweeping curves with this saw and still require a small saw to smoothen the curve.
6. Using a Scroll Saw

Even though scroll saws can make straight cuts, making curves is the easiest as the blade is thin so that you can get those tiny details. Scroll saw is perfect for making the tightest curves with intricate designs due to its computerized system of replicating patterns from paper to wood. All you need is to place the pattern to the workpiece using contact paper, make the necessary settings and allow the saw to cut out the curves with utmost precision.
Usually, the cut starts from a point in the waste area of the curve and then works its way through the curve line. The design determines the cutting style the blades will take to produce the curves.
7. Using a Bandsaw

The bandsaw is a large stationery saw with a workstation and thin blade on a set of rollers. This setup makes it possible to cut curves in wood. The flexible blade can cut a continuous loop making it perfect for exterior angles. Making interior cuts without threading the blade from the exterior is difficult with this saw.
Changing the saw blade will allow you to make different curve angles, including tight and sweeping curves. Generally, the thinner the blade, the tighter the curve it can make. However, the small work stable on the bandsaw limits the size of wood you can work on to sizes that can fit on the workstation.
Bonus Read: 14 Essential Marking Tools for Your DIY Projects
Tips For Cutting Curves
If you want to make curves in wood, you’ll find some of these tips useful:
1. Choose The Right Blade
Getting the right blade for the saw is just as important as any other factor, as they determine what you can cut in the wood. Narrow curves require thinner blades, while wider curves can work with thicker blades.
2. Sharpen The Blade

If the blade is not sharp, precision will be affected, and the curve may even break when dealing with thinner wood. So sharpen your blades and replace worn-out blades before you start cutting.
3. Stability
Depending on the cutting tool you’re using, you may have to hold the tool over the wood. You may also put the wood on the saw’s work table. Either way, you need stability to ensure accuracy. You want to maintain stable hands when moving the blade or the wood.
Final Thoughts
There are several ways to cut curves in wood, but the right way to choose is based on the available tool and the type of curve. Some agencies will create better tight curves, while others are great for making wider curves. You need to identify the type of curve you want and then select the most suitable tool while ensuring to factor in its availability.

 By
By


