

Accurately marking your material does improve the look of any DIY project. Every DIY plan will specify the importance of measuring and re-measuring the dimensions. But if you do not mark your measurements well, then your hard work has gone in vain. A wrong cut does not just spoil your project but also gives it an unprofessional look. Whether it is a right or a left cut, you need an excellent marking tool to get it right.
Essential Marking Tools You Must Have
Your DIY arsenal is incomplete without these essential marking tools. These do work to measure up your project. Unfortunately, there is no one right marking device, so you need to do some trial and error to determine what best works for you.
The cornerstone of any successful DIY project is to measure and mark accurately. Keep in mind that you get to measure twice, but you get to cut just once. Know the best tools and understand how you can use them to make your work faster and accurate. Nothing beats a project that has all its pieces fit together in the exact and proper manner.
1. Pens and Pencils
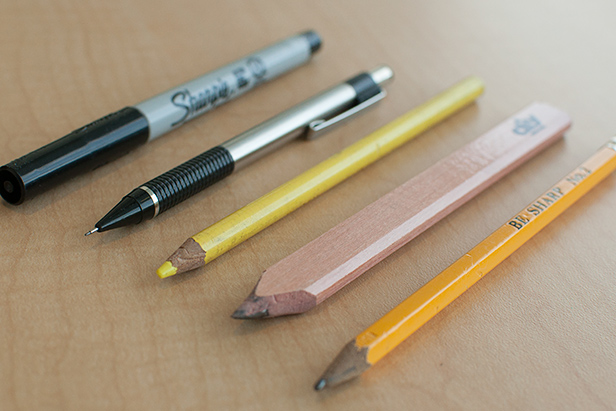
It would help if you had a bunch of pens and pencils on your workbench because no one size will fit all your DIY projects.
- It usually the go-to option in most cases, but at times, these fall short on delivering.
- If you are working on walnut, you will need a yellow or a white colored pencil.
- When using the drafting templates, you will need a 0.5 lead mechanical pencil. The lines that these make can be spotted easily.
- Sharpie markers are great to write on metal or at the end of a board.
Pencils are great, but they are soft, and because of their lead shade, it is a little challenging to mark with them on certain metals. Sharpies are easy to see and work great, but if you wish to paint on the marks, you will have to seal it with a special primer and paint several coats to cover up the marks.
Pens are narrow and friendly and do not need any sharpening. However, they do not accept abuse the way a pencil does, and their marks cannot be easily erased either. A grease pencil is the best choice to mark a ceramic or PVC tile or any material with a gloss finish.
Also Read: Tile Cutter: Everything You Need To Know
2. Sliding Level
The sliding level enables you to mark out the adjusted part to create the desired angle. A pencil is then used to mark a line on the material.
3. Scratch Awl

The scratch awl is a marking tool to mark the spot where you wish to drill. It can be tough to find a pencil point with the drill in hand. Instead, mark the point with an awl which makes spotting the place easy. Combine it with a brad point bit, and you will get your hole marked in the exact right spot. The scratch awl also doubles up as a marking knife.Your marking process is incomplete till you have mastered using the bobs, plumbs, and levels. These tools let you mark any project with ease and enable you to get to assembly within minutes.
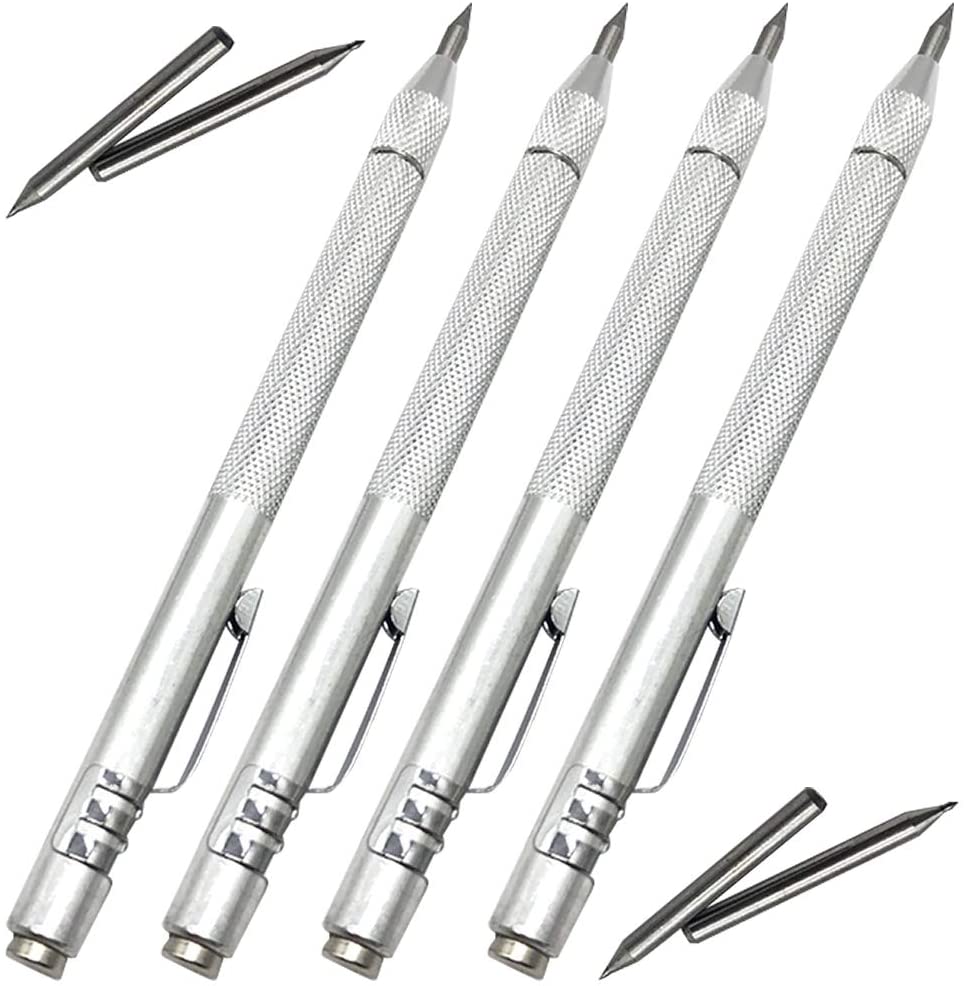
4. Marking Knife
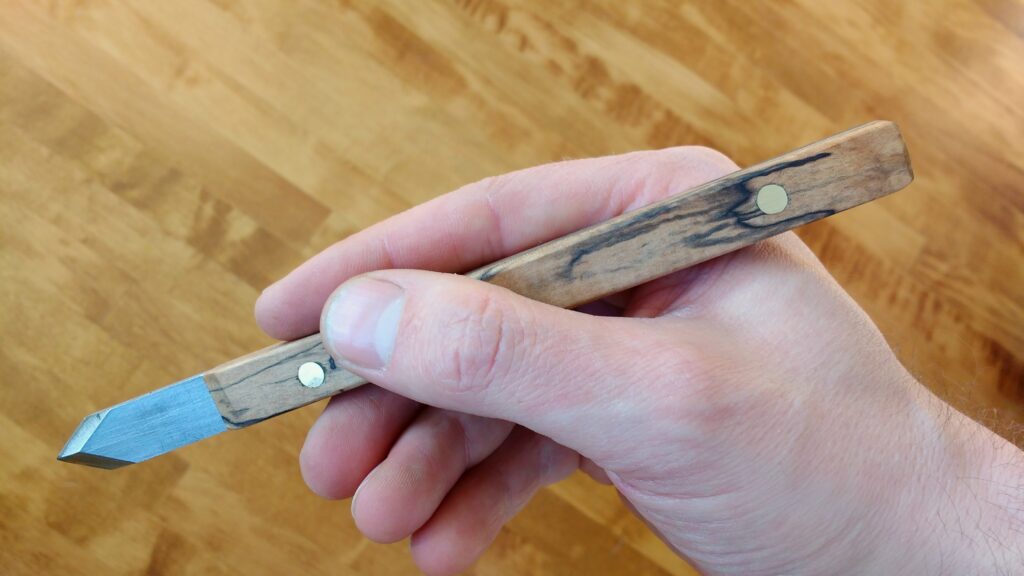
A marking knife is another excellent marking tool because of its distinct benefits. A marking knife can make a clean line across any wood, just like a razor. You cannot erase the line, and it makes a naturally clean cut. If you do not have a professional marking knife, then there is nothing to worry about. A utility knife, a hobby knife, or a pocket knife does the same work. The marking knife comes with a wooden handle that makes it easier on the hands. Just make sure to use these knives carefully, and you are good to go.
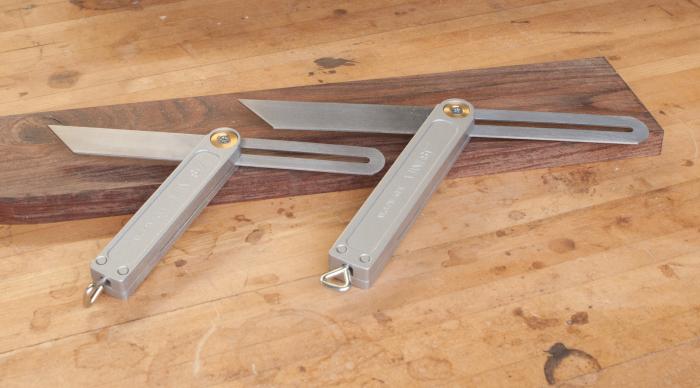
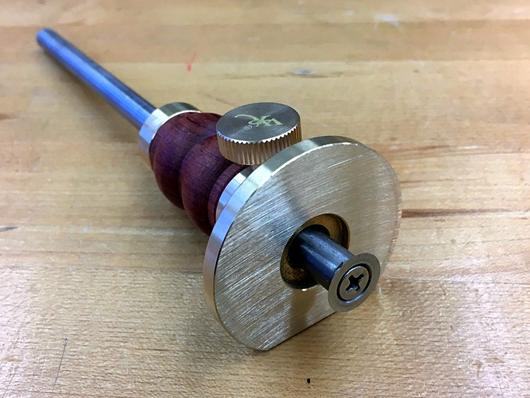
5. Marking Gauge
A marking gauge or a cutting gauge is also known as a mortising gauge. It is used to layout the tenon and mortise joints. The gauge is made of wood and equipped at two points, making it like a cinch that carves lines that are not parallel but of the exact width of the chisel.
A mortise gauge lets you mark two lines scribed parallel to the edge. The two sharp spurs on the gauge can be adjusted and set to the width of the mortise chisel before marking the workpiece. It is a commonly used marking tool in woodworking projects.
You May Also Read: How to Cut Laminate Countertop? Complete Guide
6. Scriber
Scribers are great to mark a line on any material. It has a sharp point and works like a pencil to engrave a fine line on a plastic or metal surface. A scriber is perfect in places where your pen will not work.
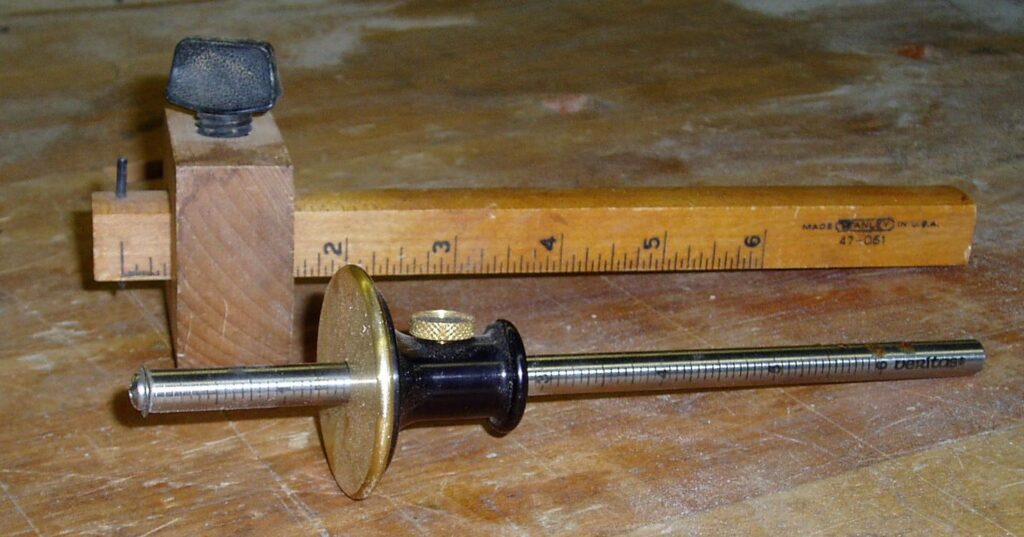
7. Wheel Marking Gauge
A wheel marking gauge is made of a steel rod and an adjustable fence. It also features a cutting tool. A marking tool is a viable option in DIY projects where you need to repeat distances. You can find several wheels marking gauge models. The basic one has a thumb screw that can be set on the board width and is best used for scribing a line on multiple board faces. The cutting wheel in the marking gauge makes a clean line that it does by severing the wood fibers.
Bonus Read: How to Cut Plexiglass the right way
8. Engineer’s Square
You use these hand tools to draw a perpendicular line on the material with a scribe. The engineers’ square is placed on the work surface, firmly placing the flat edge on the workpiece.
9. Center Punch
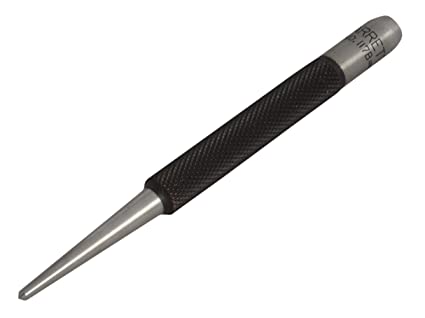
The center punch is used to mark a center dot for drilling. A hammer helps to drive the center point into the metal, leaving a small impression of the surface.
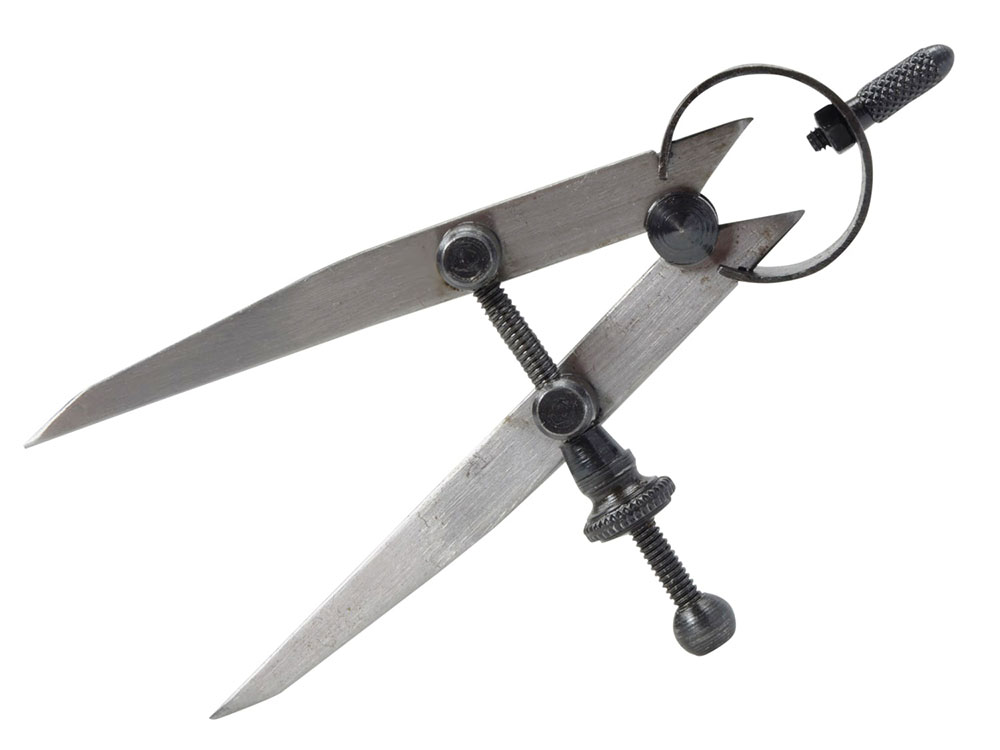
10. Odd-leg calipers
The old-leg caliper is used to inscribe a parallel mark on plastic or metal. It features two legs, one with a foot that works as a guiding edge, and the other as a scribe point. The guiding side runs on the object’s edge that needs to be scored, and the scribing edge makes a parallel line on the edge.
11. Compass
A compass is a no-brainer. Like you worked with one in middle and high school, the compass is used in DIY projects to mark circles. It helps to draw angles and mark the distances.
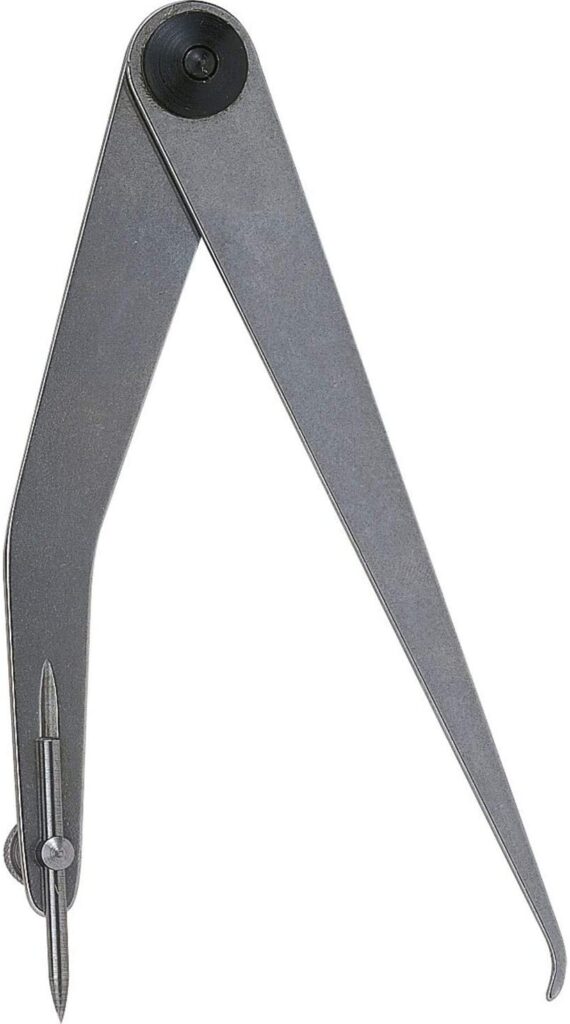
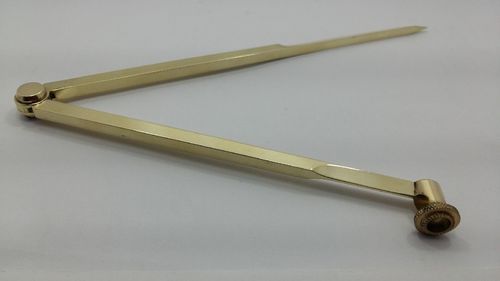
12. Dividers and Spring Dividers
From the compass family, dividers are something that you would have to lean on when marking repeating distances. You can use it to make a permanent mark and then strike a line on the spot with a marking knife.
Spring dividers are hand tools used to draw a circle or scribe an arc on materials. These have two legs that resemble a small compass leg. One leg sits firmly on the workpiece while the other rotates and scribes an arc or circle on the material.
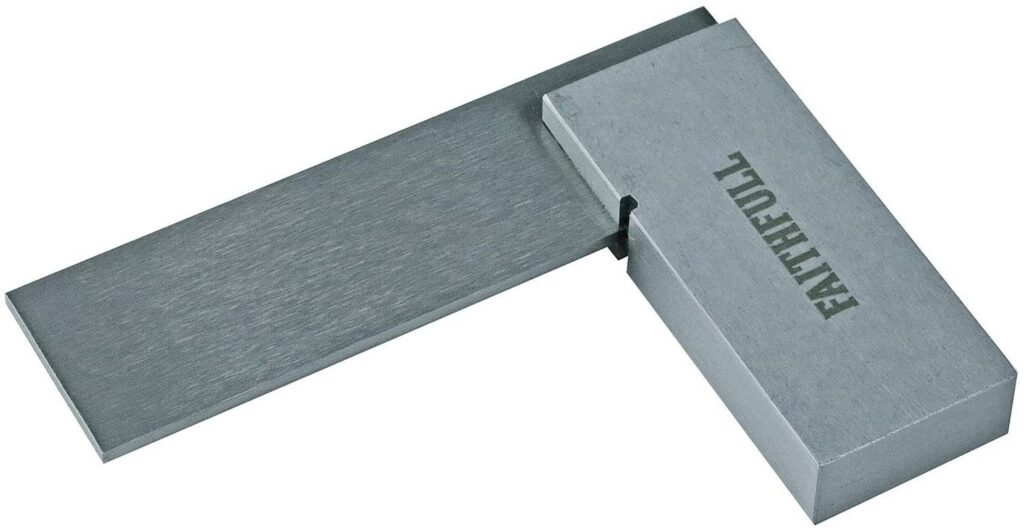
13. Try Square

Wish to mark perpendicular lines on a material? Then a try square is what you need. The try square makes paths that are parallel to one another, with the line drawn at a right angle to the edge.
14. Levels, Plumbs, and Bobs
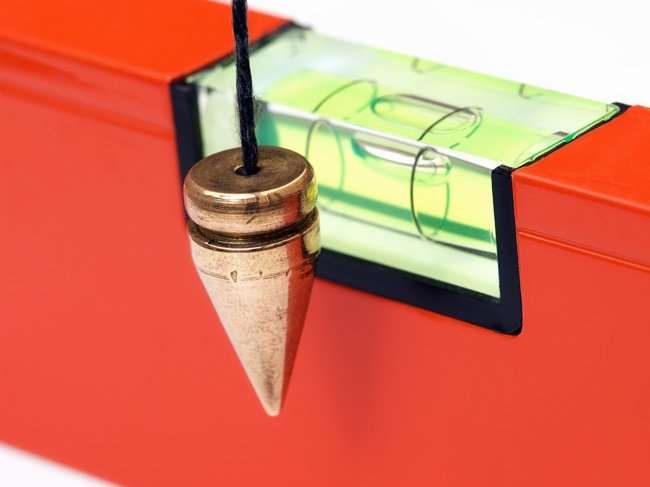
Your marking process is incomplete till you have mastered using the bobs, plumbs, and levels. These tools let you mark any project with ease and enable you to get to assembly within minutes.
Summary
If you are in search for the one ideal marking tool, it would be disheartening to know that there are none. The key is to figure out which tool finds a place in your personalized tool kit.
The marking tools serve a crucial purpose. It lets you transfer your measurements on the material to know where to get the right cut. These allow you to create patterns helping you design a well-crafted project.
You get what you pay for. So do your homework and hunt for the best tools that you can afford. Each device has its own job to do. Each tool comes with its goodness and flaws. The idea is to work with them and to see if they give you what you want. If a tool makes you happy, then it deserves a place in your DIY factory.

 By
By


