
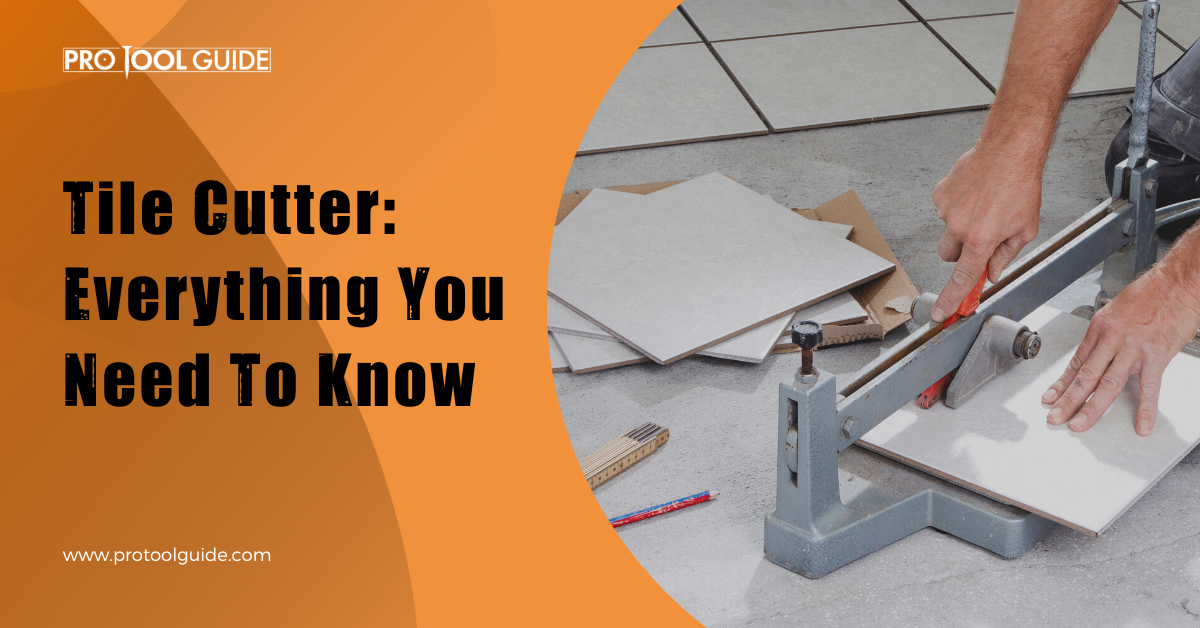
A clean and right fitting of a tile is extremely essential to leave a wonderful impact on the installation. The tool used for the cutting part plays a significant role on the finishing of the overall installation.
There are many tools available in the market for tiling job. For a DIY tiling task, you will need an efficient tile cutter to cut according to the perimeter of the room to fit perfectly around the corners.
Setting up a room on your own? Now that’s a challenge in itself, isn’t it? Certainly, it is! Especially when you are going through the tedious process of measuring the spaces for the induction of tiles; this becomes even more difficult to befit everything in a balanced order.
But do you know that there is an even greater task than this? Yes! It’s the cutting of the tiles according to the measurements of each room and its perimeters. Moreover, setting up the tiles in the corners of any room will require a little more than the usual effort.
What is a Tile Cutter?
A tile cutter is one of the most basic but powerful power tools out there. All you need to do is determine the size of your job, the material and you could get a great tile cutter under $200.
It has a handle which allows you to apply pressure on the tile you are cutting and that guides the tile cutter along the rails. Usually, it has a tungsten carbide wheel that scores the tile and helps you to make the cuts.
It is great for making repeated straight cuts by using the score-n-snap principle with mechanical leverage, which is a huge advantage. You can cut ceramic, porcelain, marble of even vinyl materials using different tile cutters available on the market.
Almost all manual tile cutters have the speed square built right in and most are also equipped with a diagonal fence.
Types of Tile Cutter
Tile cutter is just a simple power tool though it has some specific types which can be useful while dealing with different materials. Below are the ones you should know about:
Manual Tile Cutter
A manual cutter tile is perfect for making straight cuts on ceramic tile. It is important to know that you can’t use it on stone tiles or for cutting small areas or even combination of cuts.
Handheld Tile Cutter
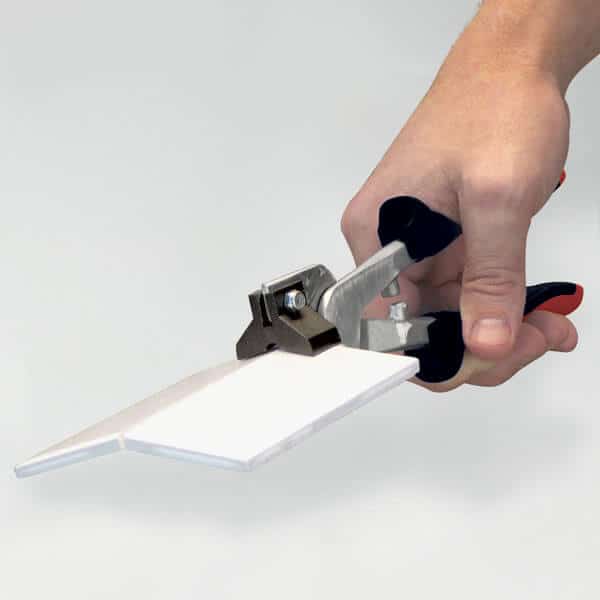
A handheld tile cutter is very reasonable and can be purchased from online webs easily, and you’ll be able to find a wide variety of them as well.
This durable tile cutter offers fast cutting with its sharp scoring wheel and teeth. This efficient tool allows you to perform simple tile job instantly and effortlessly.
If you are planning to buy a tool for a simple tiling job, a handheld tile cutter will be an ideal choice for you. This portable tool can give you excellent finishing off your tiles to correctly fit around the corners of the room.
Snap Tile Cutter
The snap tile cutter also known as a rail tile cutter works like a glass cutter.
A glass cutter has a carbide wheel, which is forcefully and slowly drawn across the glass to create a score. Once the score is made, the glass is snapped off by hand or with a tool.
In a snap tile cutter, the tile is inserted inside and the wheel is moved along it. After the scoring is done, a snapper which is inside the cutter is moved along the scored area. By pulling back the lever, the snapper is pressed on the score until the tile breaks into half.
It works best for small projects like in bathroom, cabinets etc. It cuts both ceramic and porcelain tiles.
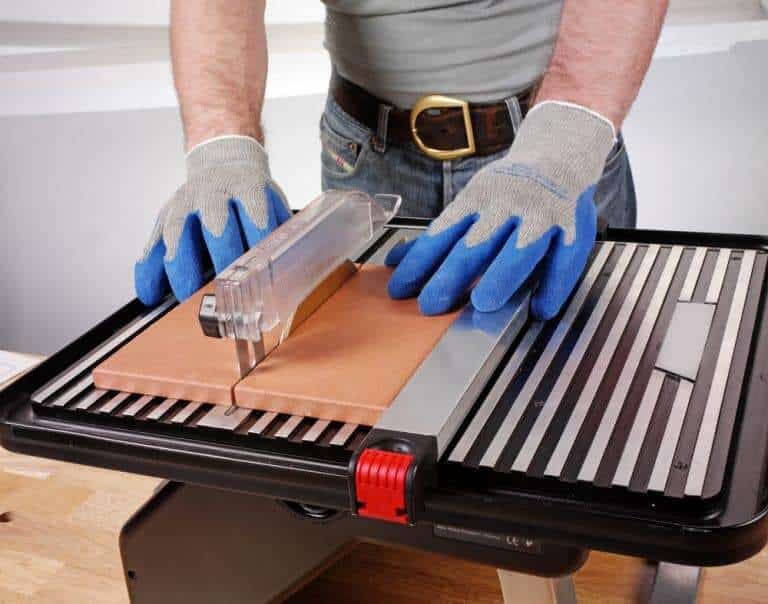
Electric Tile Cutter
The electric tile cutter gives you a feather edge on the surface of the tiles. It can be used on bathroom floor made out of teavertine as well. They may not be ideal for heavy jobs and odd cuts and would probably annoy your neighbours as well.
Who Should Use a Tile Cutter?
Tile cutter has many advantages over other cutting tools. It is incredibly fast and is the cheapest way of cutting where we don’t need any external agent like electricity or water.
Built to use for professional as well as beginners, as it can give clean and bright finished edges. With easy adjustment of cuts, you will able to perform the tiling job as the way you want. It is a safe alternative to any other power tool, so the job can be done by anyone if they read through the manual or follow the instructions.
A porcelain tile or a glass mosaic can be cut in various methods using different tools. Diamond blades, tile cutters, tile nippers, tiling accessories and wall tiling battens are something you can use to execute the job. But, if you need a safe and reliable tool to perform the job effortlessly a tile cutter will be an ideal choice for you. There are usually two types of Tile cutters –manual tile cutter and electric tile cutter.
As the name says, the manual tile cutter is used without electricity to cut ceramic, porcelain, extruded tile, gres porcelain in a straight line. So, it can give an excellent finishing look with safety. But how to use manual tile cutter? What are the safety measures to keep in mind while operating it? Let’s check it out!
How to Cut Tile with a Manual Tile Cutter
If you are plan to cut the tiles manually since it’s cheaper, easier and safer, then a manual cutter tile is perfect to makestraight cuts on ceramic tile; however, it should be kept in mind, you cant use it to make mixed cuts or use it on stone.
When using a tile cutter, the first score is quite important. The continuous and a solid motion will help you score the tile easily. You will only need one or at most two passes to snap the tile as more than that would result in an uneven breakage. Use minimal pressure to avoid internal cracks and til breakage while snapping.
1. Purchasing the Tile Cutter
If you need to perform a diagonal cut, buy a tile cutter that has more width than the corner to corner distance. With the help of a rotating guide, one can make cuts at different angles.
2. Practice the Cut
You can practice the cut by using some inexpensive or scrap pieces of tiles. This step is especially for the beginners and professionals can directly skip to step 3
3. Marking for the Cut
A pencil or some sort of mark can be used to highlight the cut on both the sides of the tile from the beginning to the end
4. Slide the Level
Basically, you need this to perform the task easily. On the tile cutter, you need to slide the level so that the blade comes close to you
5. Placing the Tile
By keeping the glazed side up, place the tile into the tile cutter. You have to ensure that the marking are perfectly over the guide line. You can even cut many tiles similarly by adjusting the protractor gauge. Make sure it is against the side of the line and fixed properly
6. Moving the Level
Adjust the lever so that the tungsten or carbide wheel is over the marked line. Push the lever down towards the edge of the tile by applying equal pressure continuously. This will make the marking edge weak enough to cut easily
7. Cutting it into Two
Apply pressure on the weakest point which is on either sides of the score line by pushing down the lever.
8. Make the Sides Smooth
Use a sharpening stone or sand paper to smoothen the sides of the cut edge. In the moulding process, if the cut edge remains hidden you don’t need to smoothen it.
Helpful Resource:
Tile Cutter: Safety Measures
Using a tile cutter is usually safe over any other tools for tile cutting. But you need to adopt some safety measures to avoid the risk of unwanted hazards.
- Use a protective gear or something to protect your face from pieces of the cut tiles to enter the naked eyes.
- Also, if you are using an electric tile cutter you need to follow some more precautions. You have to keep it away from the water.
- While performing the job you need to stay alert and inspect your tile properly to complete the job flawlessly.
A tile cutter is the best alternative for the widely used wet tile saw. It is quite beneficial for experts as well as beginners. With cheap cutting, you can be assured that the job will be done comparatively faster.
Helpful Tile Cutter Reviews:
Who should use a Handheld Tile Cutter?

A handheld tile cutter is extremely portable, lightweight and safe so that it can be utilized by professionals as well as by beginners.
A person who has never done a tiling job can do this work with ease just by reading the next section of this guide since it is super easy. Even, professionals can use this for their day to day work as it is really difficult as well as time consuming to work with huge tools.
The sharp tooth and scoring wheel assure us instant result and attractive look that pleases us in all ways.
It is a safe alternative to other tile cutting tools which has many advantages; you probably won’t ever regret buying one.
This can even be a lifelong investment because you will be able to use them for a long time if they are taken care of. Here is a simple procedure to do all sorts of tiling work using this tool.
How to Use a Handheld Tile Cutter
1. Practicing the cut
Professionals can directly skip to marking for the cut; however, this is a significant step for the beginners. If you are not confident to perform the work, instead of spoiling the expensive tile you can practice the cut on some scrap or inexpensive pieces of tiles. You can watch videos online explaining how to use a hand held tile cutter quickly and is perfect for beginners; it will help you practice better. Apart from that, you can always read the guide and then start practicing on some cheap pieces of tiles.
2. Marking the Cut
After having a little knowledge on cutting and after practicing a few times the next step is marking. Marking the area you are going to cut is extremely important because it will help you cut more accurately and will make the job a lot easier. Using a pencil or a marker, highlight the cut from the start to the end or you can just draw a straight line.
3. Slide the Scoring Wheel
Take the scoring wheel of the handheld tile cutter and stretch it over the highlighted line. Apply decent pressure so that the line becomes the weakest point on the whole tile. You may do that repeatedly until the tile is at its weakest point.
4. Cutting the Tile
After you draw the scoring wheel over the marked line, step 4 is to place that tile on its line in between the jaws of the handheld tile cutter. Apply some pressure onto the tile and snap that tile into two pieces quickly. Always use the same amount of pressure to avoid breakage and get the perfect two pieces.
5. Smoothening the Edge of Cut
This is not a mandatory step, but it is important when it comes to safety and finishing; it will also provide a much more attractive look. Use a sharpening stone or sand paper to smooth the sides of the tile perfectly for the aesthetics.
Handheld Tile Cutter Safety
A handheld tile cutter is safe to use, unlike any other cutting tool which requires a lot of precaution and concentration; and even can be very dangerous to use.
But, while working with any sharp tool, you need to maintain some precautions to avoid the risk of any threats or any harmful situations.
- Whenever you are working with a tile cutter, use a protective gear to prevent your eyes from any particles that may damage them, so always remember to wear eye protection at all times.
- It is necessary to protect your hands from the sharp jaws of the cutter so to do that you can wear thick gloves that can keep your hands safe from the harmful teeth.
- If your tile cutter is made only from metals like Iron, aluminum, etc., you will have to protect your handheld tile cutter from the water, so it does not rust and stays the same colour, with its perfect looking teeth.
So, this efficient tool is a great and an easy option for performing any tiling job for beginners and professionals; everyone will be comfortable with this object.
Also, this tool is one of the cheapest tools available in the market for tile cutting; therefore, it goes easy on your wallet as well.
Apart from all that it is much faster and does not require any electricity; you won’t even have to install anything. This impactful and safe tool can do your tiling job instantly and accurately if used in the right way.
How to Cut Tile Without a Tile Cutter
Tiles can be cut in straight lines with a tile cutter but nothing more than that. How about cutting tiles for the curved surfaces? Will the same tile cutter work? It definitely won’t.
Don’t worry! There are ways to cut tiles without even using a tile cutter. Tiles of the floors have straight cuts and therefore the use of tile cutter makes sense. Let us now understand the cutting technique of tiles without using a tile cutter.
For better home improvement options; you can opt for a tile cutter from any regular departmental store. But it will take care of the small jobs only.
However, if you intend to take care of the bigger jobs or your home requires thick tiles cutting; you will have to look around for other options as well for instance buying a wet saw to make special tile cuts.
Here’s are the ways to cut tiles without a tile cutter.
The process of cutting tiles without a tile cutter is lengthier but within one’s budget. You don’t have to dent your pocket in order to cut tiles as per the need of the surface. Let us first understand the cutting of the tiles in straight lines and making holes.
Using a Glass Cutter

1. Marking the Exact Point
The first step to cutting tiles without a tile cutter is marking a point on the tile. The best is to mark the top of the tile from where you want to cut it into pieces. Make sure you have an accurate measuring tape or any device to check the point marked.
2. How to Use Correct Markings
Marking the right points or markings will make a big difference in cutting the tiles in perfect angles. You won’t be able to feel the need to use a tile cutter if only you will learn the art of adding correct markings from where you will begin cutting the tiles and to where you will finish cutting them.
3. Squaring it Up
Now after the mark has been done, placing a square mark a little away from the marked point should be the next step.
Once the markings on the tiles are done; the next step is to square the tiles in proper manner. Place a square right away from where you have added the mark on the tile.
Next step is to use a sharp object for instance a glass cutter to score the tile right on the cut line. Place the tile on a hard surface. You can use a wired clothes hanger under the tiles aligned with the scored tile. Now give the either side of the tile a good pressing and break it along the scored line.
Once done; you have just cut the tile without using a tile cutter. To acquire finer edges; smooth the cut with the help of a concrete surface or a brick as you gently rub the tile over it. However, this might be optional and in most of the cases; you won’t feel the need to execute this step.
4. Scoring
With the help of a glass cutter, the tile needs to be scored on the point marked earlier.
5. Placing on a Solid Surface
Now, it is time to place the tile on a solid surface, with a cloth hanger of wire under the tile with a proper alignment of the score.
6. Press
After the alignment has been done, put pressure on both the sides of the tile equally. The tile will eventually break.
7. Smoothen the Edge
If need be, you can make the edges smooth by rubbing them against a brick or a rough surface.
The above process is considered to be one of the easiest ways of the two proven methods. The other one is cutting tiles with the help of a wet saw.
The above process is considered to be one of the easiest ways of the two proven methods. The other one is cutting tiles with the help of a wet saw.
Using a Wet Tile Saw
To use this technique of cutting a tile, follow the steps as mentioned below. It is imperative that each process is followed meticulously or else you might not get the perfect finesse of the cut.
- First of all, you need to fill the reservoir of the saw with water.
- After this, you need to mark the line cut on the side of the tile which is glazed or smoother.
- Now, place the tile in a way that the front part of the tile is facing upward right against the guide.
- Once everything has been done accurately, time for you to start the saw for the cutting process to take place. Remember that the tile should not be forced towards the saw. If you do that, you might not get the desired result. For a clean cut of the tile, let the saw approach the tile with no force applied. It needs to be natural.
Check out our detailed guide on wet tile saws to learn more about them.
I am sure; you have got the confidence in making the cut on tiles in your home without the use of any tile cutter which people usually use.
These methods of cutting the tile are convenient and quite cheaper compared to the use of tile cutter which is expensive to buy and maintain. You can be the master of tile cutting with these simple steps followed with precision.
Conclusion
Tiles are hard substances used to fulfil various needs in a household. To ensure that without the help of any professional too, you have the result that is just like a professional would give, you need to have the practice.
Initially, you might break a tile or two but with time, you will be an expert. You will never need a help from outside for the tiles to be cut.
With a manually operated tile cutter; you can only make straight cuts. Tile cutting is not that difficult a task if you have planned and performed it right. Just take care of the markings and the scoring of the tile lines and make sure that you cut it with accuracy and precision without diverting away from the main scored lines.

 By
By


