

Bird droppings, dust, and space crunch are a common menace for those who stay in the country and own a car. And this is when the question of how to build a wooden carport crosses their mind.
So what is a carport? These are standalone structures used to keep your car and other vehicles in to protect the automobile from the outside elements. The carport could either be built on a secure foundation or could be freestanding. The carport maintains the polish of the car and also increases its lifespan. It also increases your property’s value.
Thing to Consider Before Building a Wooden Carport
1. Carport Options
The idea of having a carport is smart, but what are the options available? The easiest is to buy a ready-to-use carport structure online. The other option is to build a wooden carport yourself.
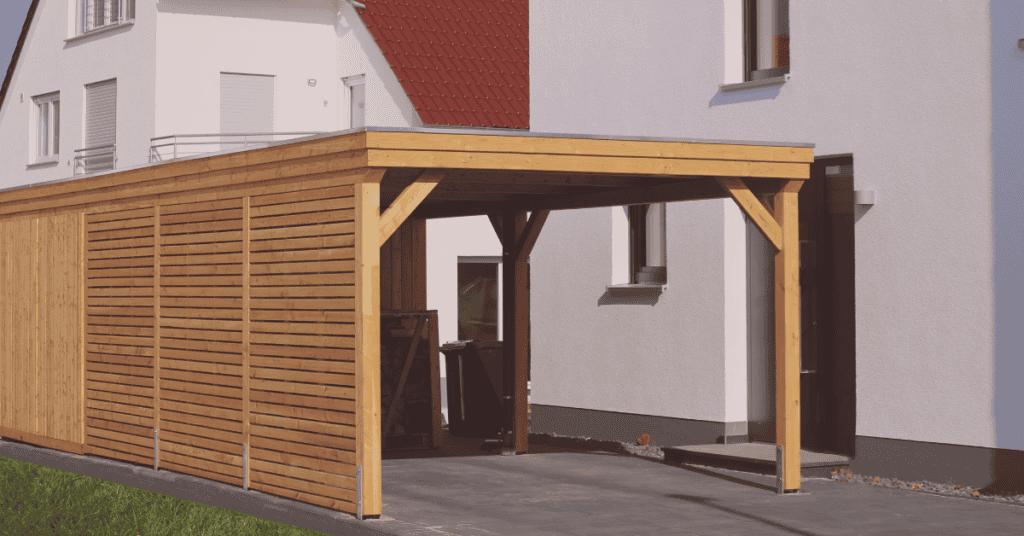
Carports could be made of metal or wood, but wood is a popular choice, highly accepted, and popular. Wood carports add a tasteful and elegant look to the house, and these are easy to build and maintain.
2. The Planning
Building a wooden carport is easy, but you cannot just get up one day and start constructing it. It involves a lot of planning. You need to work on the appropriate structure, check out the local building regulations, and plan your budget. All these may seem very complex, but it is not so. A DIY wooden carport project is not overwhelming when you plan it well and go through our step-by-step guide.
3. Before you Build the Carport

You need to consider the things before you pick up the tool and start building a wooden carport.
- Determine the type and size of the carport that you need. This needs to be decided based on the number of vehicles that you own, or you plan to buy in the future.
- The Design of the carport and the materials used for construction should be based on the weather in your area. The carport should be efficient and durable to offer utmost protection.
- You will need a local building permit to build a carport. Understand these requirements and fill out the necessary paperwork. Find out if there are any homeowners’ association restrictions. Like some heritage communities do not allow additions to the existing structures to not hamper the aesthetics of the place. Factor in the cost and waiting period involved in getting the permits.
- Design the carport with a gap either at the top or the bottom for wind circulation. This is necessary because if the carport or the car is wet, then proper wind circulation will keep the areas dry.
How to Build a Wooden Carport?
The internet is flooded with many wooden carport plans. You can get them for free or download one of the packages. If you are aware of the architectural intricacies, then you may want to draw the plan yourself.
Step 1: Tools Required
- Miter saw
- Safety gloves
- Glasses
- Drill bits and drill machinery
- Tape measure
- Chalk line
- Carpentry pencil
- Spirit line
- Jigsaw
Treated lumber is an ideal choice. These are durable and can be customized easily. A wooden structure effectively built will be sturdy and ensure guarantee of service.
Step 2: Preparing the Ground

- You will first have to choose the right place and land to build and erect the wooden carport and then start preparing the ground. On an average, you will need a 16 feet length and 9 feet width, which should suffice. If you have a big car or a truck, or more than one vehicle, then you would need to make the required adjustments.
- Once you decide on the space, remove the grass and use gravel to cover the ground. You may alternatively build the carport on bare ground. Dark weed matting prevents grass and weed from growing.
- If you have a concrete pad to build the carport on then the above steps will not be necessary.
- Identify the gas, plumbing, and power lines before deciding on the place to install the carport. Do not construct the carport under trees.
Step 3: Digging Holes to Raise the Posts
- You will have to plan at least four posts, one on each corner, depending on the size of your wooden carport. You will need additional support on the right and left of the halfway mark, so that makes it a total of six posts.
- A batter board and string should be used to make the perimeter. The diagonals should be equal, and the corners should be at a right angle.
- A post hole digger or power auger lets you dig the post holes of two or four feet to create the footing. Then place a concrete tubing form in the hole to level the footing 1 inch over the ground level.
- Prepare a concrete mix in the wheelbarrow and put it inside the footing. Place the post anchor bolts in the center of the footing before the concrete starts to harden.
- The concrete should be given sufficient time to cure.
- Setting the post in concrete gives it support. Place the post and use a spirit level to plumb it before you fill the pole using concrete.
- Backfill the holes using gravel around the tubing form. Then align the anchor bolts and use sufficient bolts over the footer for it to connect with the anchor.
- Mark the height that is desired on the post ensuring that they match. You may have to trim the post using a power saw which needs to be done to ensure equal post height.
- Attach the post to the anchors using structural screws or nails with a power drill. If required you may have to install a shim in between the anchors and posts.
- The carport should be constructed a minimum of seven feet from the ground to the lowest rafter, ensuring adequate height for the post.
- If you wish to build a slanting roof, then cut the posts such that the one that is closer to the house is two feet taller than on the other side. This will let you construct a roof that slopes away running the rainwater away from the foundation of your home.
Step4: Attaching the Beams and Rafters
- Leave the concrete to dry before you install the support beam. The 2×8 beams should be placed on the post. Make sure to check that they fit in horizontally before you drill and insert the carriage bolts.
- To reinforce the carport structure with the 4×4 beam to the post, cut the sides at both ends to 45 degrees. Check to see if the post is plumb, and then attach it in its place. Pay attention that it is aligned well to give it a professional look.
- The top of the beam should be flush with the top of the post. Then bolt the beams to the post. Align the beams in the front and the back of the frame with bolts.
- The next step is to attach the rafters. Cut six rafters and place them at an interval of three-foot at the top of the beam. Attach these rafters using joint hangers that are galvanized.
- The rafters should be attached at the top ridge and the support beam at the two ends respectively. The rafters should be spaced at an equidistance.
- A spirit level should be used to place the top ridge in a perfectly horizontal position. Then you can install the remaining rafter into the structure.
- It is not difficult to build a rafter, but you should make it as per plan and use a miter saw to cut the angle. The bottom rafters should be made with 2×6 lumber, and the 2×4 lumber can be used to build the other rafters. Align everything well before you use the 51/2 inch galvanized screw to lock the components.
- Drill pilot holes through the bottom rafters and insert a 51/2 inch screw in the support beams. This should be done on both sides of the RV carport without leaving any gap to offer a professional look.
Step 5: Attaching the Gutter and the Roof
- The gutter should be matched with the length of the low side of the carport and should be attached to the appropriate beam.
- Now connect the downspout to lead it to the nearest drain.
- The next step is to fasten the roof board to the rafter.
- Attach the ¾ inch plywood sheet on the rafter. Use a circular saw to mark the line and adjust the width. The plywood sheet should now be attached to the rafters. Use the 1 ¼ inch screws to lock it in its place so that no gaps are left behind.
- Caulk the plywood to make sure that they are waterproof and then attach the shingles.
Final Step: The Finishing Touches
- Use putty to fill the holes and leave it to dry for many hours. Then use sandpaper to smoothen out the surface. The screws should be inserted well, making sure that the components are well aligned.
- Caulk the plywood roof joints and fasten the shingles on the plywood roof, reinforce the joints using metal plates and then stain the wooden elements.
- Use a paintbrush to stain the wooden components and to protect the carport from any extremal damage. This will ensure that your wooden carport stays sturdy, durable, and waterproof as well as is aesthetically pleasing.
Conclusion
A carport offers much more than just protecting your car. It can be used to shelter your motorcycles, automobiles, and other vehicles. A well-constructed carport extends the life of your vehicle and increases your home’s resale value.
This guide lays down the steps to build a DIY wooden carport. While the steps are easy and lets you build the carport in a day, take care to wear proper eye and ear protection like dust masks when using power tools, cutting the lumber, or mixing concrete.

 By
By


