

Protecting your wooden projects from water is one of the cardinal maintenance rules you must follow to enjoy it for a long time. However, this is sometimes impossible, and furniture and other wooden projects are damaged by water. It may be due to the exposure of the wood to flood, rainfall, or even spills.
Wood damaged by water comes with many challenges like rot, mold, swelling, and warp. Thankfully, you might be able to save the furniture, but only if you act fast and decisively. Remember, correction is often expensive, so to reduce the restoration cost and improve your chances of recovering your wooden furniture, you should learn how to fix wood damaged by water.
As water penetrates the lumber’s pores, it causes the wood to lose its sturdiness and become vulnerable to damage. Even wood with good water resistance will get damaged on continued exposure to moisture, causing swelling, staining, and losing its attractiveness. It gets even worse for antique furniture as recovering requires utmost precision.
Replacing wood damaged by water is expensive, so fixing the problem is a viable option. If you want to learn how to repair water-damaged lumber, you should stick around this piece. Our experts will highlight the best way to fix wood damaged by moisture, including helpful tips to do it safely.
Signs of Water-Damage

Early detection is the key to a successful recovery as the damage is minimal, and fixing will require less effort. You must pay attention to the wooden furniture or material to identify signs of water damage. Often, these signs may be similar to insect attacks but with slight differences. Here are a few signs that your wood has absorbed moisture:
1. Swelling
Swelling is one of the most obvious indications of water absorption in wood. Wood naturally absorbs moisture from the surroundings, especially when the pores are unsealed. The heightened exposure to moisture can occur due to seasonal changes in humidity, flood, and exposure to rainfall, among others.
Check your wooden structures for signs of swelling which typically comes with an increase in size. With your thumb or finger, you can press down parts of the wood suspected to be swollen. Swollen sections of the wood will be softer.
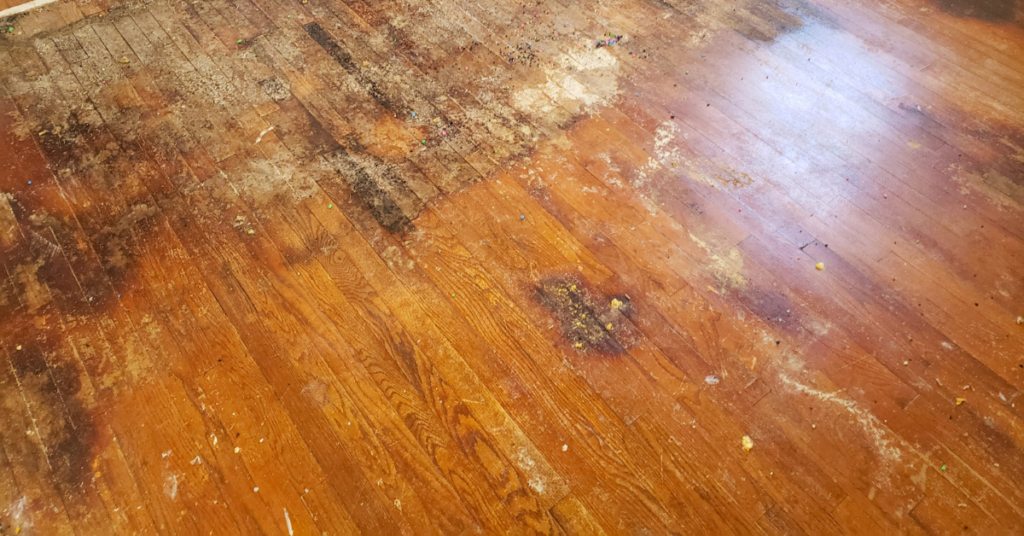
2. Discoloration and Stains

Moisture often causes discoloration as it weakens the hue while leaving stains on the surface. The stains are often due to improper drying of some areas. You may notice a darker shade that was not present before; the wood color fades at other times.
3. Mold
Exposure to moisture over a more extended period can lead to the growth of mold and mildew. Mold thrives on wet wood and can spread fast over the surfaces making the wood unsightly. It is difficult to remove mold growth on wood as it is stubborn and keeps growing after cleaning it.
Step-by-Step Instructions to Fix Wood Damaged by Water
If you want to fix any wooden structure damaged by water, you should ensure it is possible first. Some damages are extensive, and the wood may have lost its integrity. Use a moisture meter to gauge the moisture content in the wood and determine the best recovery method to implement. You can follow this concise process to fix slightly damaged timber.
Step One: Allow the Wood to Dry
No recovery process can be effective on wet wood, so drying the wood is the first step. Wipe any moisture on the surface using a rage before air drying the timber. It may take a few days for this to dry out the wood. You can also make use of fans, dehumidifiers, and air movers.
A fan takes a shorter period to dry the wood, but ensure you place the wood in a well-ventilated environment to prevent humidity buildup. It would help if you also used a dehumidifier in the room after drying to prevent the wood from absorbing moisture again before the work begins.
Step Two: Remove Rotting Wood
Depending on how long the furniture has been exposed to moisture, there may be a few parts with rotten wood. Rot destroys timber and makes it unsalvageable, so removing those parts is best. The damaged sections are usually swollen or twisted, and drying makes identifying decay in wooden projects easier.
Pull the damaged sections off by hand or use a chisel or sandpaper if the decayed part is soft. Sometimes, removing an area from the wood will affect its stability. In such cases, apply preservatives and extend their lifespan for a little longer or replace the furniture.
Step Three: Fix Stains
Moisture leaves stains behind on the wood, which can be unsightly. During restoration, you want also to repair its poor look, so you should treat water stains. The stains may be light or dark and feature varying removal methods; darker marks are harder to remove and require more rigorous treatment.
You can remove a light water stain on the wood by rubbing petroleum jelly into the wood and allowing for about two hours for the jelly to work into the spot. After the waiting period, wipe the oil off the surface, ideally taking the stain with it.
For tougher stains, put on your gloves and mix oxalic acid and water in a one-part oxalic acid ratio to six parts water. Use the acid solution to scrub the stained area and rinse using clean water. Leave to dry correctly.
Step Four: Sand the Wood
It is time to flatten the wood, strip off any finish, and smoothen the area. Wear your safety gear before proceeding with this method to avoid inhaling the dust from the wood. Use medium grit sandpaper or orbital sander for larger surfaces to scrub off the surface.
Sanding is essential when applying a finish as it provides a suitable surface for the finish to adhere to the wood. Typically, sanding can also reduce the stain hue. You can utilize chemical stripping agents or denatured alcohol to remove any previous finish on the wood. The chemical stripper is best for removing paint or polyurethane, while denatured alcohol is used instead of sanding shellac wood.
Step Five: Fill Holes

Skip the process if there are no holes after sanding; otherwise, you must fill them with wood or auto-body filler. Put the wood or auto-body filler in the crack and work it with your finger or putty knife for minor openings.
Fill up all gaps and ensure the surface is flat and flush with the surrounding wood. The filler takes about 30 minutes to dry; refer to the package for details about its drying time.
Step Six: Repair Loose Ends
The moisture and restoration process may have weakened some of the glued sections in the project. Now is the best time to reapply the glue and reinforce the joints. Apply the glue and wait a day for it to hold before proceeding.
Step Seven: Apply Finish
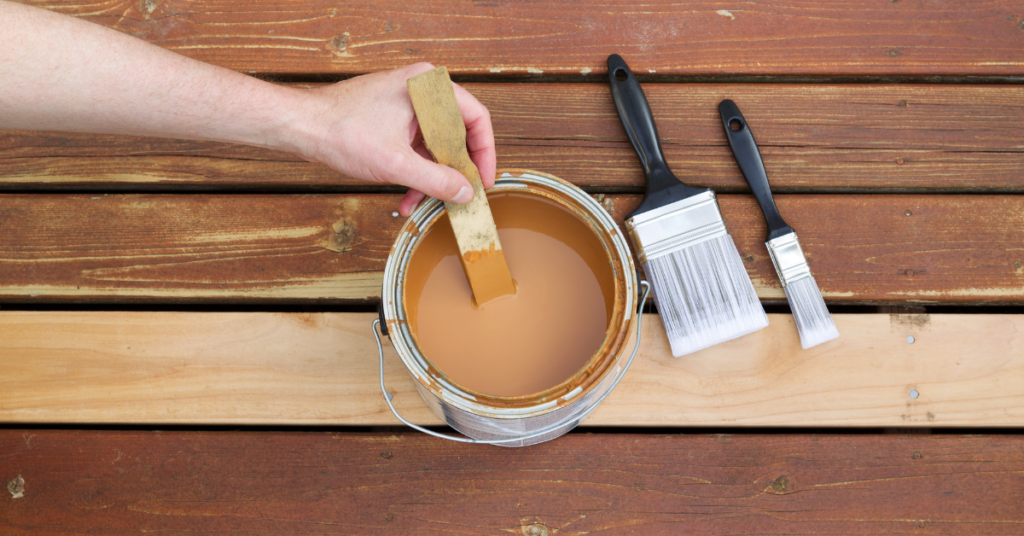
You can paint or stain the wood with your preferred finish, and depending on the type you choose, the application process is usually similar. Staging or painting can hide stains on the wood, especially when you finish with the right hue. It may require more than a single coating to get the desired finish.
Step Eight: Seal the Wood
Sealing the wood after the finish is vital to ensure its durability. Sealing the wood bocks its pores, making it difficult to absorb moisture, thereby increasing its lifespan. You can use a sealer, polyurethane, or varnish to coat the final surface and keep water away.
Extra Tips to Recover Wood Effectively and Safely

You can improve your chances of success and ensure your safety while fixing water-damaged wooden projects by following some of the tips in this section.
- Dealing with mold may require a more conscious effort to remove it permanently. Cleaning with white vinegar is an effective way to remove mold.
- It would be best to have gloves and nose masks during some restoration steps, including when cleaning off molds and sanding. Mold and wood particles get into the air when disturbed and can cause problems if inhaled.
- Ensure an even, consistent drying process, as uneven drying can cause warping, another problem.
How to Prevent Your Wood from Water Damage?
After fixing the wood damaged by water, you want to keep moisture away and prevent reoccurrence. Not only is repairing the wood laborious, but it may also be impossible to achieve the second time as the lumber’s structure weakens. Following these preventive measures and prolonging your project’s lifespan is best.
1. Keep in a Well-Ventilated and Dry Place
Ensure the wood is in a well-ventilated dry area for good air exchange and less humidity. Please keep it away from water sources as wood absorbs moisture from its surrounding.
2. Use Oil Finishes
Oil finishes are great sealants as they block the pores and repel moisture. They also create an attractive classic sheen on the surface with tung and linseed oil among the most popular oil finishes for wood. The downside is that oil finishes are prone to cracking, exposing the wood to moisture damage.
3. Quickly Wipe Spills
You can reduce the wooden project’s exposure to water by wiping off any spill immediately. Leaving spills on the surface gives enough time for the moisture to seep into the wood and cause damage.
4. Use Sealants
Always use sealants after finishing to protect the surface and repel moisture. Sealants also protect against scratches and fading with varnish and polyurethane, the popular types.
FAQ’s
In this section, you’ll find answers to any lingering questions about fixing water-damaged wood. Here are some popular questions about this topic with their answers:
Ans: Some special oils can shrink the swollen wood, but this is often minimal. The majority of the time, the wood remains swollen but dry.
Ans: Extensive rotting parts in areas that control the project’s structural support show it is too damaged to repair. It’s important to figure this out before embarking on the repair process to save yourself the stress.
Ans: Wipe the wood using a dry rag if there is visible moisture on the surface before drying in the open air. You can also use hair drying to reduce the moisture content. Pay attention while using any of the drying methods to avoid improper drying.
Ans: Cleaning the stain with petroleum jelly and oxalic acid solution, sanding, and finishing are ways to remove or hide stains on the wood.
Summary
Moisture can damage your wooden projects, reducing lifespan and leaving behind an unsightly structure. Fixing this problem requires patience as you dry, sand, and finish the wood, among the other processes of repairing water-damaged wood. You should identify when the wood is too damaged to be fixed to save yourself the stress.

 By
By


