

Suppose you have kids looking for an exciting way to reduce their screen time and encourage them to play outdoors and with natural materials. In that case, the outdoor mud kitchen is the right step. Mud kitchens are usually simple setups where kids can pretend to cook with mud and other natural materials.
Kids love to play dirty, and what better way to allow them to enjoy some outdoors than by play-cooking in a mud kitchen? Building this kitchen may initially seem confusing, especially with styles with different layers and cupboards; however, their building process is straightforward when following a concise guide.
We understand the challenge many DIY enthusiasts face when building an outdoor mud kitchen for their kids. We compiled this list containing several mud kitchen ideas with short descriptions and a link to their complete plan.
DIY Mud Kitchen Ideas
Imaginative play, like play cooking, can boost your kids’ independent and social skills and improve creativity and basic cooking skills. You’ll find many ideas you can implement in this section.
1. Cedar Mud Kitchen

Here is a simple mud kitchen made from cedar wood due to its natural resistance to decay. The design features a two-layer kitchen, with the lower layer as a storage section while the top layer carries the burners, sink, and cutting area. There’s also a fence with hooks to hang utensils.
Cedarwood, especially the 2x4s used in most of the project, is expensive and will increase the overall cost of the wood. Start by building the table before adding the lower shelf and the backslash using cedar fence boards. The burners are drawn on the wood surface and painted black to make them visible.
The plan involves a detailed description of the process, a few pictures, and sketched diagrams of each step, so it’s easy to complete the job. With stain and a coat of exterior grade polyurethane, you can seal the wood and increase its resistance against moisture. The key to this plan is the details in the project, like the burner knobs, sink, and painted burners.
2. Wide Mud Kitchen Design
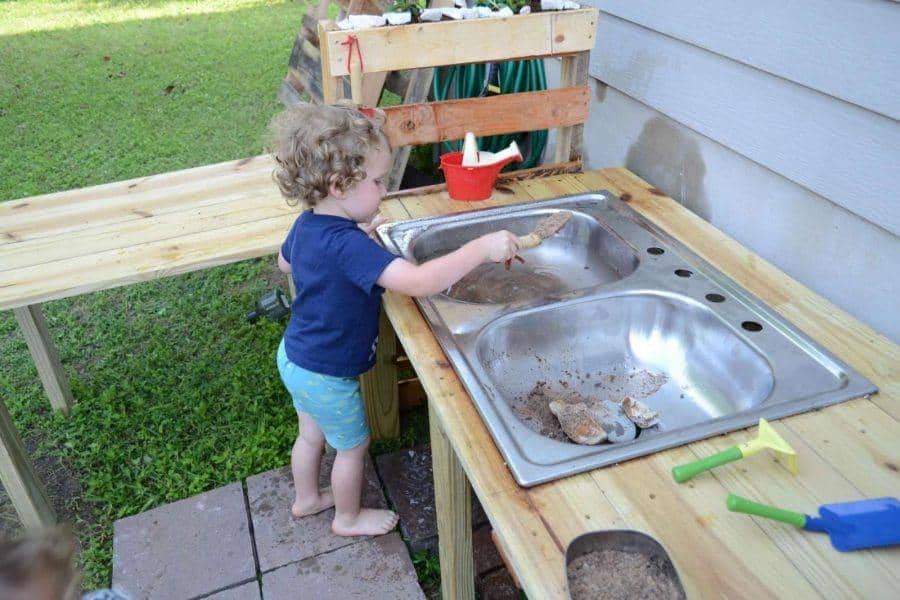
Mud kitchens for two or more kids will require more room, so this design sits on a more expensive area and features a different surface. The ends feature an elevated utensils hanger that doubles as a planter for your kids’ favorite plants. A stainless steel kitchen sink features two basins, so more than one kid can use the sink at a time.
Build the side table before the more complicated, extended table requiring a cut section to accommodate the sink. The plan utilizes scrap wood to complete the cross-section. The 2×4 boards act as legs, while 1x6x8 panels are cut into two and serve as the table surface.
Aside from the wood, you’ll also need half pallets to attach to the long table sides, pavers to make the floor, sink, wood screws, drain strainer, your favorite flowers, and woodworking tools. You want to ensure the table surfaces are well-sanded to prevent injuries.
3. Mud Kitchen With Drawer And Several Layers
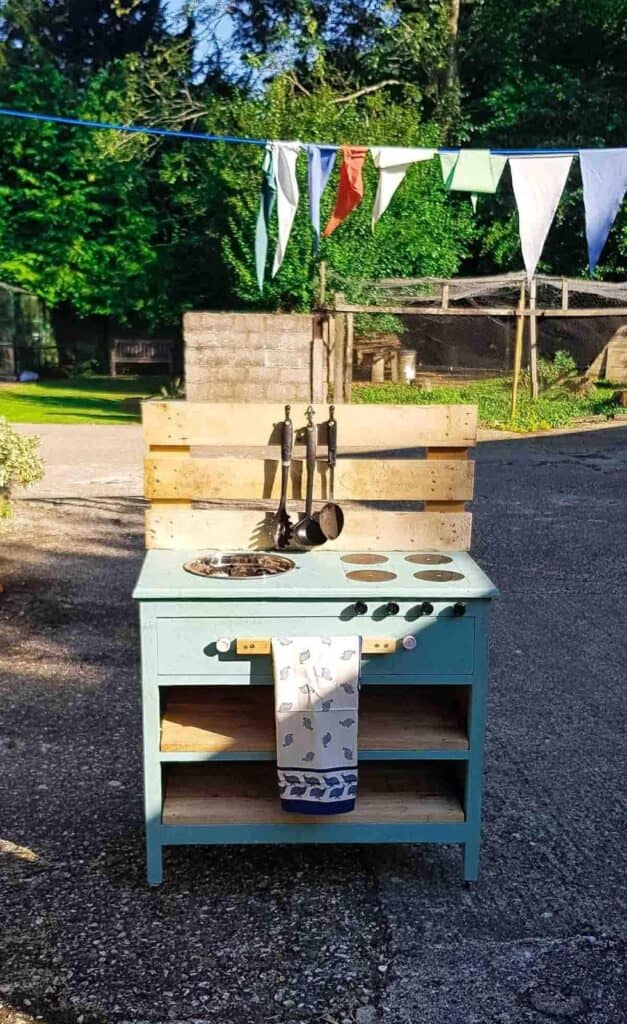
Two layers, a drawer, and books on the backsplash are all the storage spaces available in this mud kitchen idea. The top of the kitchen surface features a four-burner marked area and a sink with the drawer handle as the kitchen towel’s hanger.
This plan uses free materials around the home, including an old table, a basin for the kitchen sink, and a drawer. The table top is cut so the basin can fit in, while the pallet-style backsplash is attached to the back. With these materials, you can assemble a befitting mud kitchen without spending much on buying materials.
Other tools and materials for this project include an offcut to serve as a towel hanger, second-hand kitchen, drawer handles, utensils, old CDs, basin, drill bit, impact driver, wood screws, jigsaw, and combi drill. The finishing involves the use of caulk to seal holes and paint. Remember that the hole you cut on the tabletop depends on the shape and size of the basin.
4. Robust Mud Kitchen Design
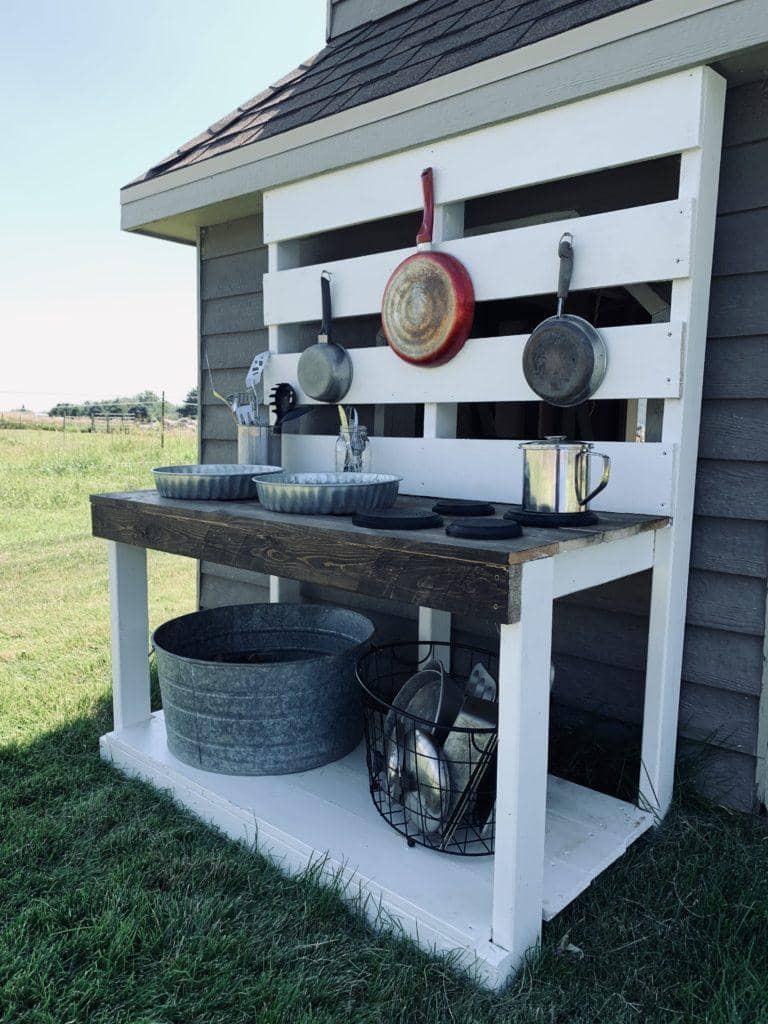
Large and solid mud kitchen ideas like this look elegant, with the color contrast for the parts against the wall and lush green lawn helping to beautify the project. The design features the kitchen table surface, a second ground-level surface, and an extended backslash that stretches up.
Affordable pine wood is the primary material for this project, with wooden discs, a storage basket, metal round disks, screws, outdoor paint, and nails, among the other tools you need. Even though this project is enormous, it involves simple cuts and joints, making it simple to follow.
The project is painted white, while the table top is black for good color contrast. Rather than paint a black circle on the wooden top like most kitchens, this plan uses black-painted wooden disks as burners. A rigid schedule does not bind the design. But it allows you to explore creativity by guiding you on the critical sections.
5. Pallet Mud Kitchen

You can make a simple yet effective mud kitchen design using pallets. Here, two pallets on each other make the table surface, with the spaces between boards serving as the sink section. Pallets are easy to get and may even come for free, which makes this design affordable.
With nails on the backboards to hang utensils, the pallet layers serve as storage spaces to decongest the area. The height is perfect for kids, with two panels making the table while one panel makes the back. There’s also a tiny chalkboard where kids can write meal plans.
You’ll need three panels, a washing-up bowl, 3cm screws, an oven tray, a chalkboard, a cacti plant, a shelf, exterior paint, and utensils. The plant on the top of the backboard livings up the space and adds greenery to the area. Finish the project with an exciting bright color that fits the surrounding.
6. Bench-Style Mud Kitchen

Mud kitchens can come in different styles, with a bench style presenting a unique design for people looking for a simple yet outstanding kitchen for their kids. It uses affordable pallets and a board to build this project, with the pallets divided to form the legs while the other pallet makes the back.
Before you start this project, gathering all the required tools and materials will be beneficial. Luckily, the tools are primarily regular woodworking tools most DIYers already possess. You’ll need L-brackets, wingnuts, bolts, gloves, eyes, nose, food protection, cup hooks, timber screws, and marine ply.
Start the project by cutting the pallets to get the legs and sanding to get a smooth surface before painting each piece. Painting before assembling ensures the paint reaches all the corners; however, the board is left in its natural look to give it a different look and exciting contrast. Add hooks to the backboard for hanging utensils and kitchen gloves.
7. Pallet And Scrap Wood Mud Kitchen
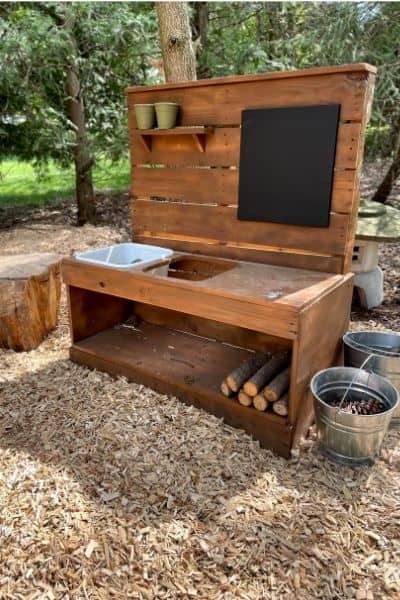
The extensive project requires a lot of materials to complete but will deliver an exquisite kitchen your kids will love. You have a sophisticated scrap wood plus pallet mud kitchen design. It features two sinks on the tabletop and a storage section underneath, with wood piled into a corner for different aesthetics. The backsplash features a large blackboard and a plant stand for holding your favorite plant cups.
With pallets and scrap wood, this extensive project will cost a minimal amount. One or two pallets will complete the kitchen, depending on the size of the pallets with scrap pieces. The position of this kitchen will also determine the most suitable finish, with this dark wood finish helping it blend into the area with light brown sand around.
The idea uses pocket holes to attach the sides to the kitchen while regular screws hold the other parts together. Create a stable base by attaching a board to the table base and a ledge along the bottom side edge.
8. Easy To Build Mud Kitchen

Easy to build is one of the main characteristics DIYers love, especially as you don’t need expert-level skills to make it. This kitchen is easy to assemble and highly affordable due to the type of wood used for the project. Built entirely from pallets, you only need to purchase other materials for the project aside from wood.
The beauty of this project is its natural look without a color change, so the wood grain is visible. The backrest features a unique shape with hangers for your plant cups. A lower section under the table helps as a storage section, while the table features a sink and a wide area for cooking.
Since the surface is barely protected from the weather, keeping this kitchen under shade is best to prevent moisture from damaging the lumber. Check out the simple process plan to replicate this idea in your backyard.
9. Simple Mud Kitchen Setup

You can build a more sophisticated project to enjoy its effectiveness, as this simple mud kitchen idea will prove. Its simplicity and ease are the main draws to setting it up. Once you get the materials, you can set this up in less than thirty minutes.
You’ll need about thirty bricks, a small thick wood plank, and a few nails or hooks. You can set up a mud kitchen for your kids with these three materials. You can quickly get these materials for free from building sites willing to let go of some bricks with broken parts.
Start by clearing the desired area and arranging the bricks to form a stable raised foundation without needing mortar to hold the bricks together. Place the thick lumber on the two foundation tops while you hit nails to any surface behind to hold your utensils.
10. Upcycled Old Shelf Mud Kitchen

If you have an old shelf, this project immediately becomes a simple task by adding a tabletop board, backboard, and shelf layers l. However, this should not put you off if you don’t have an old shelf, as you can build from scratch.
Start by marking the shelf dimension, including the tabletop, to determine the area’s board size. Cutting out the sink area will require precise cutting tools like the jigsaw, while the size depends on the basin. The backsplash features a plain board with a slight curve for aesthetics.
The brightly colored mid kitchen will excite your kids and protect the wood from harsh weather conditions. Decorative knobs add beauty to the kitchen while serving as hooks for utensils. Under the table are two storage layers, with the lowest layer holding mud buckets for cooking.
11. Extended Mud Kitchen With Bench

If you’re building a mud kitchen for more than one kid, making an extended kitchen like this idea is best so each kid has enough space. The plan features a sitting table for kids to enjoy. This design requires ample backyard space as the kitchen features two sections, with the bench occupying even more room.
With two sinks, a blackboard, and plant hangers, this idea is likely and will keep your kids busy. The whole ground area is covered with soft gravel that blends with the brown finish of the mud kitchen. The size of this project means it is costly; however, it is worth the investment considering its size and aesthetics.
It uses H3-treated pine wood for the structural and decking parts of the kitchen to get a more durable project. You also need two stainless steel bowls and a natural water-based decking oil. There’s also a tiny sink table in the corner for extra activities.
Summary
You’ll find this guide with quality mud kitchen ideas valuable if you need help with an idea for building the perfect mud kitchen. You can select the best design depending on your style, space, and resources.

 By
By


